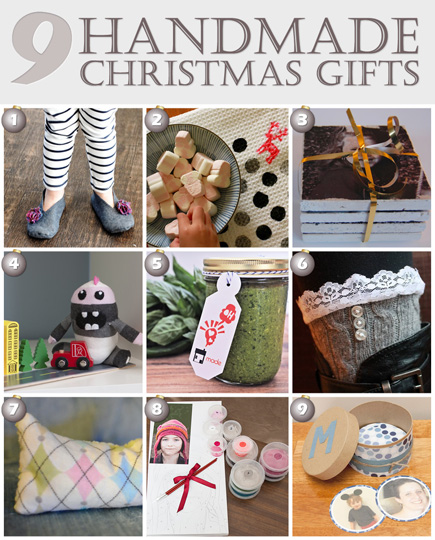
You might be wondering what is up with this Sunday post. Well Tamsyn asked me and 7 other amazing ladies to join in on her days of Christmas for a handmade gift idea. In case you don’t know, we sort of arranged Max and Ramona’s eventual marriage a while back. Therefore in order to please Ramona’s future mother in law, I happily obliged. Technically it’s Monday in Australia, so here goes my tutorial on felt slippers.

I want to put a disclaimer out there. We are not a craft/sewing blog. I originally wanted to make these felt slipper, but then I realized I had to hand sew them. No thanks (and the final product wasn’t that cute). I wanted felt slippers with a comfy flannel lined sole. I found this tutorial but couldn’t resize it to Ramona’s foot. So I made a pattern and some slippers via trial and (lots of ) error. I will break down the successful part, so hopefully you can make some sweet felt slippers for someone you love.
1. Making the Pattern
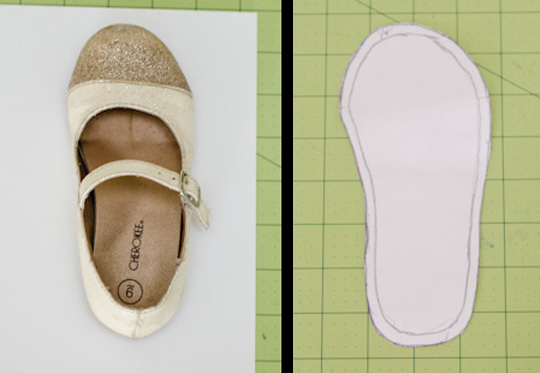
To make the pattern for the sole, I took Ramona’s shoe and traced it. Then added 1/4″ for the in seam.
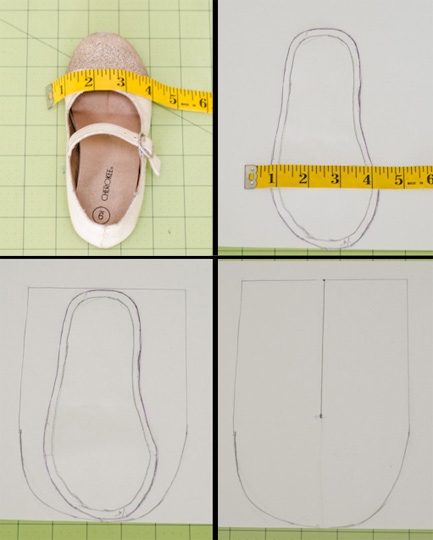
I measured the top of her shoe. It was 4.5″.
I took the sole pattern and laid it on a new page to begin the pattern for the top of the slipper. I measured 5 inches total with 2.5″ in the exact center of the sole.
Then just sketched out the U pattern for the top. It starts and stops with the sole pattern.
I drew a line from the heel to 3 inches before the toes to cut for the opening.
This was my first attempt at making a pattern, so my explanation/skill may be lacking. However Nick was sweet enough to make a pdf for you to download and resize as need.
2. Sew those babies
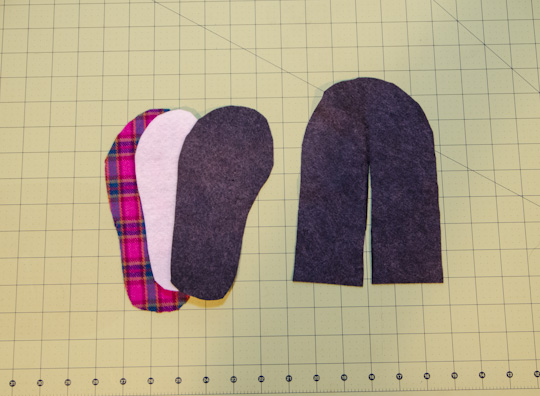
Materials:
Peltex Fabric Stabilizer
Wool Felt (mine was 35% wool/65% rayon)
Flannel for the bottom of the sole
The yardage you get depends on the size of the feet, but most likely all you need is the smallest cut they will give you for the stabilizer and flannel.
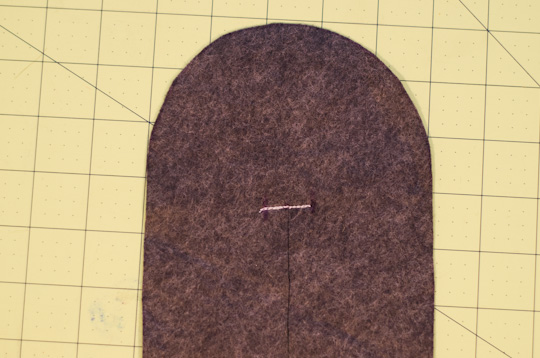
I began with the upper piece. You need to reinforce the slipper at its opening. I sewed a straight line then back stitched the entire line. You can sew in a triangle of fabric stabilizer if you prefer. However if you do that, you will want to add some flannel there as well for comfort sake. (I am using white thread, so you can see it. It looks much better with coordinating thread.)

Stitch along the slipper opening. This is for decorative purposes, but it also keeps the felt from stretching when you turn it right side out. I used a joining stitch. (I know the stiches look different, but the thread came loose during sewing. Sorry. Also remember the white thread is just for you.)

Last step for your upper piece is to sew the heel closed. Line the felt up and sew with a joining or zig zag stitch.
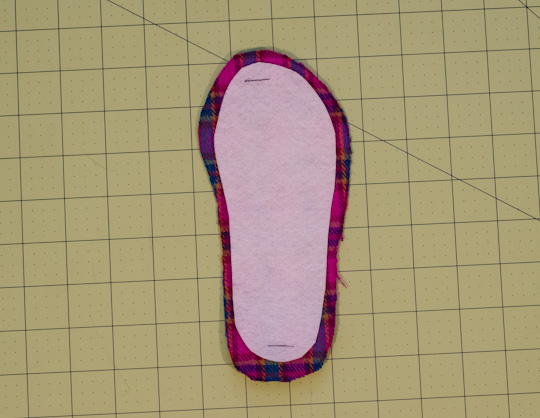
Now for the sole. The stabilizer should be cut without the 1/4″ inseam, so it just fits the finished sole. Sew a few stitches to hold the stabilizer in place. I sewed it to the flannel so the stitches wouldn’t show on the finished felt sole. Place your felt on top of the stabilizer, and you are ready to attach your pieces.
*You can use grip stop or suede instead of felt for the bottom of your sole, so your slippers aren’t so slippery. I just wanted to keep my materials at a minimum, and Ramona loves to “skate” in her slippers.

Start at the toe and pin the upper piece around with the wrong side out. You are ready to sew those babies.
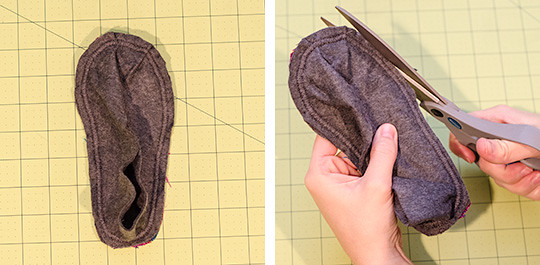
I sewed using the joining stitch (again) with a 1/4″ seam allowance. You can use a zig zag. You want a stronger stitch here to withstand all the running that will happen in these beautiful felt slippers. Trim your seam allowance carefully so you don’t clip your seam.
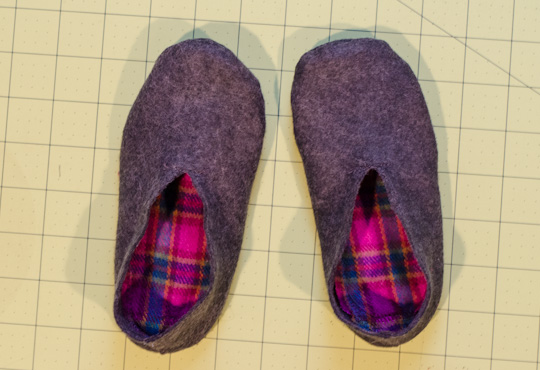
Turn your slippers right side out which is slightly more difficult than you would think thanks to your durable fabric stabilizer. When you make the other slipper don’t forget to flip the sole pattern to make the opposite foot.
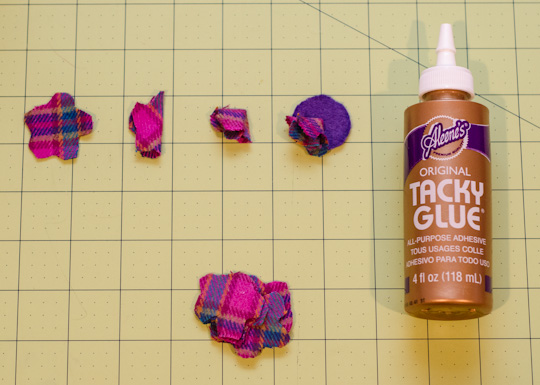
I decided to embellish them a little with flowers. You can get the full tutorial here.

Ramona loves her new slippers. They are still second to her princess heels, but I’d like to think these provide just as much fun. I know they were supposed to be a Christmas gift, but I needed a model. Plus giving presents early doesn’t count when they are 3, right?

Dance party for the new slippers. Now go make some for your sweetie. They are actually pretty simple once you get your pattern established. Have yourself a merry little handmade Christmas! Go check out the other tutorials for more great DIY ideas!

- If you don’t recognize that one, go back and re-read.
- Personalized Hand-Stamped Tea Towels from Chibi Run
- Personalized Tile Coasters from Made 2 Style
- Sock Monsters from Ava Pot Pie
- Homemade Basil Pesto from KukuCouture Invitations
- Lace Boot Cuffs from S{Thomp}ing Ground
- Aromatherapy Eye Pillow from Markham Street Design
- DIY Paint by Numbers Canvas from Sophie at Home
- Personalized Memory Matching Game from Max & Me
You can also check out our other handmade gift this year – Brown Sugar Vanilla Body Scrub!


those are too cute!!! i love them! i need to check out the other gifts, too!
Yes do it! There are some really cute ones in her roundup!
Pingback: Handmade Personalized Tile Coasters « Made2Style
Oh my! They look so cute and very comfortable! Thanks for such a great tutorial… it will come in handy!
Thank you! It was my first attempt at a serious sewing tutorial, so that makes me feel better.
You have some sewing skills! I myself do not…they look great and what a cute little girl! Glad to have been a part of this!
xo Cindy
Haha thanks. I bet you could sew! I’ve seen how crafty you are! It’s really easy. I promise…except the making the pattern part. Hopefully I solved that for everyone though.
Hey guys! Just wanted to let you know how much I’ve enjoyed perusing your blog. With such a glut out there, yours was refreshing and inspiring. Thanks for making a gray North Carolina day a bit brighter!
Thanks Katie! That is so sweet of you to say! It made our night!
These are just so gorgeous, and Ramona looks absolutely adorable. I showed the pictures to Max and he said that he wants pretty flower shoes too!!
LOL well mum get on making that boy some! 😉
Very cute, I bet my girls would love a pair of these next winter :o)
I’m sure they would! What a cute picture with the 2 of them in matching slippers too.
I am seriously in love with those slippers. I love the color you chose and that flower embellishment is just perfect. I love that you lined them in a fun pattern. I’ll take a pair in side 8 1/2 please
Thanks! Well luckily we wear the same size, so I guess I should just double up when I make some for myself! 😉
These are completely adorable! So impressive and you make me feel like I could make them! I will have to try! =)
They are so easy once you get the size of the pattern down. I know you could make them! You should try!
This are adorable! I don’t have any little ones but I am kind of jealous! I want some to fit my feet!
I bet you could resize the pattern and make some for yourself!
Pingback: 12 Cozy DIY Slippers
I love them!! Were they quite slippery for her or did she manage okay? I bet I could add a few small rubber “polka dots” on the bottom though…
They were a little slippery, but the felt was thicker so it wasn’t terrible. There is actually a utility fabric specifically for slippers, but I didn’t wind up using it.
Thanks Amber!
Pingback: 14 Easy To Make Home Slippers Ideas