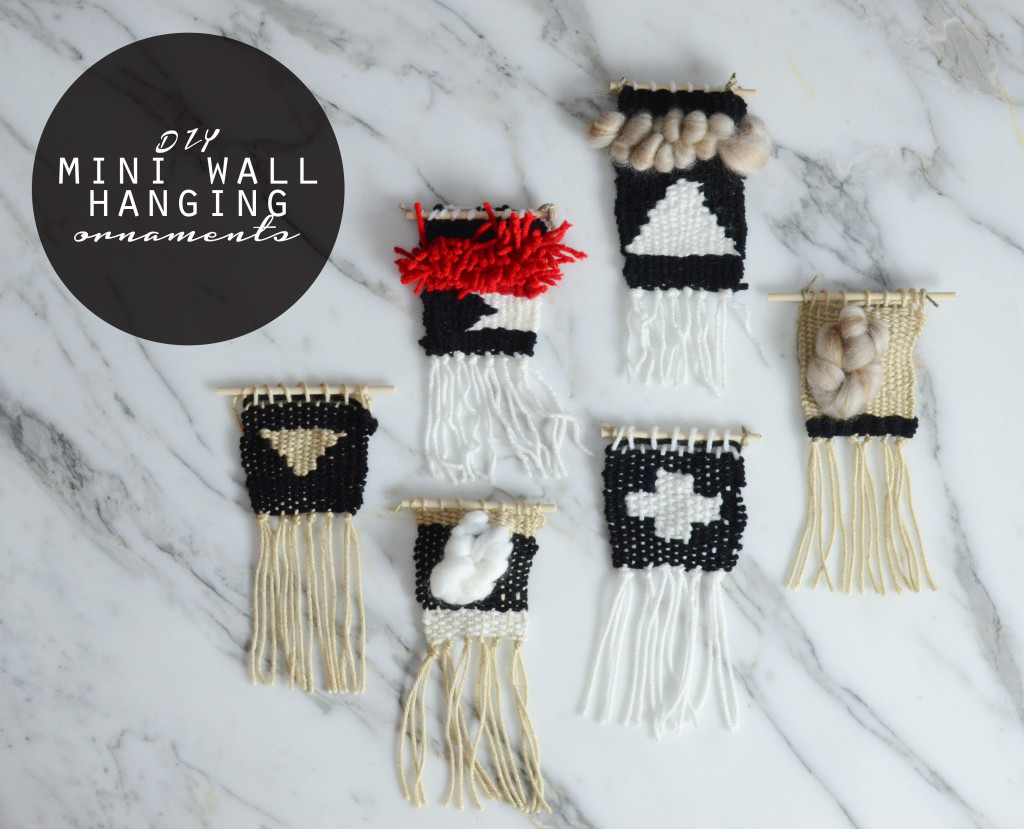
When it’s Christmas time and you want to learn to weave and Elf is on (the Will Ferrell version not the other one), this is what happens. You DIY ornaments – the mini wall hanging kinds of ornaments. Actually that’s kind of a lie because most of these were made while watching Gilmore Girls. Details.
So are you ready to learn how to DIY some super awesome ornaments aka mini wall hangings full of awesomeness?? They are actually very easy and a great way to de-stress from the holiday craziness.
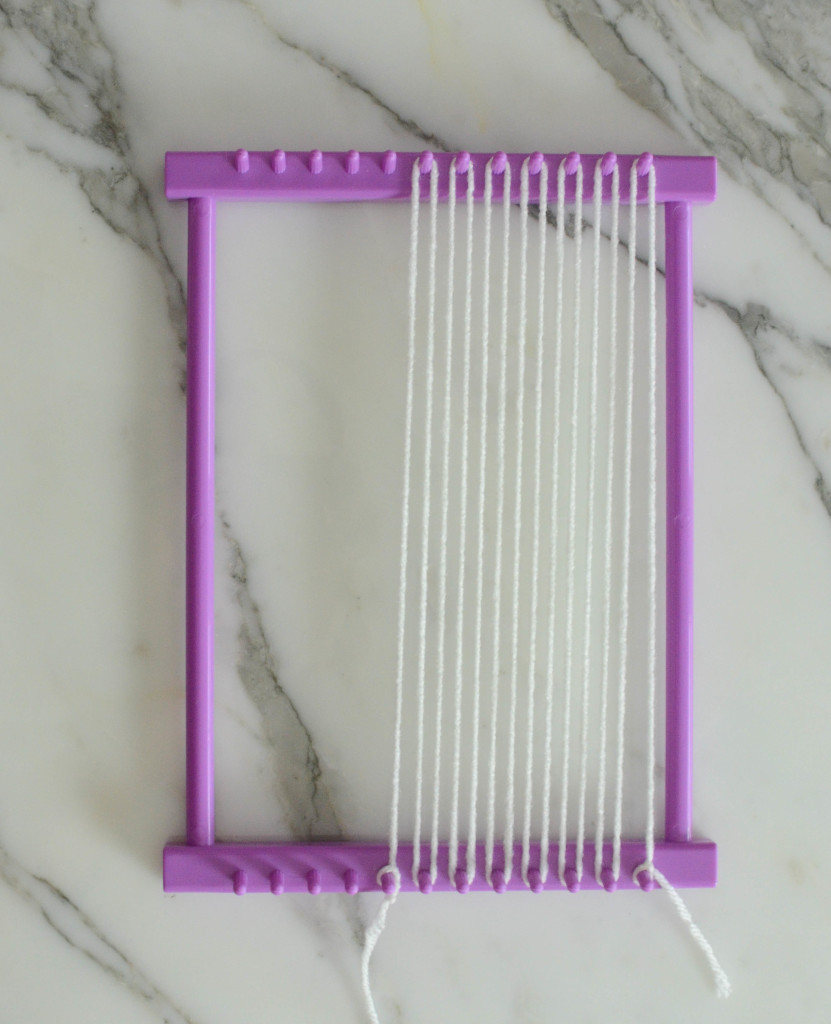
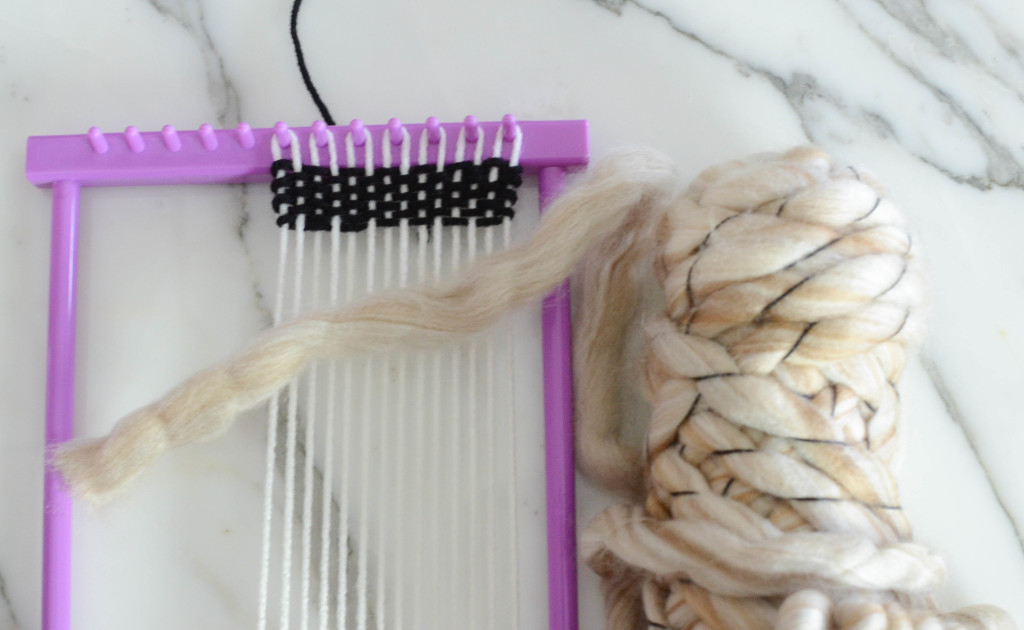
Ramona got a peg loom for her birthday (similar loom here). I only used 7 pegs since I wanted tiny weavings. You just tie the yarn then loop it back and forth around the pegs. Now the warp ( <— weaving terminology) is set and ready for your weaving skillz.
I’ll show you the basics so you can weave whatever your heart desires.
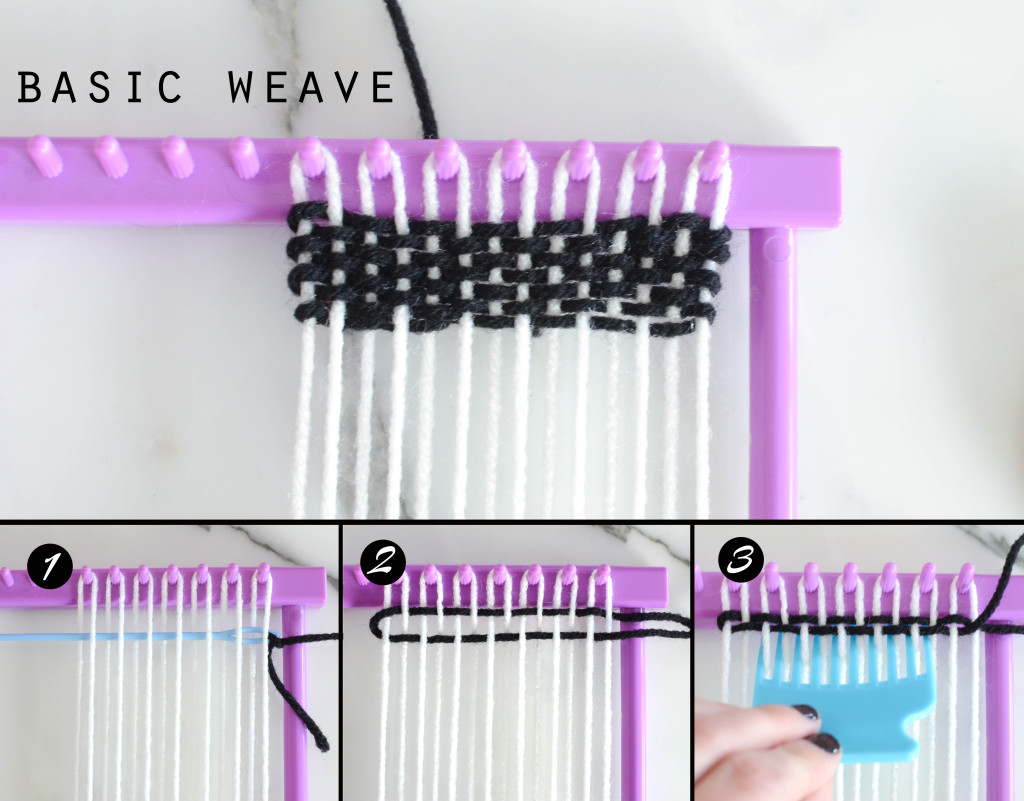
Start with a basic stitch.
1. Go under 1 line on your warp. Then over. Under, over, under, over…
2. When you get to the end go the reverse on the way back. So if the thread is over the warp, go under. If it’s under, go over. The line above always determines how the line you are weaving should look. Do the opposite of the line above.
3. Push your weft (aka the line you just wove) to secure it in place.
Make sure you pull the yarn straight. Don’t twist it across the loom. Tie your yarn to secure it in the back. I ran my end piece back through the loom a few times to secure it a little before I knotted it. Here’s a great video in case you need help with your basic weave.
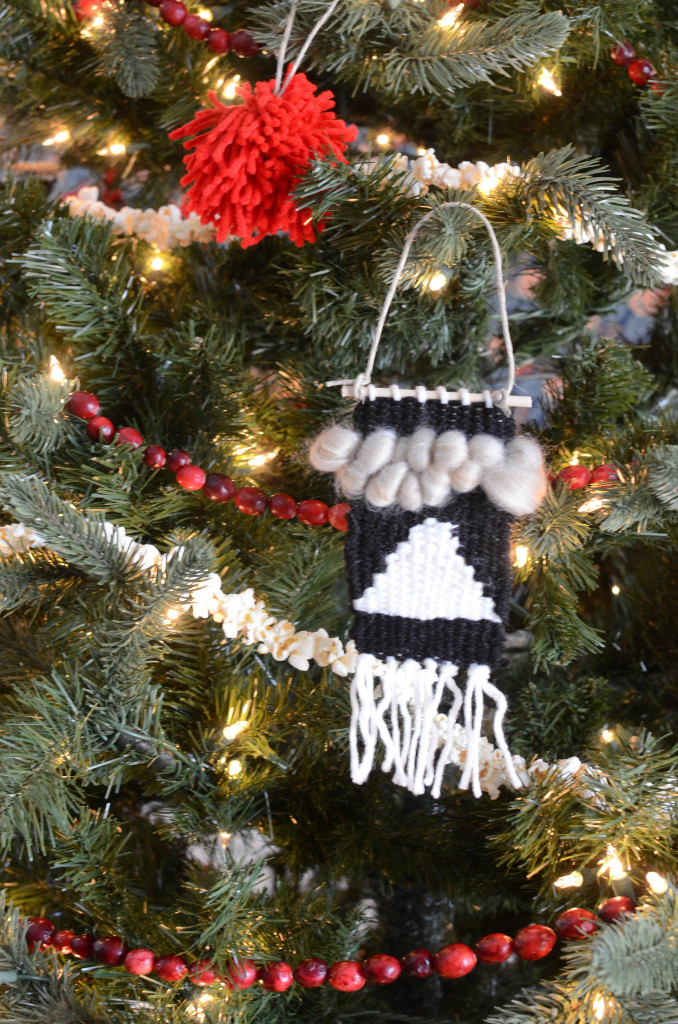
Weaving blocks is the start to making a pattern or shape in your design. This Swiss cross ornaments is literally weaving each color in block increments down the ornament. I made some with triangles and other shapes in the same way with the exception being they were not perfect blocks of thread, but the concept is the exact same.
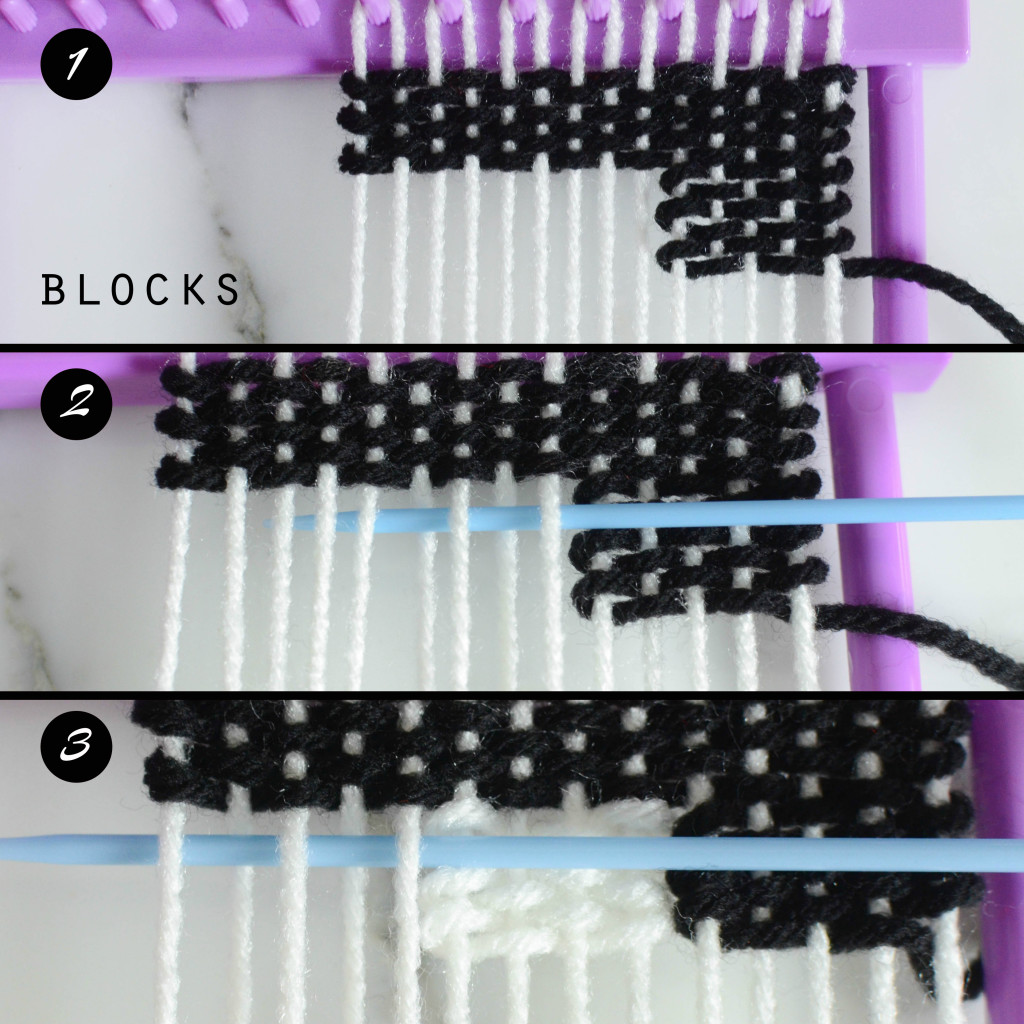
1. Determine the size of each block. I had 14 strings across my weft, so I decided to do 5 black + 4 white + 5 black. I started at the right and wove on 5 strings to make my first block of black. Weave a basic stitch on those strings alone until you have the desired height. Mine was 6 lines of basic.
2. My next block which was white started on weft next to where my block of black ended. I wove across 4 strings and did 6 lines of basic down to keep it consistent with my block of black.
3. Finish the last block of black on the last 5 strings. You can see how the needle is doing the opposite of what the line above is. I did 6 lines of basic down.
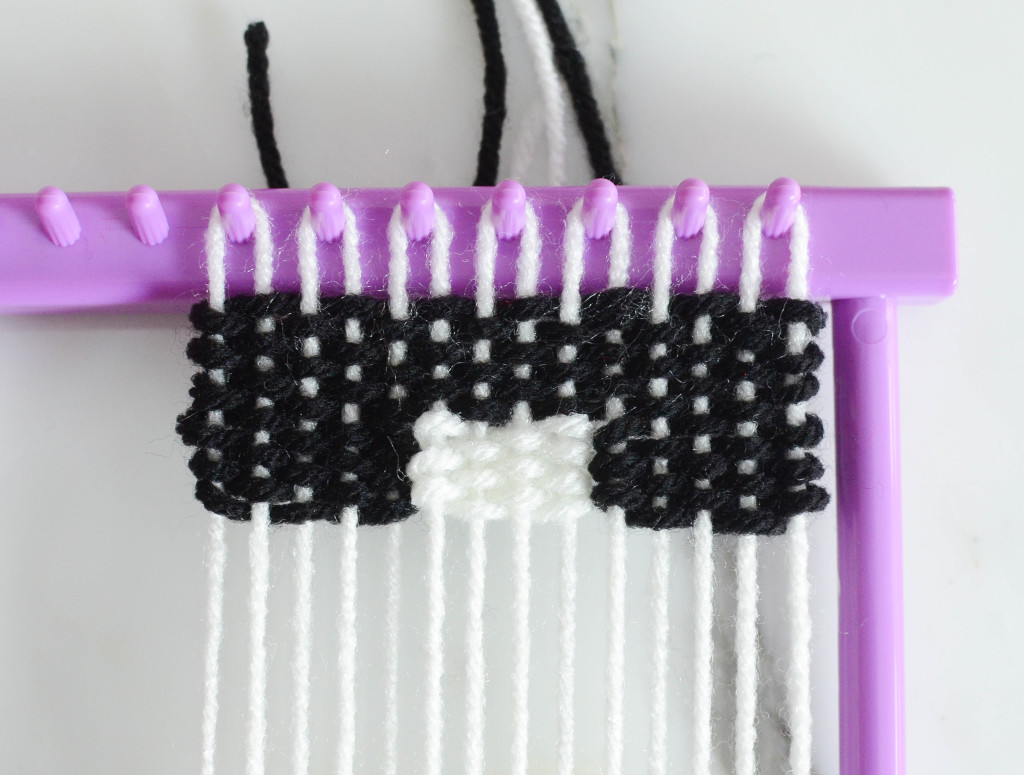
This is my first line of blocks completed. Notice that there is a no yarn connecting the blocks together. There is a tiny slit between them. You can barely tell and as you work down, it becomes even less noticeable.
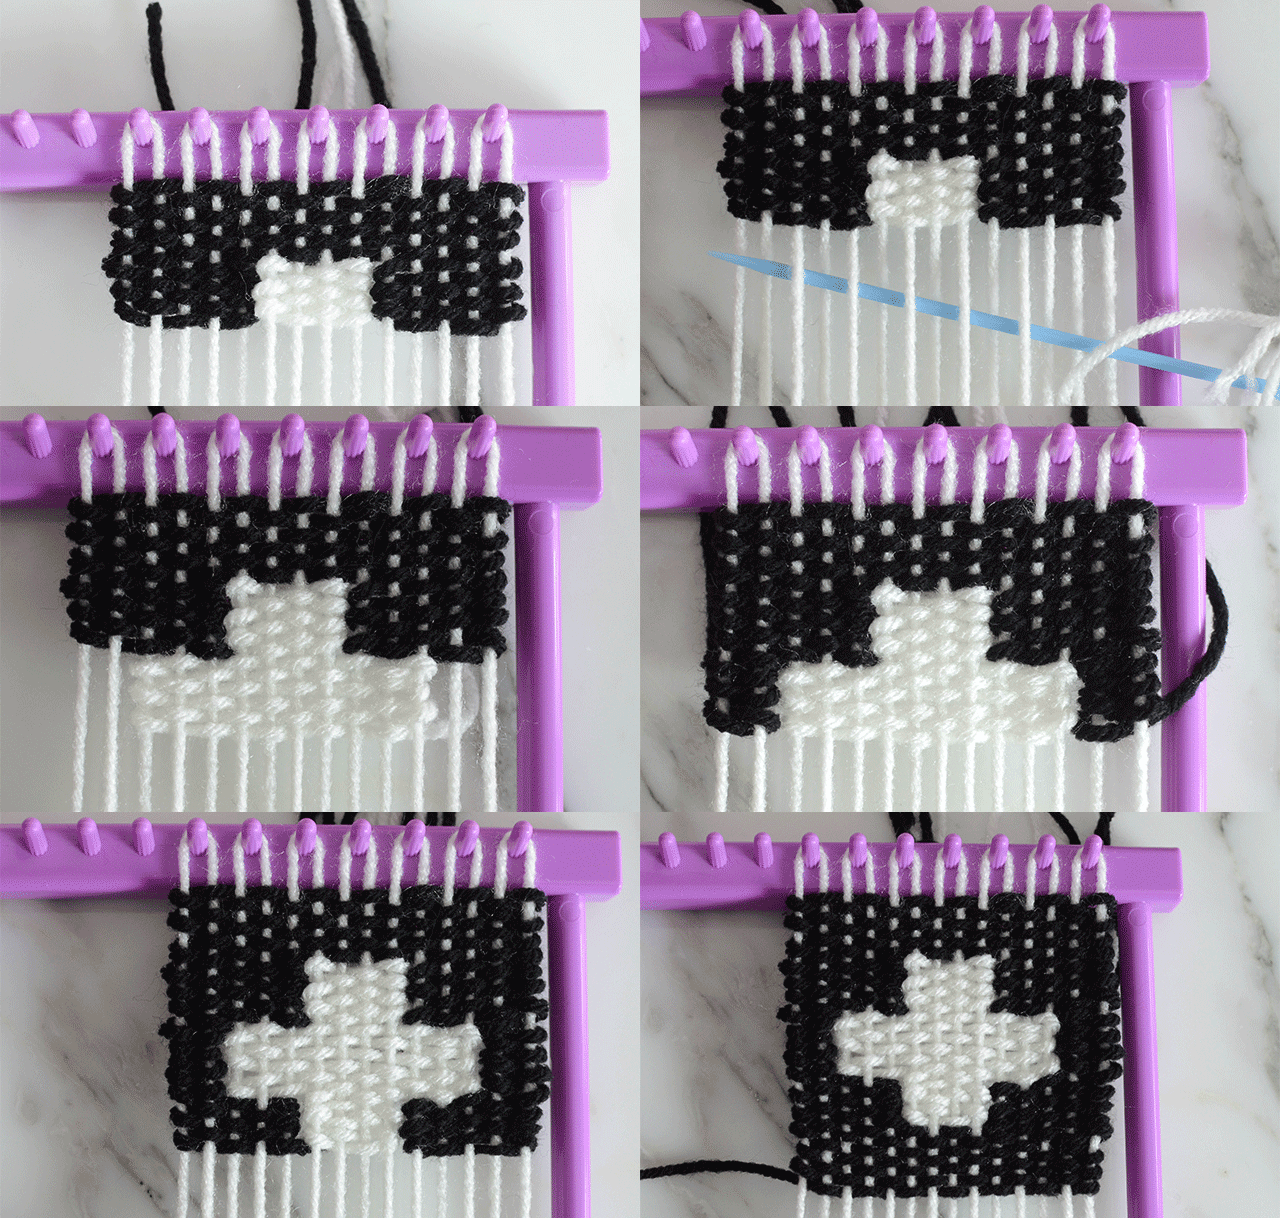
Here’s a little gif of the block weaving coming together. It’s basically in real time too…
You can see the little tab shape I made using block weaving and varying the number of strings I wove across. So I would do 2 lines horizontally across 6 strings on my waft, then do 2 lines horizontally across 4 strings…etc. Not as complicated as it reads. Most of this is intuitive once you get it started.
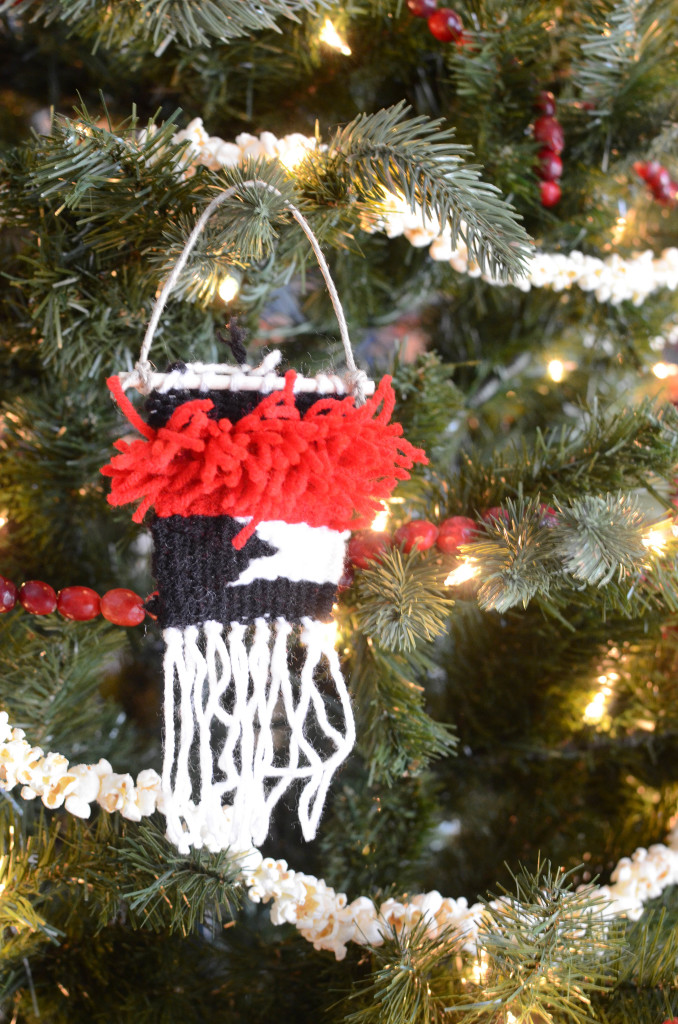
Let’s talk about rya – those pretty red strings hanging from that ornament.
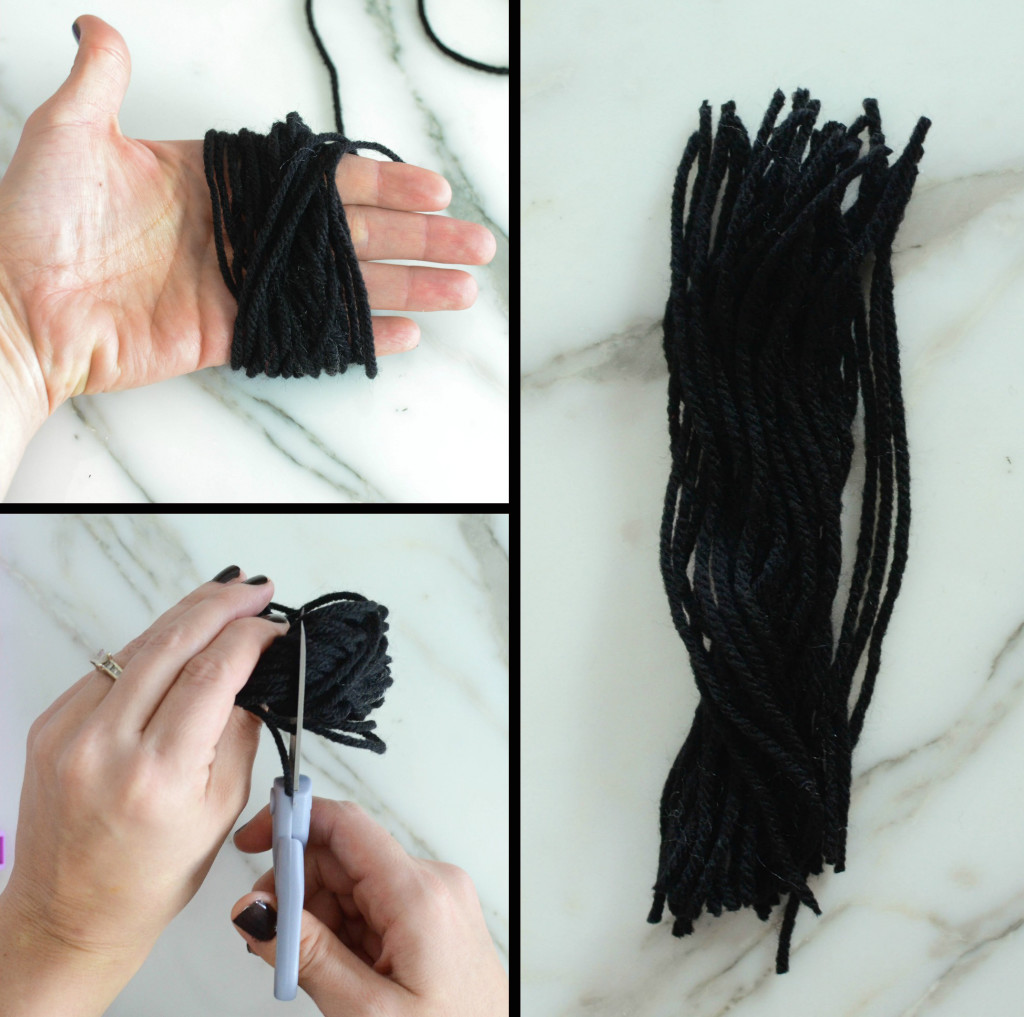
The quickest way to make the strings is wrap yarn around your hand. Slip it off and make 1 cut. You will have strings the same length ready to tie to your weaving.
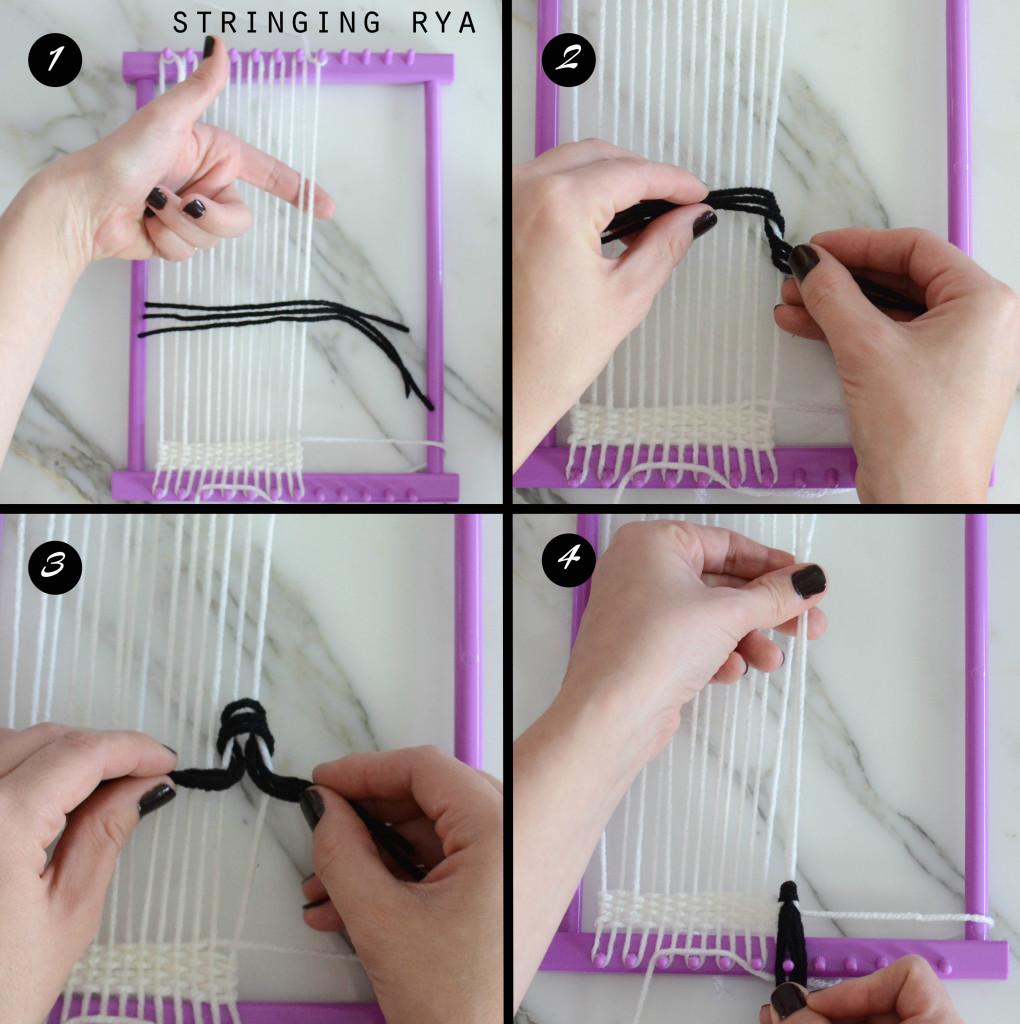
1. Lay your rya strings on top of 2 strings on your loom.
2. Pull the right side through the right string on your loom.
3. Pull the left side through the left string on your loom. You will have a loop with 2 both sides coming up through the center.
4. Tighten the strings and pull them down the loom.
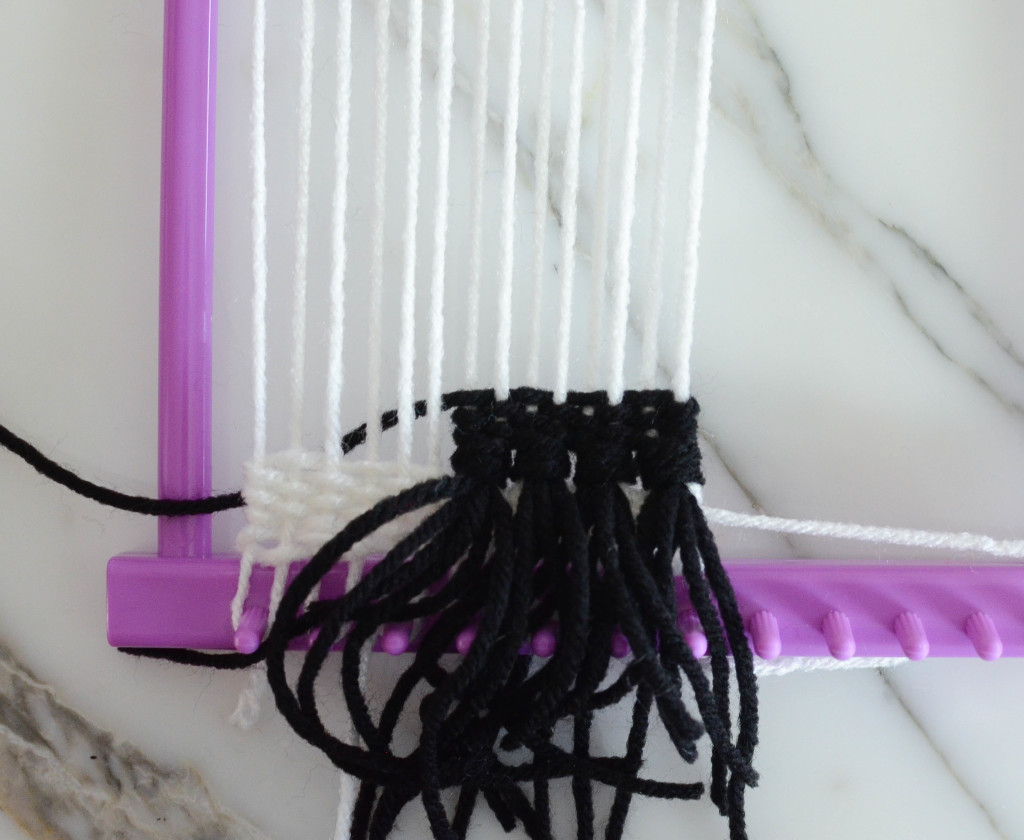
Continue that process until you have as much as you want. If you string it all the way across and you have 3 strings left on your loom, do the outside 2 and skip the other one.
Once you have your row of rya, secure it with a basic weave. This keeps it from falling out and makes it look fuller. You can add another row of rya. I waited to trim my rya until I was finished with the rest of my ornament.
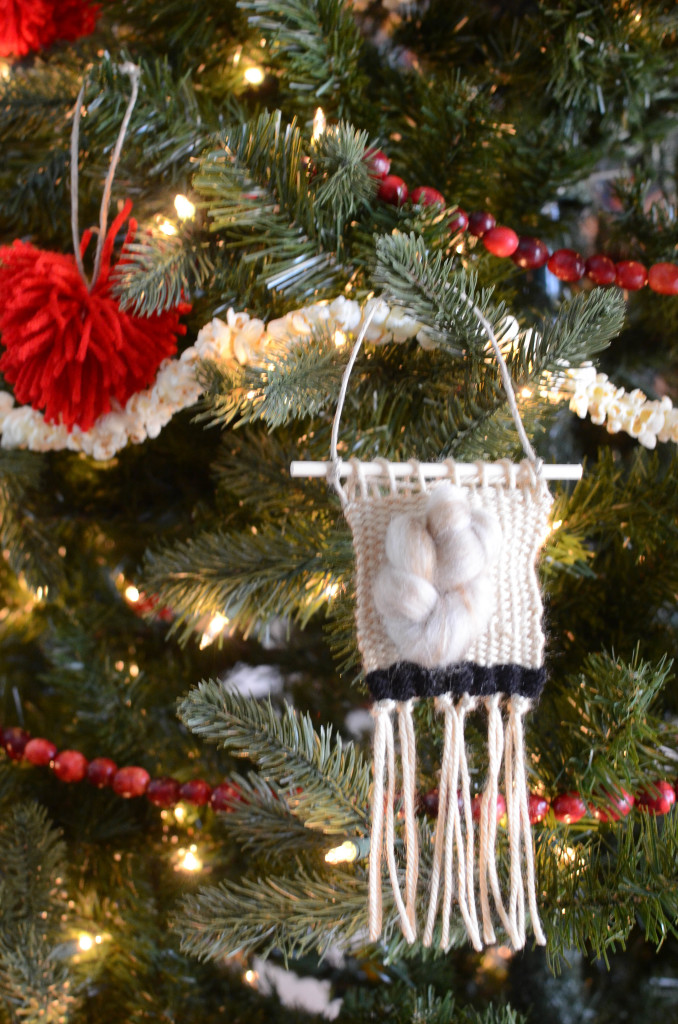
When I finished the weaving, I tied the ends in a slip knot. Then trimmed them. I cut a wood dowel down and strung the weaving through it.
I loved working with Quickie yarn. It was so textural and gorgeous! I was able to cut that black string and just use the wool yarn. It’s too thick to use a needle, but use your fingers. It’s easy to work with.
There you go friends! A super cute ornament that won’t break when your kid pulls it off the tree. Seriously. I know. It’s the mother struggle.
 My past Dare to DIY was our easy burlap stocking. Go check out this years Dare to DIY deck the halls link up for more great Christmas inspiration! Thank you a million times Kim, Michelle, Rachel, and Katja for hosting this year!



how cute are these!!! so fun, amber!
Thanks Cassie! They were really fun to make! Great excuse to sit on the couch and watch tv!
What?! These are incredible! I need a coupon so I can go buy yarn. I think I need larger versions of these for year round wall decor!
The Michaels and Joann app always save me money. If you keep the weavings pretty monochrome, it’s pretty cost effective too.
These are so cute! I’ve been working on some large weavings, but I’ll have to take a break to make some ornaments like this.
A little tip for the thick yarn: wrap a little bit of tape around the end and it makes it a little easier to weave.
Thanks for the tip! I was thinking I need a bigger loom. I kinda want to weave a giant wall hanging now. Someone talk me down!!
DO IT!
So fun! They’d make great gift toppers too!
I thought about that! Doing the recipients initial in the weaving, but I haven’t wrapped a thing yet. I can just see myself trying to do all of that Christmas eve. I could just take some of the ones I’ve already made and put them on the gift with a little name flag. That way I’m gifting and taking down my decor in one fail swoop!
Best Christmas ornaments I’ve seen all season. I love anything that involves sitting and watching hours of Netflix.
Me too. Guilt pleasure. I don’t even watch live tv anymore. Binge watch all the things.
As Netflix gets all judgmental – “Are you STILL watching?”
I think I’ve trained my Netflix to stop with the attitude. I don’t need its negativity about my several hour binge. Actually I just always click start new show instead of waiting the 15 seconds for it to automatically start. I’m that impatient.
These are too cute! Love the black and white.
And now I want a weaving loom for Christmas. I love all the kids crafts.
Think of all the wall hanging you can make for the barn!!
Gosh STOP IT! These are way too awesome!!!!
Haha thanks! The Swiss cross one is so you!
oh my, those are just impossibly adorable! nice job!
Thanks Gretchen! The key to making anything adorable is tiniest. I think.
OMG! LOVE these!!! I just bought myself a child’s loom to see if it was something I liked doing and I’m obsessed! Thanks for showing these other techniques though. I was sort of stumped for how to do anything other than the basic weave! These ornaments are perfect!!
It’s so easy! You will have it down after the first one. Then you will officially be addicted!
I love this tutorial! I just updated santa and told him I wanted a loom for Christmas!!
You will have so much fun with that present!!
OMG Amber! I am dying from all your greatness in this post. I love the craft and your images, love all the weaving lingo, love your writing. You are destined for greatness! Love love love it!!!!
Haha thanks friend! I just wish I would have taught myself a long time ago. We could have spent hours weaving together!
I love these so so SO much Amber! I’m going to need a whole tree-full next year! So you’ll have plenty of time to get them finished 😉 Great job!!
Haha absolutely!! Although I know you’ve got weaving skillz!
You go girl!
Finger snap!
So, I’m not hip enough to understand these wall hangings. But I can actually get behind them as ornaments. They’re the right amount of hipster/holiday. Now give your poor kid her toy back. ;P
NEVER!!! The whole point for having kids is so you can take their cool toys for yourself! Also you are totally hip enough to get wall hangings! I think Milly the cow asked for one for Christmas.
Pingback: Favorite Finds No. 45 - Shrimp Salad Circus