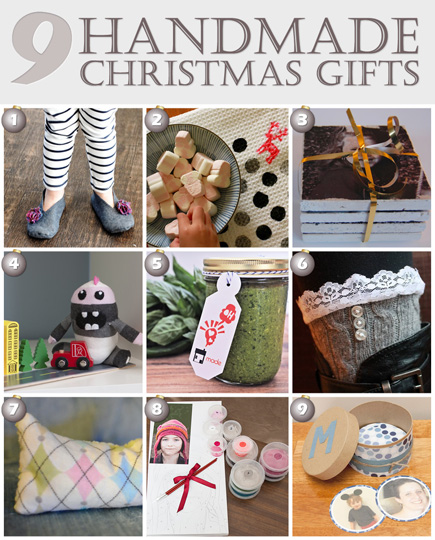
DIY Felt Slippers

You might be wondering what is up with this Sunday post. Well Tamsyn asked me and 7 other amazing ladies to join in on her days of Christmas for a handmade gift idea. In case you don’t know, we sort of arranged Max and Ramona’s eventual marriage a while back. Therefore in order to please Ramona’s future mother in law, I happily obliged. Technically it’s Monday in Australia, so here goes my tutorial on felt slippers.

I want to put a disclaimer out there. We are not a craft/sewing blog. I originally wanted to make these felt slipper, but then I realized I had to hand sew them. No thanks (and the final product wasn’t that cute). I wanted felt slippers with a comfy flannel lined sole. I found this tutorial but couldn’t resize it to Ramona’s foot. So I made a pattern and some slippers via trial and (lots of ) error. I will break down the successful part, so hopefully you can make some sweet felt slippers for someone you love.

1. Making the Pattern
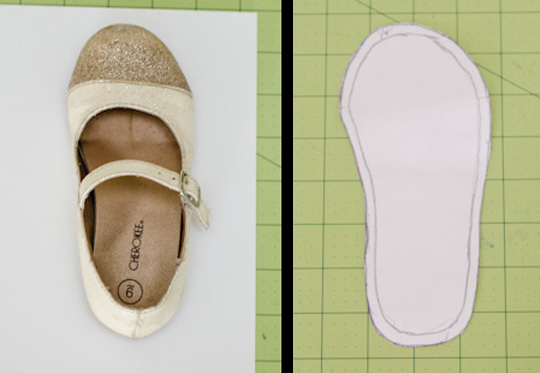
To make the pattern for the sole, I took Ramona’s shoe and traced it. Then added 1/4″ for the in seam.
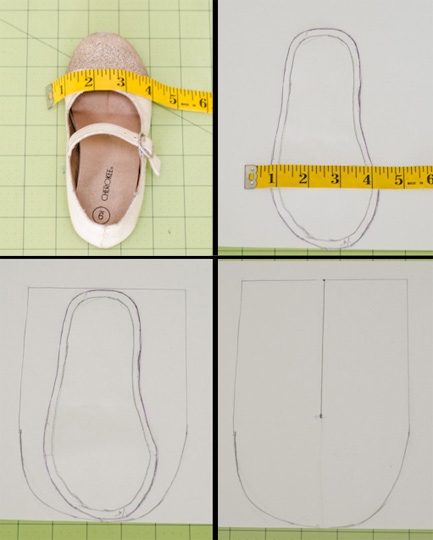
I measured the top of her shoe. It was 4.5″.

I took the sole pattern and laid it on a new page to begin the pattern for the top of the slipper. I measured 5 inches total with 2.5″ in the exact center of the sole.

Then just sketched out the U pattern for the top. It starts and stops with the sole pattern.

I drew a line from the heel to 3 inches before the toes to cut for the opening.

This was my first attempt at making a pattern, so my explanation/skill may be lacking. However Nick was sweet enough to make a pdf for you to download and resize as need.

2. Sew those babies
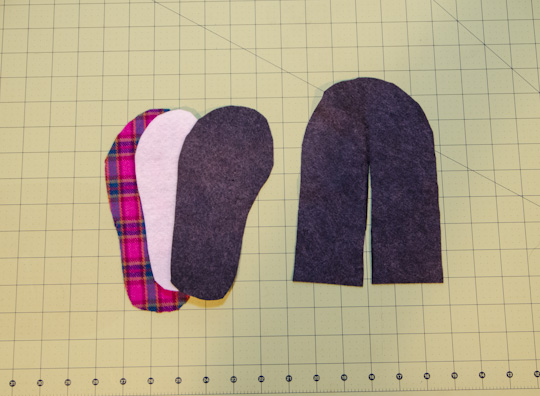
Materials:

Peltex Fabric Stabilizer
Wool Felt (mine was 35% wool/65% rayon)
Flannel for the bottom of the sole

The yardage you get depends on the size of the feet, but most likely all you need is the smallest cut they will give you for the stabilizer and flannel.
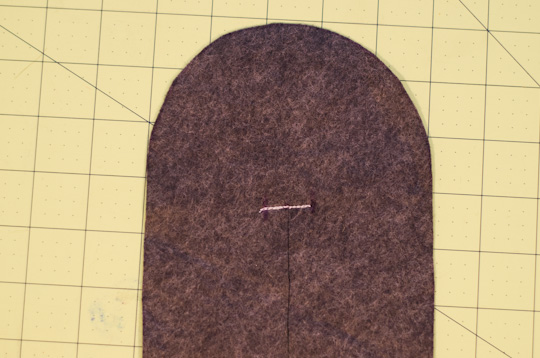
I began with the upper piece. You need to reinforce the slipper at its opening. I sewed a straight line then back stitched the entire line. You can sew in a triangle of fabric stabilizer if you prefer. However if you do that, you will want to add some flannel there as well for comfort sake. (I am using white thread, so you can see it. It looks much better with coordinating thread.)

Stitch along the slipper opening. This is for decorative purposes, but it also keeps the felt from stretching when you turn it right side out. I used a joining stitch. (I know the stiches look different, but the thread came loose during sewing. Sorry. Also remember the white thread is just for you.)

Last step for your upper piece is to sew the heel closed. Line the felt up and sew with a joining or zig zag stitch.
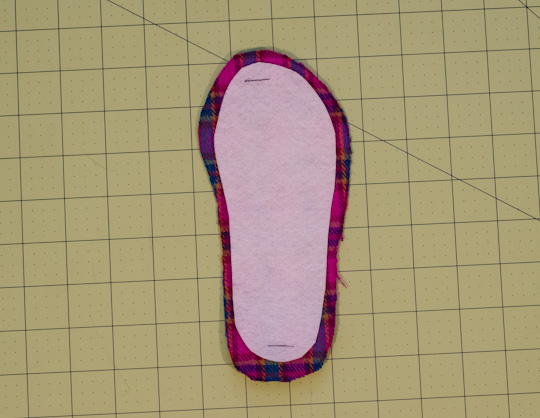
Now for the sole. The stabilizer should be cut without the 1/4″ inseam, so it just fits the finished sole. Sew a few stitches to hold the stabilizer in place. I sewed it to the flannel so the stitches wouldn’t show on the finished felt sole. Place your felt on top of the stabilizer, and you are ready to attach your pieces.

*You can use grip stop or suede instead of felt for the bottom of your sole, so your slippers aren’t so slippery. I just wanted to keep my materials at a minimum, and Ramona loves to “skate” in her slippers.

Start at the toe and pin the upper piece around with the wrong side out. You are ready to sew those babies.
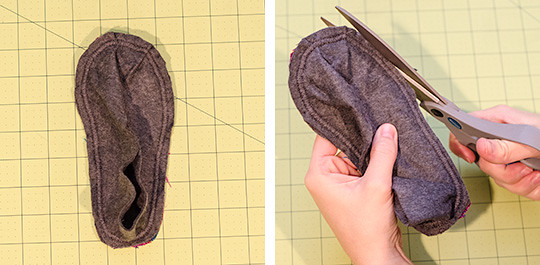
I sewed using the joining stitch (again) with a 1/4″ seam allowance. You can use a zig zag. You want a stronger stitch here to withstand all the running that will happen in these beautiful felt slippers. Trim your seam allowance carefully so you don’t clip your seam.
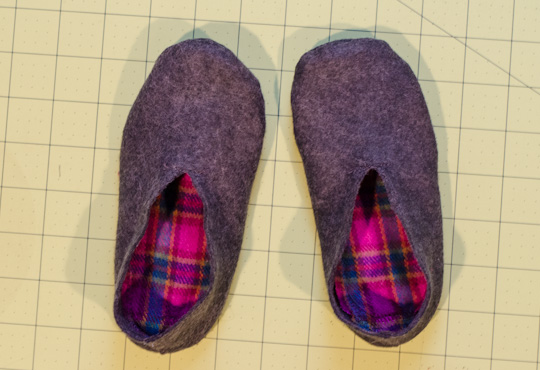
Turn your slippers right side out which is slightly more difficult than you would think thanks to your durable fabric stabilizer. When you make the other slipper don’t forget to flip the sole pattern to make the opposite foot.
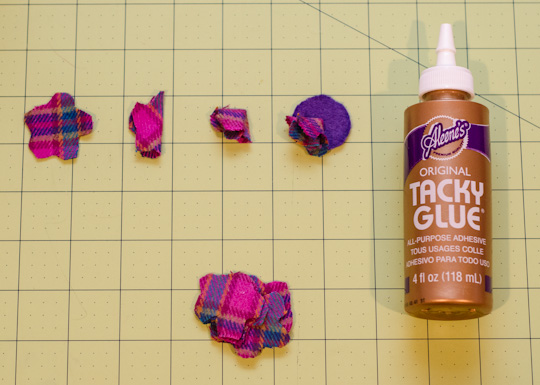
I decided to embellish them a little with flowers. You can get the full tutorial here.

Ramona loves her new slippers. They are still second to her princess heels, but I’d like to think these provide just as much fun. I know they were supposed to be a Christmas gift, but I needed a model. Plus giving presents early doesn’t count when they are 3, right?

Dance party for the new slippers. Now go make some for your sweetie. They are actually pretty simple once you get your pattern established. Have yourself a merry little handmade Christmas! Go check out the other tutorials for more great DIY ideas!

  1. If you don’t recognize that one, go back and re-read.
  2. Personalized Hand-Stamped Tea Towels from Chibi Run
  3. Personalized Tile Coasters from Made 2 Style
  4. Sock Monsters from Ava Pot Pie
  5. Homemade Basil Pesto from KukuCouture Invitations
  6. Lace Boot Cuffs from S{Thomp}ing Ground
  7. Aromatherapy Eye Pillow from Markham Street Design
  8. DIY Paint by Numbers Canvas from Sophie at Home
  9. Personalized Memory Matching Game from Max & Me

You can also check out our other handmade gift this year – Brown Sugar Vanilla Body Scrub!
Tagged As , , ,

And the Stockings Were Hung…

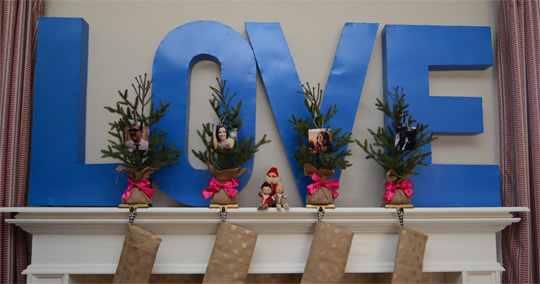
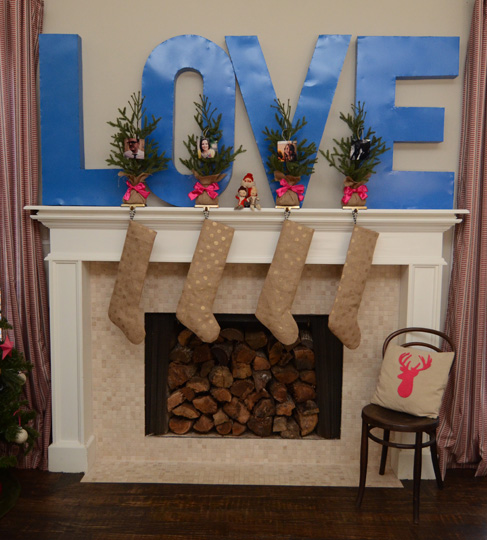
Since we have completely changed up Christmas around here, I started from scratch for the mantel. The plan was much like the one for the table – keep things very neutral and use the pink sparingly to make a statement. Otherwise things could get crazy fast.

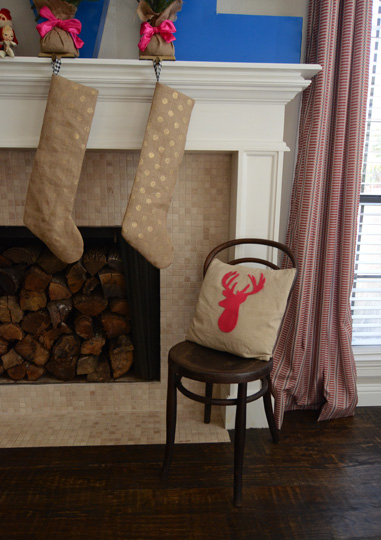
Oh why yes that is the same sought after gold dotted burlap Cassie used as her runner. Nick wanted burlap stockings, and I said hell no. Then Cassie went and pulled that burlap out. We already knew we were doing gold polka dot napkins, and I thought this is just too perfect. You win this round Nick. (I’ll share the stocking tutorial on Monday.)

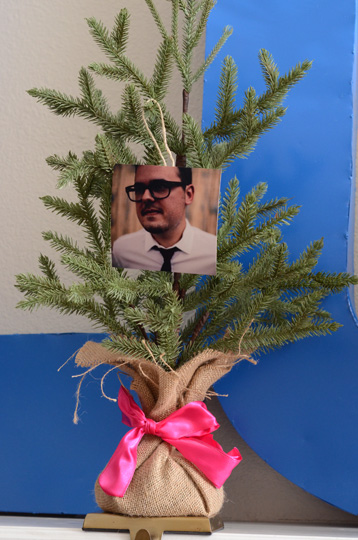
The LOVE sign is our mantel staple. It’s huge (obviously), and I wasn’t going to move it. Blue and pink look great together anyway. We decided to just make another smaller layer in front. I bought 4 Christmas trees from Michael’s and changed the ribbon to pink. I sat them on top of gold stocking hooks. It’s almost like a textural layer in front of the sign. It’s simple, and I like it.

We hung pictures on the small trees. What a good looking man I have. This is another way to tie things together since we have the THANKS collage. It seems like an infinitely better idea than monograming the burlap stockings.

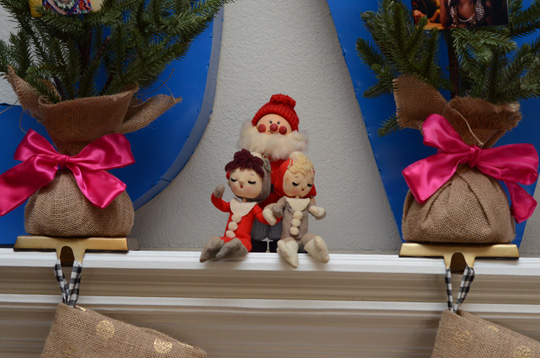
Our vintage Santa and elves are front and center. I know they aren’t wearing pink, but they look so at home amongst the trees.

I just threw this pillow together…literally. I downloaded a deer silhouette and traced it on some pink felt I had lying around. Flipped one of our pillows around and stuck that deer on there. I didn’t attach it. Fake it ’til you make it…or until Christmas is over and then the pink deer can find another home. I really want to make a pillow like this, but it wasn’t going to happen this week. (Did I mention I sewed 4 burlap stockings?) The deer sticks and won’t fray because that’s the greatness of felt.

I did tackle filling the fireplace with wood. It’s something I have wanted to do and decided to tackle late Monday. I carried in 10 (!!!!) firewood bundles in just to then fight for hours with the fireplace rack. I’m ashamed to admit that I woke up very sore the next day from all the manual labor. It’s okay though because it’s done. I love it, and it will stay forever until we move.

Luckily Ramona is too young to question how Santa can come down the chimney when there’s wood blocking his entry. The answer is magic in case you’re wondering. Just glad I don’t have to answer to a 3 year old.

I’m linking our Merry Mantel up to Michelle at Ten June.

Tagged As , ,

Killing Books in the Name of Christmas

Maybe I should have titled this something happier like upcycling old paperbacks into beautiful Christmas decor, but let’s be real I chopped up some books to decorate my table. I already shared the napkin tutorial, so here’s the paper craft edition. First the ornaments then the book page Christmas trees.

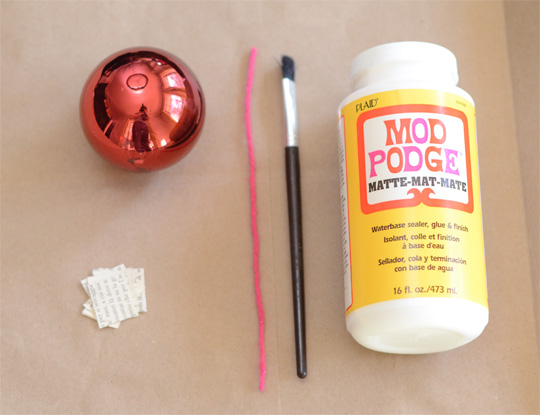
I am about to admit something that will probably make me lose any crafty or blogger credit I might have…this was the first time I used Mod Podge. I mod podged some paper scraps to ornaments to use as placecards. It’s super easy as all of you reading this I am sure already know.

I bought a box of ornaments 10 for $2.50 at Walmart to transform into some ball of a cut up classic (Dante’s Inferno in this case).

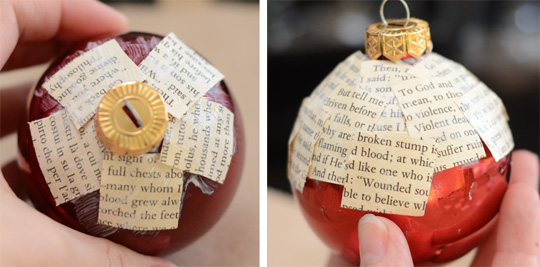
Here’s some tips for my fellow perfectionist out there on how to mod podge book pages to ornaments perfectly:

  • Start at the top and work your way down and around.
  • Make sure your font is the same on your tiny book scrap. (No italics, etc.)
  • No white space. Every scrap should be completely covered with words only.
  • Attach them right side up.

I don’t know why these things are a must, but they make the ornaments look 100% better if they are done this way. Trust me I know. I may or may not have made a bunch for my tree as well.

Here the ornaments are being used as name plates/party favor.

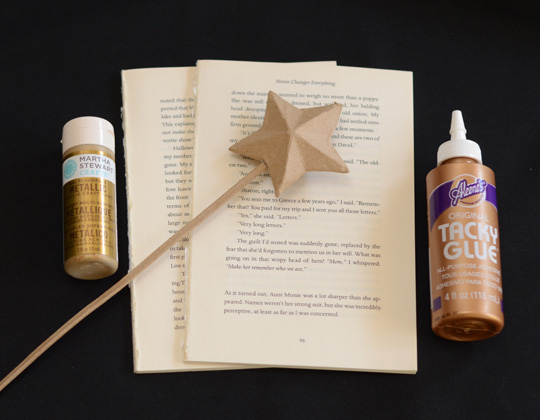
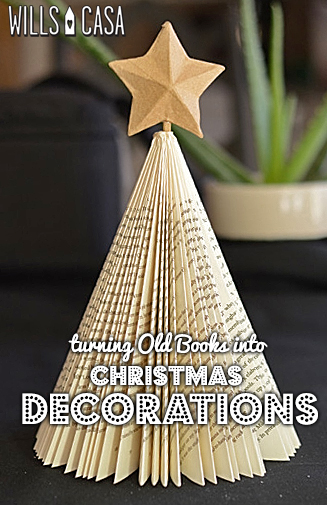
Craft 2: Book page Christmas trees. I actually remade these when I found these paper mache stars. You need to exacto 2 sets of 30 book pages.

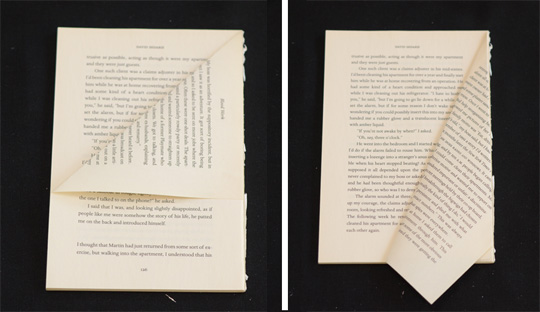
It’s all about folding. Begin by folding the top corner to the center. Then take your folded corner to the center. Repeat. Repeat. Repeat. Best when watching Elf.

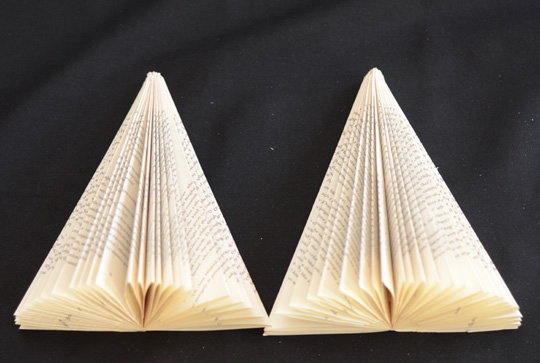
For the next set of pages just flip the “spine” on the right, so you will fold the same way just flipped. For example, the top left will be folded down to the center which is now on the right.

Cut the points off the bottom, so your tree will stand up.

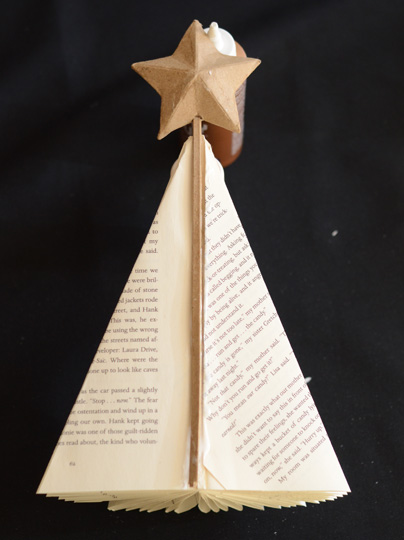
You will have 2 pieces that now just need to be glued together. It’s that easy.

Bust out the tacky glue and glue the star right down the middle. Then glue the second piece.

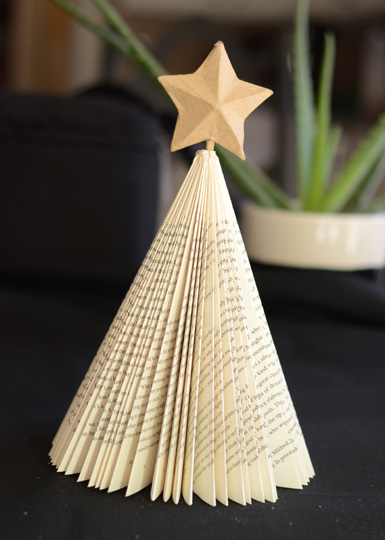
And done with the book page Christmas tree. It takes about 20 minutes.

I painted the stars gold and returned my book page Christmas trees to the tablescape.

Crafts that you can do quickly with materials you most likely have on hand. Double win. Check out more Christmas crafts over at Hi Sugarplum.

Tagged As , , ,

Dare to DIY: Give Vanilla Brown Sugar Body Scrub

This DIY challenge has been the most difficult thus far. Originally I thought the tablescape was going to be the hardest since it was completely unfamiliar territory, but enter Dare to DIY gift challenge. I should clarify the execution was easy, but deciding on what to make was the real challenge for me. I was all over the place with ideas but refused to pull the trigger on anything. (Dare I say too much pinterest?) Nick told me to figure out who I was going to DIY for then decide on the gift. (Sidenote: Nick’s love language is gifts, so of course he would solve my DIY gift problem.)

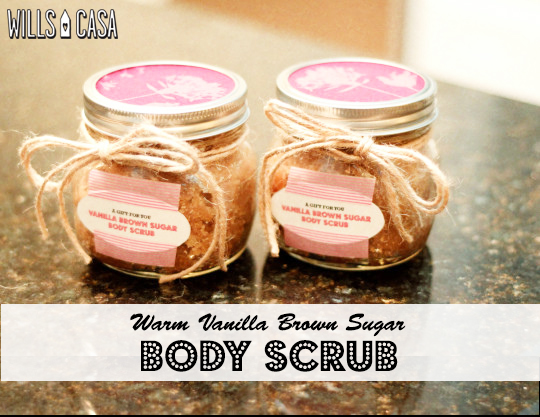
I made Vanilla Brown Sugar Body Scrub for Ramona’s teachers. This is a simple DIY that easily replaces the generic Bath and Body Works gifts for a fraction of the cost. Plus you have most, if not all, of these supplies on hand. Recipe originally found here.

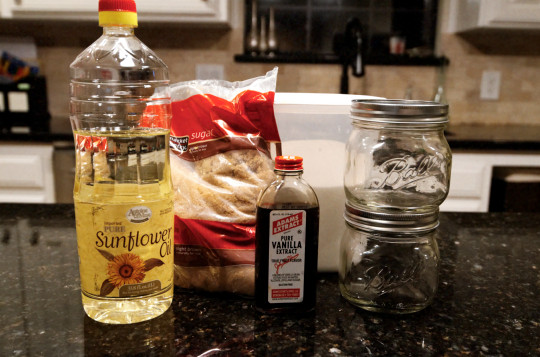
Materials:

  • 2 cups of Brown Sugar
  • 1 cup of Granulated Sugar
  • 1 Tablespoon of Vanilla
  • 1 cup of Sunflower Oil
  • 2 – 4 oz canning jars (similar)

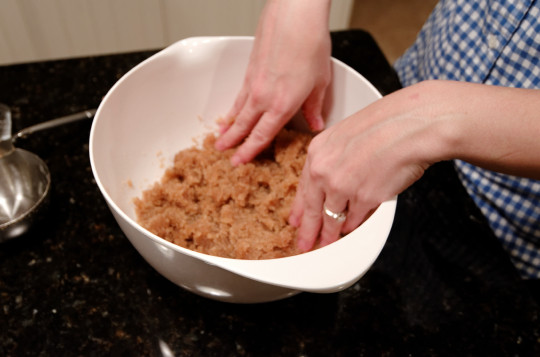
Mix the brown sugar and the granulated sugar together. Then add your vanilla and sunflower oil. Before you add any additional oil, pat down your sugar mixture. You’ll be surprised how much oil is hiding in there.

I wanted to make the packaging a little fancy, so I traced the lid on a pretty vignette on some fabric. Use my new favorite craft supply, spray adhesive, to attach the fabric to the lid.

Everything looks better tied in jute. Nick created these cute labels for the 4 oz jars. You can download the printable here. (Does that count as another DIY gift since it’s for you?) I taped the labels on with washi tape, because you need this craft supply in your life.

This scrub smells amazing (like well um vanilla and sugar), and who doesn’t love natural body scrub? If your family draws names for gifts, then these babies are great to give to the people you didn’t draw. Something simple, but useful. Inexpensive, but not cheap. Homemade, but quick (less than 5 minutes).

Go check out the others who Dared to DIY at Decor and the Dog, Maybe Matilda, Newly Woodwards, and Two Twenty One.

*This post contains affiliate links.
Tagged As ,

DIY Anthropologie Napkins

Let me set the stage (or more appropriately the table) for you. We had to arrange a table for the Dare to DIY challenge. We had no idea what to do being tablescape virgins, so we did what normal people do…read blogs and check pinterest. Luckily the week before Thanksgiving is flooded with tablescape inspiration. I ran into this tablescape on Design*Sponge with some beautiful napkins.

via

Oh those napkins! I wanted them so bad. Problem is I only wanted the hot pink ones. They are sold in a set with the different colors like the picture above. Bummer. I couldn’t shake my love for them, so I figured I might as well DIY them. Since I know you are lusting after them now, here’s how you too can make some Anthropologie inspired napkins to wipe your pretty mouth.
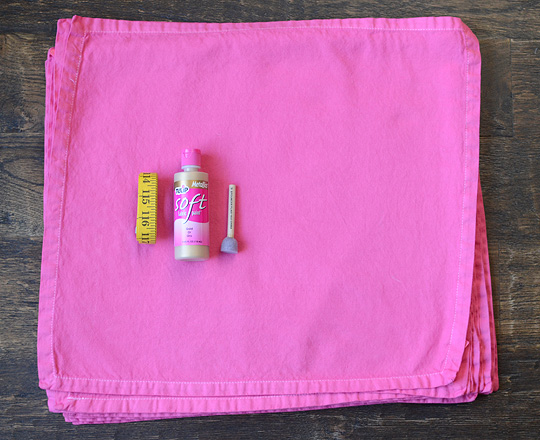
Materials:

  • Napkins (shocker – I dyed mine but if you can find napkins in the color you want just make sure to prewash them)
  • Flexible Ruler
  • Fabric Paint (mine was Tulip Metallics Soft in Gold)
  • Spouncer (mine was 3/4″)
  • Craft brush (not pictured but still necessary)
To be honest this project is a bit of an undertaking. Make sure you give yourself about 30-45 minutes per napkin.

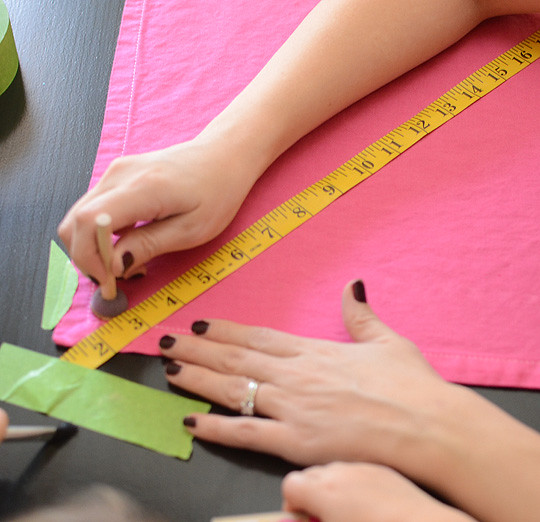
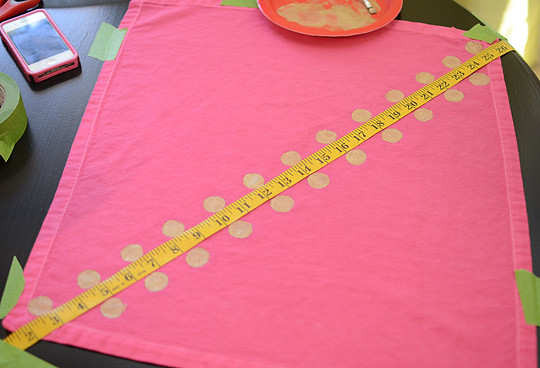
I taped the napkin and the ruler onto my table, so it wouldn’t move while I worked. Word to the wise, put something underneath your fabric because it will bleed through. Luckily the fabric paint came off the table without much trouble.

I began in the center with the first polka dot cut in half at the exact center. The ruler was about 1 inch thick, so I spaced the dots 1 inch diagonally as well.

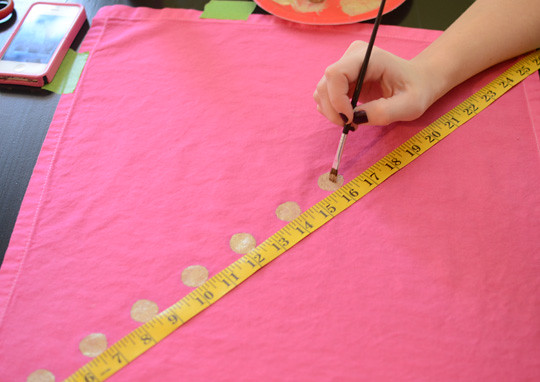
I am way too much of a perfectionist to not use a small craft brush. When you use the spouncer, the dot doesn’t fill in equally. The craft brush smooths out your dot and makes sure the entire dot is filled.

It’s quicker to make your polka dots using the spouncer all the way down the line. Then go back with your craft brush and perfect them.

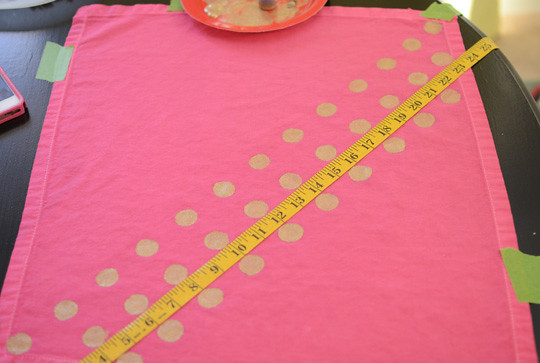
You already have your spacing established, so the 2nd line is much easier because you just hop over the ruler and dot down the line.

*Yes I was listening to Christmas music whilst polka dotting. Nick was making book page Christmas trees, and Ramona made the biggest mess ever with playdoh got creative in her own way.

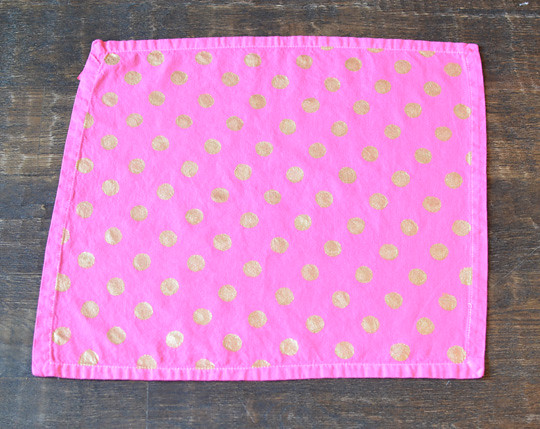
Move the ruler down. Line it up at the bottom of the previous line of dots. Keep moving that ruler and just go on polka dotting the crap outta them napkins. The paint dries in 4 hours. It says it can be washed if you turn it inside out…not possible for napkins. I say just hand wash them which was my suggestion if you dyed them anyway.

You can see that I didn’t polka dot past the thread. I put painters tape on the thread line if I needed to put a half dot. Basically the same thing you would do if you were painting stripes on the wall.

They are definitely statement napkins. (May be the weirdest thing I’ve ever said written.) Anthropologie inspired but there’s definitely a Kate Spade feel to them as well. Now go polka dot something before this trend is passe (I hope that never happens).

Tagged As , , , ,

Fabric Dye Guide

Having a blog makes people do crazy things like desperately needing the right shade of pink for napkins on an epic Christmas tablescape. Okay I may be exaggerating that last part, but my point is dying fabric is not something I would have attempted if I didn’t have a blog. However it’s insanely easy, so follow these steps and get to dying people…geez that sounds terrible.

One of the DIY projects for our tablescape was pink polka dotted napkins. I wanted to separate the posts about the dying and the polka dotting. I didn’t want a giant post, but mainly they are 2 completely different processes. You can dye fabric without polka dotting it, and you can polka dot fabric without dying it. Makes sense, right?

I dyed cotton napkins, but this can be used on any natural, washable fabric. Make sure you prewash your fabric before you begin. There are several methods when using dye, but I chose to dye in a bucket. I didn’t want to risk turning my washing machine or any pans permanently hot pink.

You’ll need:

  • Half a bottle of Rit Dye diluted in 2 cups of hot water
  • 3 gallons of hot water
  • Gloves
  • Fabric (wet your fabric and smooth out the creases)

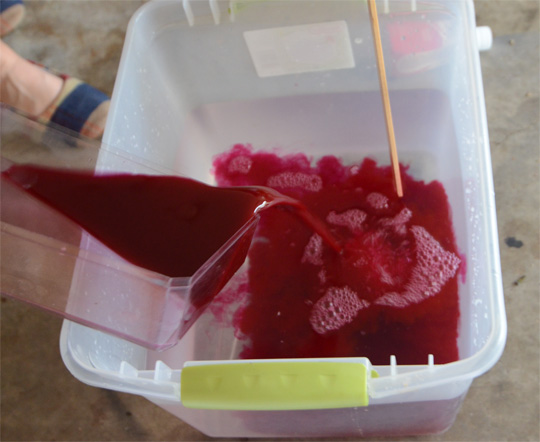
Mix your diluted dye (half a bottle of Rit + 2 cups of hot water) in with your 3 gallons of hot water. I used hot tap water and 1 tea kettle full of boiling water to fill up my bucket.

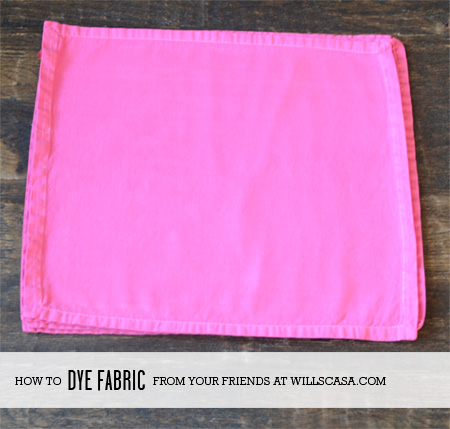
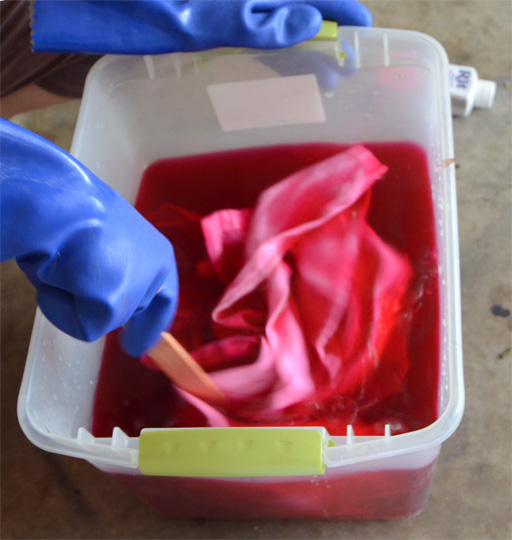
Add your prewashed and wet fabric to the dye bath. Stir it (you are now a washing machine) for 10-30 minutes depending on the richness of color you want your fabric to be. I stirred for 10 minutes while I simultaneously texted and checked pinterest (#multitaskingbrag).

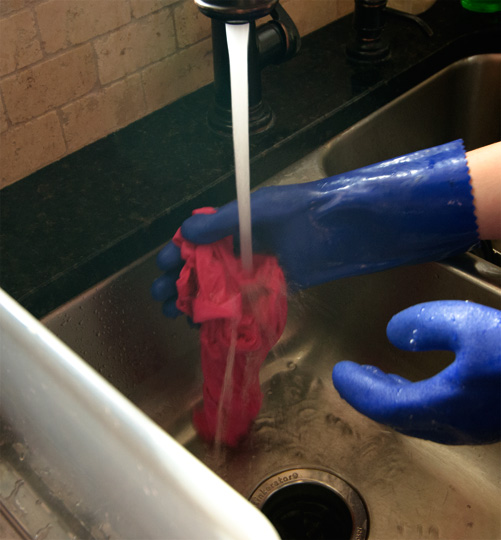
Rinse the fabric until the water is clear in this case the water isn’t pink any more. I have a stainless steel sink, so rinsing dye out wasn’t an issue. You are supposed to be able to do this in a white sink (if you dare) just make sure you clean it with bleach immediately. But honestly I wouldn’t risk it. Play it safe and rinse them outside. *Slight confession I did get some on our white cabinets and bleach wipes saved the day, so I guess it is possible.

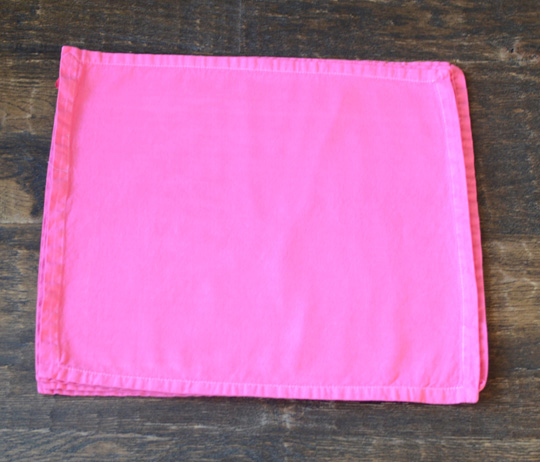
Tada! Pink napkins for the win…or for the polka dotting.

Tips & Thoughts from Wills Casa trial & error:

  • Some fabric takes the dye differently. I had 2 different brands of napkins – Target and World Market – the Target ones did not dye as well. Both were 100% cotton, so I am assuming it has to do with thread count. They did feel different. Luckily I bought different brands to experiment. (Another thing having a blog makes you do.)
  • If your fabric is not as dark as you want it to be, dye it again. Repeat the same process from the beginning (new dye bath). Round 1 of napkins turned out 80’s hot pink, so I dyed them again. They came out perfect. Round 2 of napkins turned out right the first time. All of the napkins eventually were the same shade of pink. Remember I dyed extra…blog reasons.
  • If you wash your fabric after you dye it, don’t wash it with any other piece of clothing. After it’s done, run your washing machine twice with nothing but vinegar and bleach. Then be safe and wash a mateless sock just to make sure there is no dye left. I have a front loading machine and after 2 vinegar/bleach cycles it was clean. Still play it safe with the sock thing. It would be a huge bummer to ruin your clothes because you had to have pink napkins needed to dye something. *Suggestion: Just wash them by hand in the sink. Way easier.
  • If you put your fabric in the dryer, clean out your dryer with bleach and vinegar. I used bleach wipes followed by some vinegar on a towel.
  • Clean your bucket and materials with bleach after you’re finished unless you don’t care about leaving dye residue in them.
  • Your thread isn’t going to dye. It’s typically a synthetic fiber which means the dye won’t work. It didn’t bother me to have white thread on my bright napkins. I didn’t really notice. If someone does point it out, I’ll just explain that my napkins wanted to go for the True Religion look.

There you have it! I’ll share the polka dotting process with you tomorrow!

Tagged As , ,

Giveway Winner: Young House Love Book

Well, hopefully you entered the giveaway. If you forgot, then I award you no points and may god have mercy on your soul.

This was the first giveaway on Wills Casa, and it was completely funded by us out of love for you. We hope to do another one after the first of the year for our one year blogiversary (that’s a thing, right?), so be on the lookout for that!

The winner was determined in the most scientific way possible. Actually, I just went to a website and pressed a button. So without further ado, the winner is….

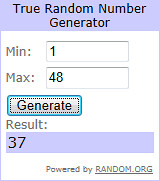
Comment #37

Congratulations Allison! You followed us on instagram, and you just won a signed book! What a bargain!

There are no tags for this post

Dare to DIY: Christmas Tablescape

Round 2, better known as the entertainment round, of Dare to DIY is upon us. The challenge was to DIY something for your table. This was a bit of an undertaking since we’ve never actually set a formal table before, gasp. It’s true y’all. If we are entertaining a lot of people, we go big time and pull out the paper plates. Classy. (Actually it’s more like I’m too lazy to clean that many dishes.)

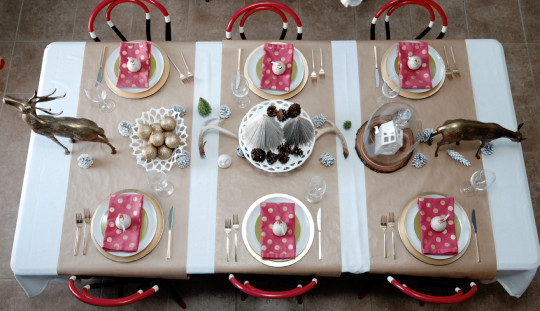
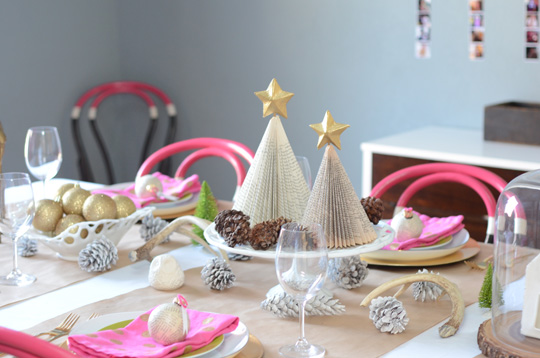
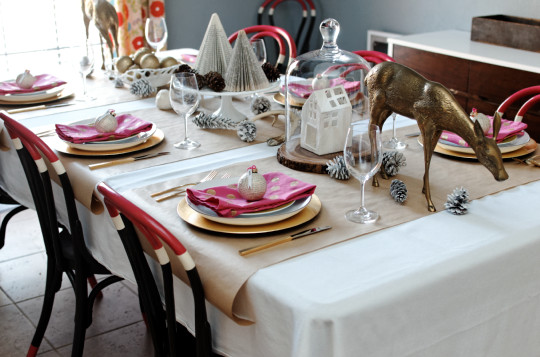
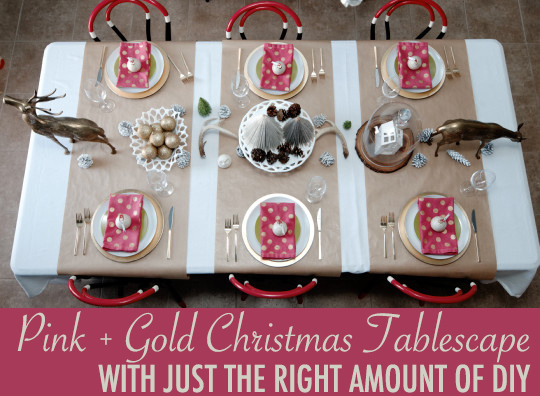
What exactly did we DIY on this table despite the fact that putting a table together was a challenge in itself? The pink polka dot napkins, the decoupage ornaments, and the book page Christmas trees.

For the rest of the centerpiece, we moved our gold deer from the living room but set them towards the end, so you can still have a conversation with the people across the table. You already know we love to put domes on things. We found the wood charger and dome at World Market. We didn’t go too untraditional by putting our Schoolhouse Electric house under it.

We cleaned out the hutch with grandma’s milk glass bowl and our cracked cake stand. (If you clicked on that link just know those elf guys were originally going to be under our dome. Sadly they didn’t want to sit up right. Nothing says Merry Christmas like creepy vintage elves staring at you while you eat dinner.)

We have 3 runners made from IKEA wrapping paper. We are no strangers to using wrapping paper unconventionally (see the background of our Christmas cards last year…wrapping paper). I guess the part of me that loves paper plates also loves disposable tablecloths. Seriously think about all the awesome wrapping paper out there that you can put to good use to set a table. Possibilities are endless.

*Excuse the sideways forks. Ramona desperately wanted to get at this table, and I thought I had it all straightened out after she rearranged it. Never underestimate a toddler’s sneaky ability to touch things just 1 more time.

Here’s the run down on the place settings:

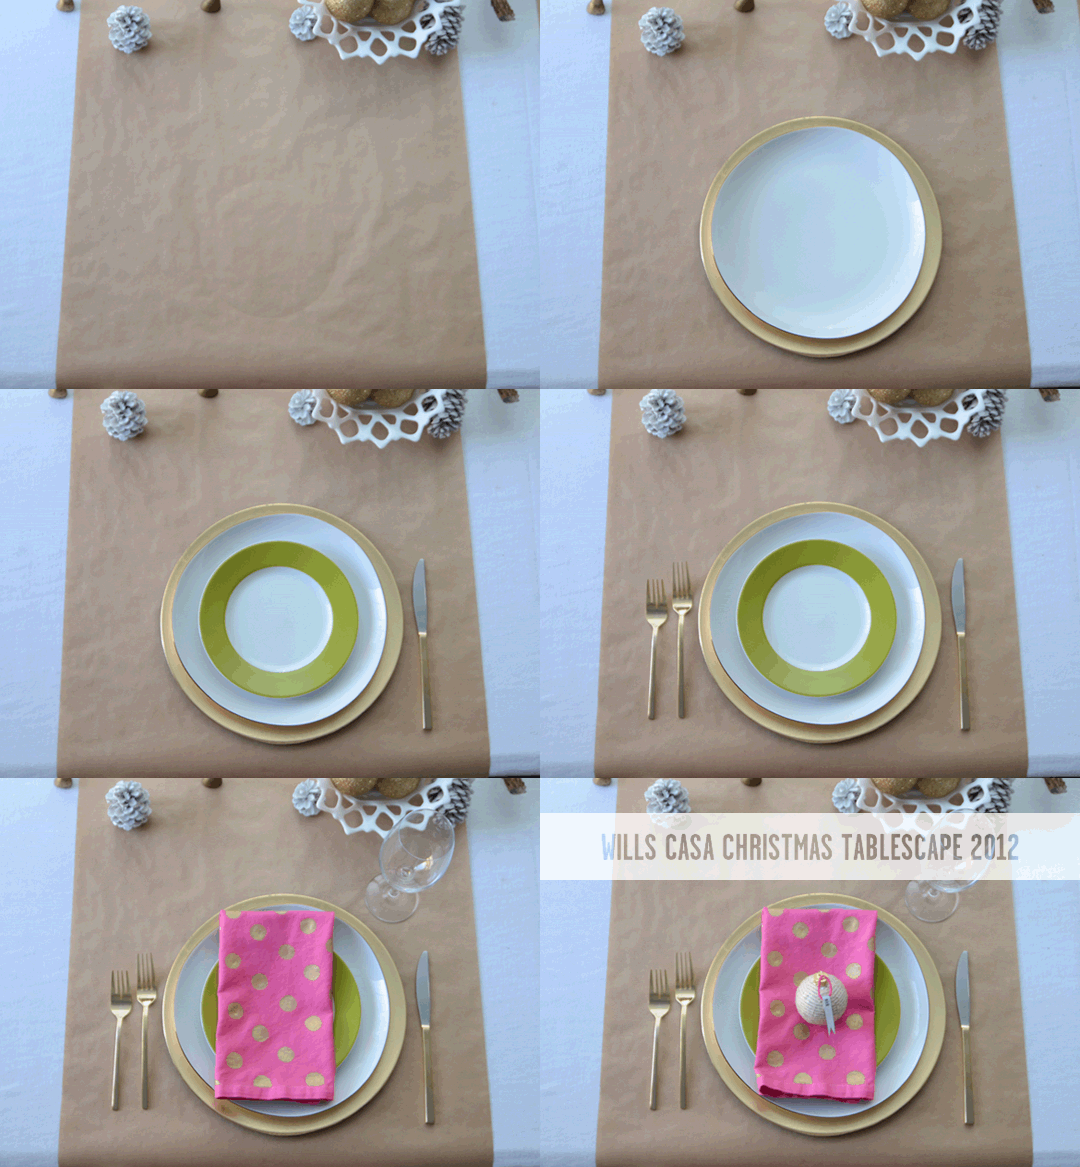
Gold charger – Walmart (98¢ a piece)
Gold Rimmed Dinner Plate – West Elm
Green Salad Plate – Crate & Barrel Outlet
Pink Polka Dot Napkins – World Market meets Amber’s DIY skills (inspired by these…tutorial here and here)
Gold Flatware – One Kings Lane from our anniversary (similar here)

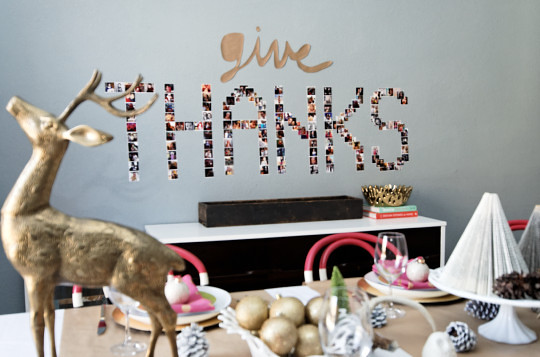
It just so happens that our give THANKS project works together nicely with the newly set Christmas table. I know a lot of you told me to leave it up anyway, but it’s great that it actually works with the space.

CHRISTMAS-TABLESCAPE

There you have it friends our first attempt to set a table like grownups. Weird for a couple that insists on having a formal dining room. (Just to clarify, I will still be using paper plates when we have our Christmas party. I don’t know why I bother buying place settings for 12. Someone explain.)

Make sure to check out all the Dare to DIY projects up on our hosts’ blogs: Decor and the Dog, Newly Woodwards, Maybe Matlida, and Two Twenty One.

Tagged As , , , , ,

GIVEAWAY: Young House Love (the book, not the blog…. cause that’d be weird)

*Sorry but this giveaway is closed, but feel free to read all about how we met Young House Love.

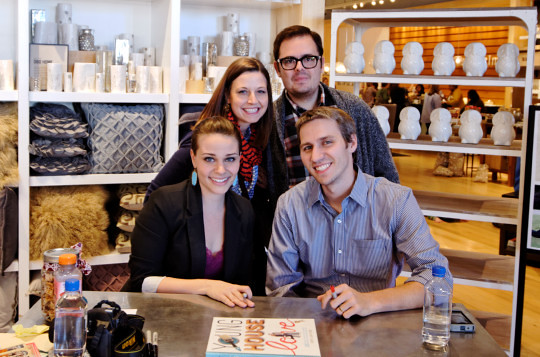
Nick and I scheduled a hot date for Saturday morning. We were going to do all kinds of dinnerware and home decor shopping. I actually needed to exchange some plates at west elm too, but man look at the line. People really wanted to get their west elm shop on.

Don’t worry there isn’t a pillow shortage or anything. It was the Young House Love book tour which we had been anxiously awaiting like the rest of the world (or in this case the rest of Dallas).

We rolled up about 10:30am with the book signing scheduled to start at 11:00am. There was easily 250 people ahead of us in line. It was pretty crazy. Luckily, the people around us were super friendly, so we were able to kill the time by chatting with them.

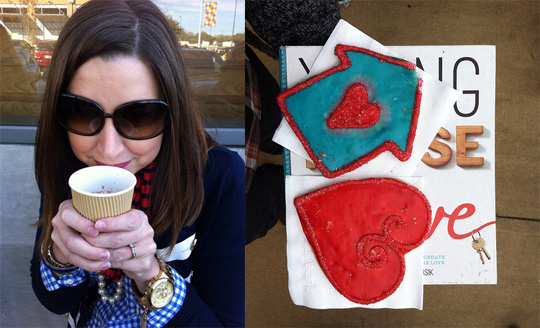
I mischievously drank coco and ate the much publicized YHL cookies. Yes when in Dallas best be prepared to bring the glitter. It was a nice distraction from my supreme nervousness. It’s just weird when you read about someone’s life for so long, then you actually get to meet them. You feel like you KNOW them, but you’ve never meet. (Am I getting myself into a Catfish type situation? But they don’t know me, so is it even weirder that I know so much about them? Oh internet thank you for these puzzling inner debates.)

Nick Edit: John is obviously more experienced at smiling for photos than I am… oh well.

After about 2.5 hours, we finally got up there to meet them and get our books signed. Sherry complimented my outfit, and I blubbered something incoherent. I’m just so awkward. I was silently terrified Nick would out me for having spent way too much time deciding what to wear that morning. (In my defense, he had already done it once that morning when we got breakfast, so I was bracing myself.) I know I’m outting myself now, but this is the internet. You can’t see my embarrassment.

If you’re wondering whether or not they can somehow be as insanely nice in person as they are on their blog…. well they are. You can tell they are incredibly genuine and honestly humble.

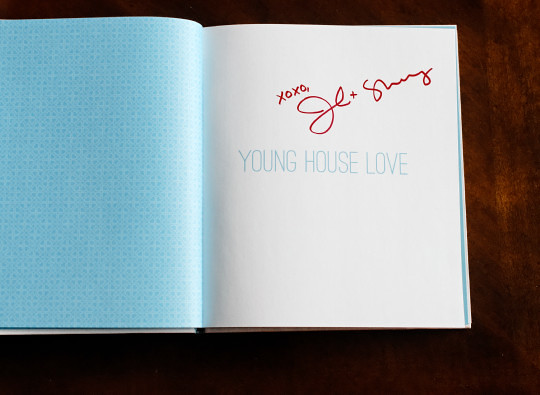
After we were done, we went and signed their guest book. Of course I couldn’t think of what to write. I mean if I messed up I couldn’t cross it out. Lots of pressure here! Nick jumped in with his witty self.

Also there were a lot of women telling Nick he was so sweet to wait in line with me. Hey ladies, he’s been reading for much longer than I have. I didn’t read any blogs until about 3 years ago, so he was way ahead of me. He even comments especially back when we were both planning our nurseries at the same time. (Ramona is about 6 months older than Clara, and we are still working on her “nursery”. Confession: She still sleeps in a crib.)

What does this all mean for you…

We’re giving away a signed Young House Love book! We know that not everyone had the opportunity to go to a book signing, so why not get an extra to share with you guys? It’s our way of saying thank you for reading, commenting, and just generally encouraging us this year. Here’s the deal…

Prize: One Signed Young House Love book
Giveaway Closes: Monday, November 26th at 11pm CST
Prize Ships: Only to the continental US (sorry international readers)
Nitty Gritty: One winner will be selected by random.org and announced Tuesday, November 27th.

To enter: Comment and tell us what a person or blog inspires/encourages you.

Bonus:

1. Like us on facebook.
2. Follow us on twitter.
3. Follow us on instagram.
4. Share about the giveaway on facebook (via Wills Casa) or twitter.

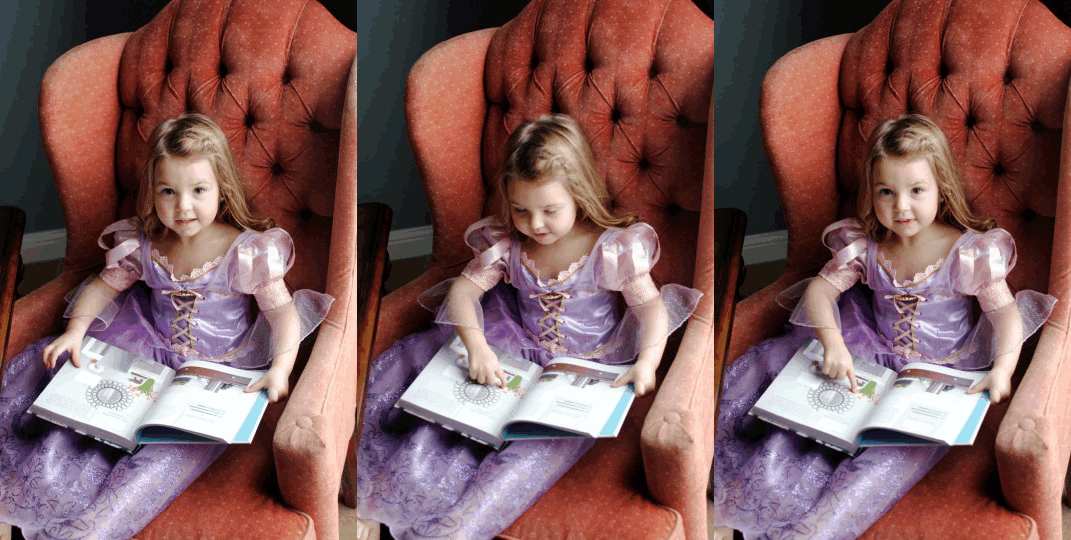
Make sure to leave a comment for each. You have 5 chances to win! The only caveat is that you may have to fight Ramona-punzel for it. Good luck!

*Note: This is what she puts on every morning, so no we did not dress her in any special way for this photo op.

Tagged As , , , ,

Dare to DIY: Give Thanks Lomo Style

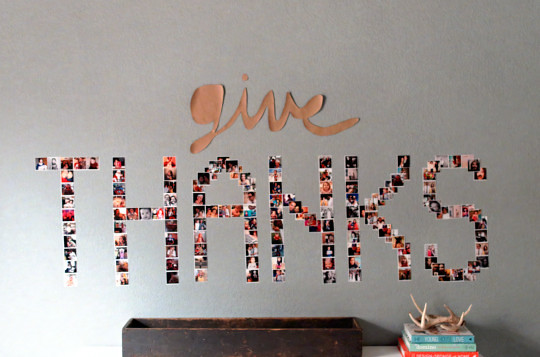
Today is the first installment of Dare to DIY Wills Casa Style. The challenge was to create a Thanksgiving project to remind you to be grateful during the season. I started thinking about what I am thankful for and how I could remind myself of those things throughout Thanksgiving. I decided to create a collage (similar to this and this) with lomo style photos to spell THANKS.

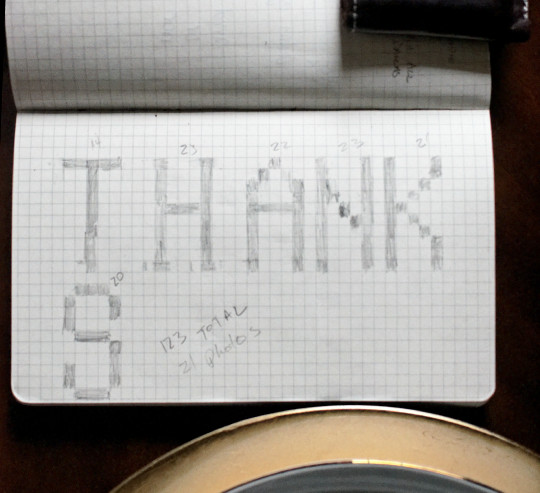
I bounced the idea off Nick. At first he made a stink face (although he vehemently denies it now). He did get behind the idea very quickly. Added bonus I woke up from my morning to sleep in (glorious morning), Nick had created this sketch to plan out the sizing and amount of photos required to pull off the project.

Graph Paper. Nerding out. DIY planning at its finest. There was more math and measurement done than I thought. Each square is one 2×2 photo. The photo size was determined after we realized if they were any bigger it would be too large for the space. We needed 123 photos to spell THANKS. It would be 70 inches long and 20 inches high.

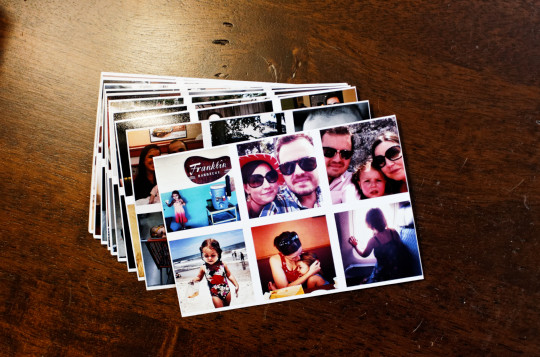
I got right to work pulling pictures off instagram and facebook into a photoshop template Nick created. Those ridiculous photos are from an 80s party, so that makes them a little more normal right? I copied, pasted, and resized photos all night until I had 21 different jpeg files to send to Walmart to print.

Even when you tell Walmart to leave your photos alone, they don’t. The pictures were very saturated which we expected and actually wanted. Thanks for putting a new filter on our photos Walmart.

The bummer thing about getting the pictures from Walmart is they stretched the photo. Basically the white space between the photos was no longer even. Not a terrible thing, but it was annoying that I had to cut off most of the white border around the pictures to make them even.

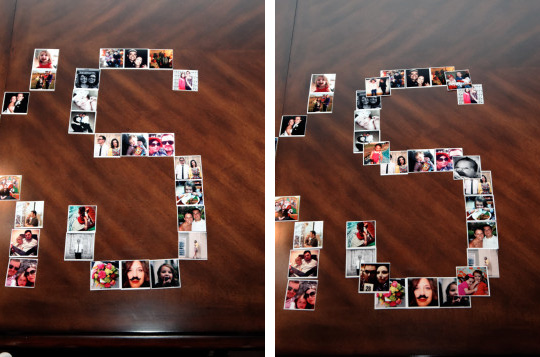
We laid the pictures out via our graph. The left is a picture of what the S looked like creating it strictly from the graph. It was too pixellated for me. It made THANKS a little more difficult to decipher since the ANKS all had the same problem. We had more pictures printed out to layer them around the letter curves to make it a smoother transition.

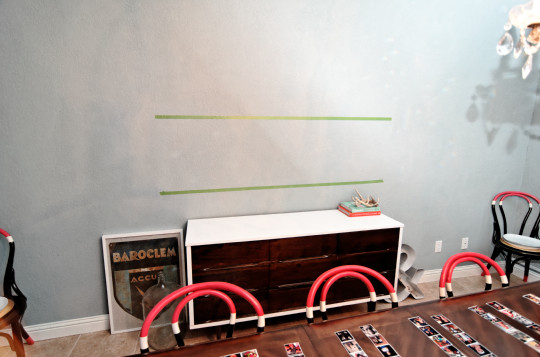
We measured and used a level to define our space at the top and bottom before we started taping 123 photos up.

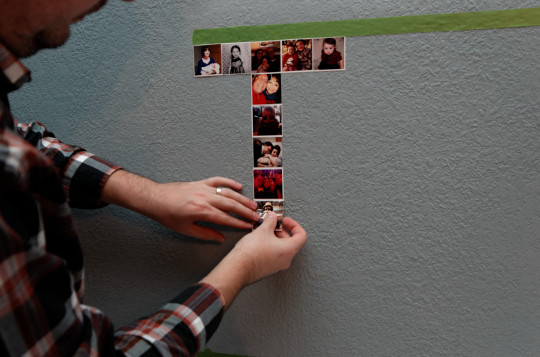
I put painters tape on the back of the photos while Nick hung them up. The space between each letter was 1 photo, so spacing the letters was pretty easy.

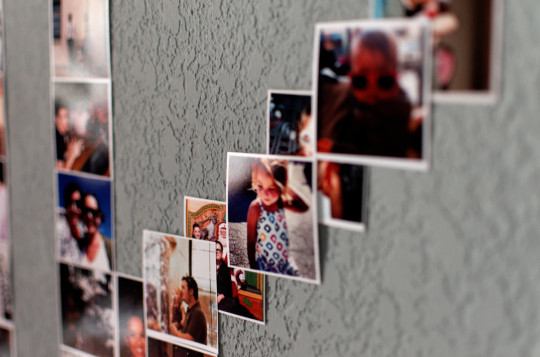
Here’s a close up of the layering on the K. I know it cuts off the pictures below. But if we are honest with ourselves, this is really just a shrine to Ramona. She is already obsessed telling us the back story of each photo.

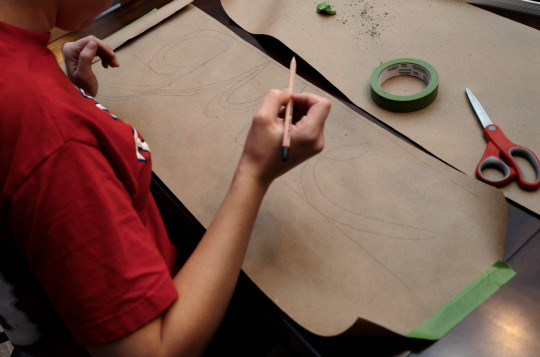
We wanted to add a lovely cursive give to the top of our THANKS. I begged Nick to find a cool handwritten font for me to trace on butcher paper, but he said no. Poor guy had really done enough at this point anyway. He thought it would be pointless to find a handwritten cursive when I could actually hand write give in cursive. Touche baby.

Go check out other Dare to DIY projects for our hosts Decor and the Dog, Maybe Matilda, Newly Woodwards, and Two Twenty One. The link up party will be on the home page of any of the host sites.

Make sure to stop back by tomorrow for a GIVEaway. It may or may not have to deal with our Saturday at West Elm in Dallas with some blog superstars.

Instagram-Photo-Wall

**UPDATE: See how we carried photos into Christmas.

Tagged As , , , , ,