Shop: Lotta Jansdotter Work+Shop

Last December we took our second trip of 2011 to New York City. We didn’t do a ton of sightseeing the first trip, and we were set out to do the opposite the second time around.

I badly wanted to go to the Brooklyn Flea and Lotta Jansdotter’s. For those of you don’t know, Lotta is a craft superstar. I was first introduced to her work when Nick bought one of her pillows for Ramona’s nursery. She has written several books and has an amazing fabric line. Her studio/store in Brooklyn is aptly named Work+Shop.
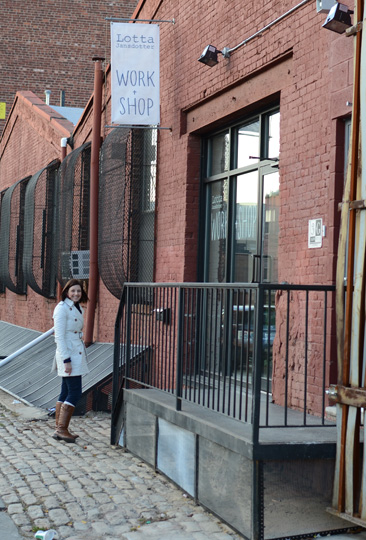
As we walked up to the shop, I noticed that Lotta was there. I was pretty giddy to actually meet her and also shocked that she was working. I guess I shouldn’t have been shocked since it’s her studio as well (duh), so it makes sense.
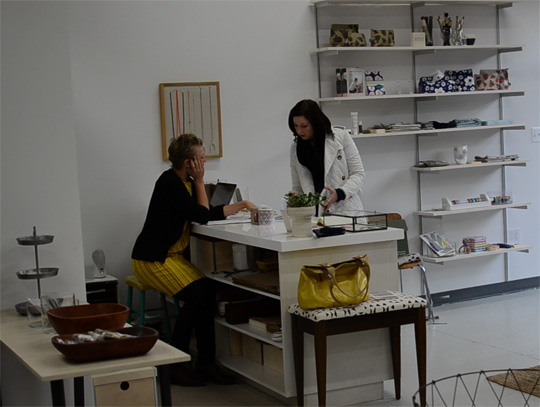
Lotta was crazy nice. I mean insanely sweet and down to earth. She let us poke around and even brought out a toy that sings the alphabet in Swedish for Ramona. The work+shop is an amazing space. I couldn’t walk 2 steps without wanting something else. The great thing about being on vacation is you can justify any purchase because it doubles as a souvenir.

Ramona wanted to smell every candle. Lotta is known for the organic shapes in her design. She has a very clean, modern aesthetic.
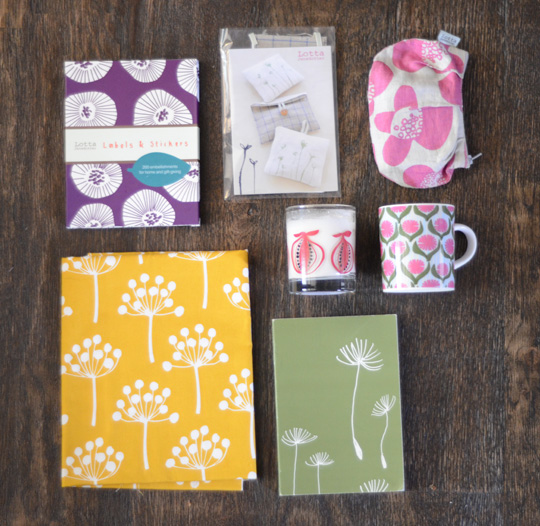
I bought a labels & stickers notebook with tags for gifts and labels that have interesting shapes. A sewing kit to make a pincushion (still haven’t made it yet). A pink flower zipper bag that is currently being used as my wallet. A candle that Ramona decided smelled the best. An awesome mug. 1 yard of florine in yellow (not sure what I’m going to use it for but it’s awesome). And a journal that serves as a blog/sewing brainstorming catch all.

It was definitely worth the trip to Brooklyn. I will make sure to go every time I’m in New York. Admittedly, it’s not often (twice in my life), but I can still shop online. Thank you internet. And thank you Lotta for opening an awesome shop and creating inspiring products.
Tagged As , , , ,

What You Talkin ’bout Ombre

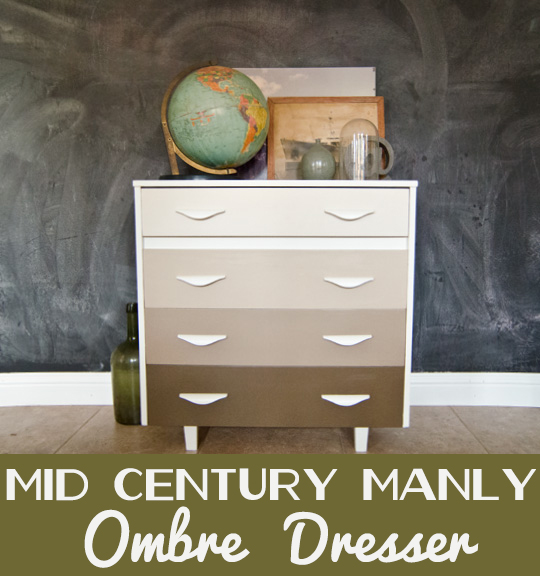
Mid-Century-Manly-Ombre-Dresser

I am a simple girl. I like my toast to be buttered, my buffets to be mid century, and my painted furniture to take the form of a gradient. You know what I’m talkin’ bout ……OMBRE.

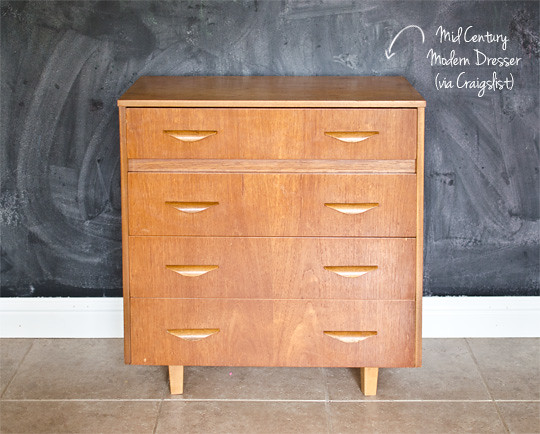
I’m admittedly obsessed with it. I’ve been wanting to ombre something so bad that I’ve basically developed a twitch. When we threw our hat in the Young House Love/Bower Power Pinterest Challenge (here), it was totally time to get our ombre on. We already had our craigslist dresser, all we needed were the paint colors.

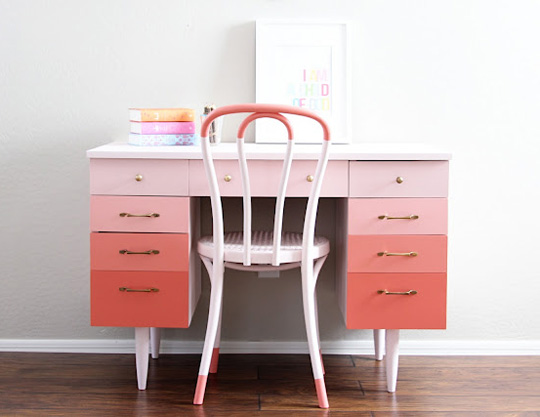
Here’s our pinterest inspiration picture.


via

Look familiar? Yes it’s the same inspiration for our color blocked bentwoods (and here). Instead of the chair, we used the ombre desk as inspiration this round. Nick wasn’t about to have his dresser ombred in coral (paraphrase: “grumble grumble girly grumble grumble”), so we went the more manly route.

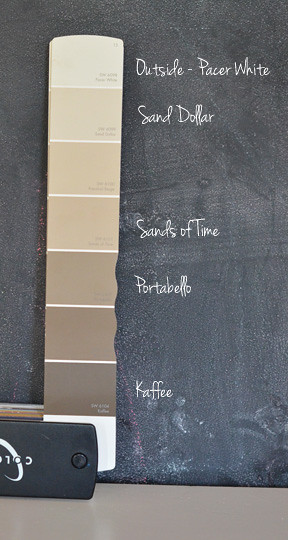
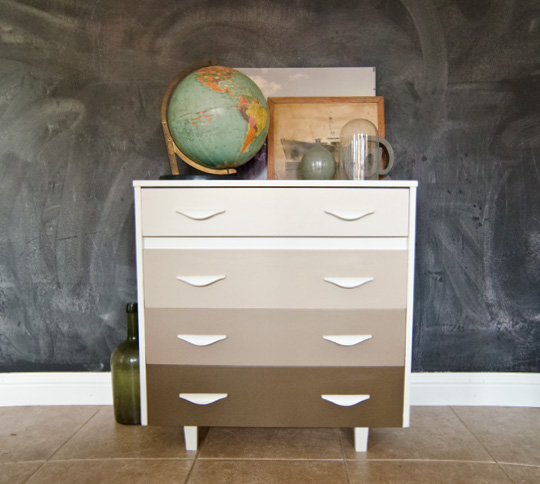
We had pacer white left over from the bentwoods and decided to use that as the outside color. From lightest to darkest our colors are sand dollar, sands of time, portabello, and kaffee. These are Sherwin Williams colors that we matched in Behr Premium Plus Ultra (since you know I love Behr).

We followed our own guide to painting furniture (except we used polycrylic as the protectant instead of polyurethane since it yellows on lighter colors). Nick put his own twist on painting the legs. Standing them up on egg crates (kid has his moments).

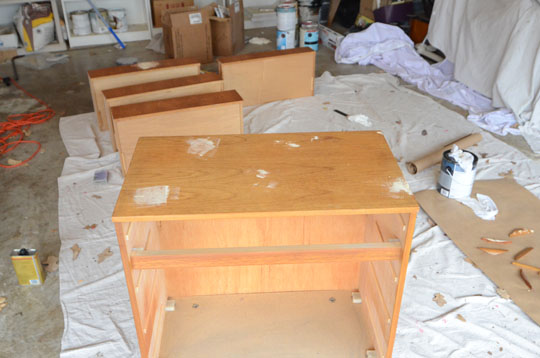
Nick actually started off the painting process….let’s just say painting furniture isn’t exactly his spiritual gift. (Also I might have mentioned something along the lines of him actually reading my post about painting furniture.) So I jumped in when the project looked like this….

And now that we’ve given it the full wills casa treatment, it looks like this:

So what do you think about our manly Ombre? Did you join in on the Pinterest Challenge as well? We’d love to hear from ya!

Check out Sherry’s Beanbag, Katie’s WatercolorCassie’s faux antlers, and Erin’s Mason Jar Chandelier.

Tagged As , ,

I’m so scared, baby…..our first auction experience

Last week, while Amber was doing her normal routine on the internet (I can’t tell you what they are, because I’d have to kill you), she saw an ad for a furniture auction in Fort Worth.

When she told me about it, our eyes immediately met as if we both knew what the other was thinking (“Yea, we’re gonna need a babysitter”). So we dropped off Ramona with my brother and sister-in-law (Thanks Allen and Sara!) and headed over there.

The neighborhood was not one that we would normally venture into after dark (probably daytime either). Amber was not the biggest fan, but I convinced her to stick it out for the experience (and the blog, so uh…. you’re welcome). After perusing some of the merchandise, we went up to the front and signed up for a number. Here’s how we felt:

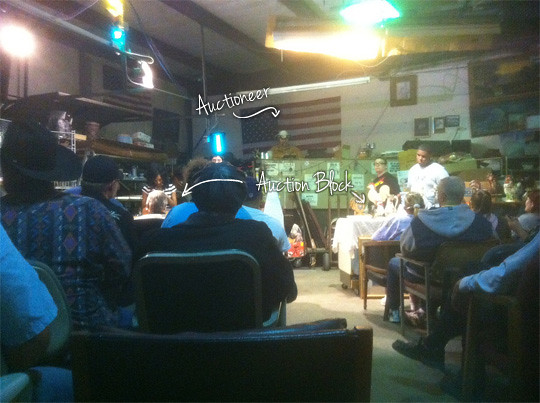
We sat down (near the back of course, in case a quick exit was needed) and waited for it to start. Here’s what the set up looked like:

Once the auction started, we mainly just sat and watched. We weren’t really sure what we were doing, and we weren’t interested in any of the stuff being auctioned.

I’m not sure what to think about the people who were bidding on the items. They definitely seemed to place a value on quantity instead of quality. Some were antique dealers, and the rest we’re really not sure.

The first item we bid on was this old green suitcase filled with old linens and doll clothes. We really just wanted the suitcase. Bidding started at $5 and we bid it all the way up to $20. There were 2 other people bidding against us. We were willing to go up to $30 for it, so we got out fairly low. I think the other people were mainly interested in the clothes, which was kinda funny especially since they wreak of smoke.

Then we sat around and waited and watched some more (we were there for about 4 1/2 – 5 hours total). After a while, they started loading up some artwork on the block. There were 5 pieces total, but only one caught my eye. It was a large vintage photo of a mountain range (about 16 x 20), mounted on foam board.

We started the bidding at $5 and no one bid against us. We gave the other artworks away to the dealer sitting behind us. $5 was plenty cheap and this sucker is really cool in person, total instagram feel, except authentic. It would cost more money than that to print out a photo this size. I’m going to add it to a series I’m working on called “Manly Artwork.”

After that, we sat and watched even more. The auction was ending, and it was “Pick and Choose” time. This meant if there was anything they didn’t get to that you wanted, you took it up to the front and it was put on the block. This is where we did the most damage.

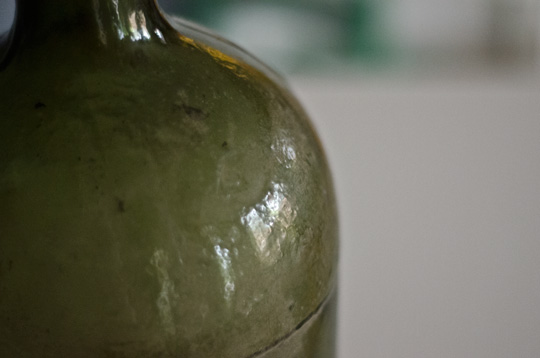
We got these 2 dusty/dirty pieces for $5 each. We’d been looking for a dome for on top of the hutch. This one is smaller than what we are looking for, but we thought it’d look good on top of a succulent or something. The green bottle was really old and seemed like a good deal for $5. Here’s a zoomed in photo for the texture…

You’d think I would have cleaned them before I photographed them, but that’s not how I roll apparently.

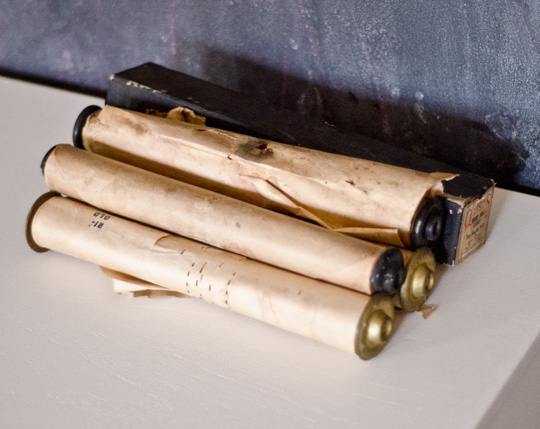
Next, we bid on some vintage piano rolls. I thought they looked cool. At $5 per roll (we got 5), it was a bit of a splurge by auction standards, but I think they will look cool grouped together somewhere.

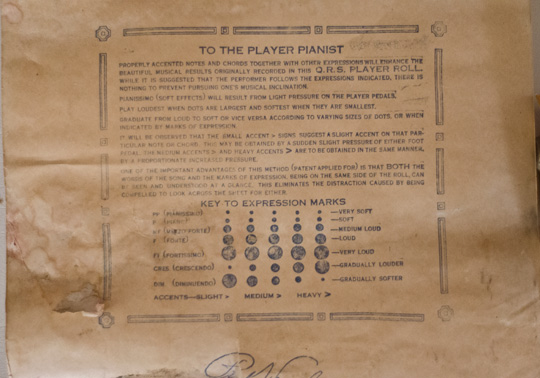
Here’s a look of one rolled out, in case we wanted to use it as a cheap art option.

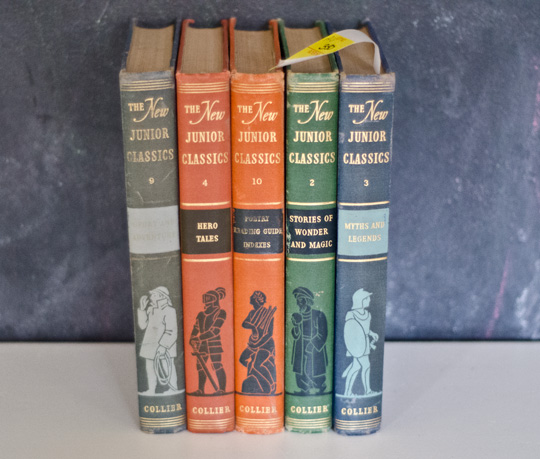
The last bid that we won was this set of old books. It was not a steal at$10 for the set, but can you ever have enough cool looking old books lying around?

Overall, it was an enlightening experience. We’ll be more prepared next time we go (yes, there will definitely be a next time). There are a lot of gems to be found at places like these and since we’re not looking to resale the items we get, we generally are willing to pay more than the vendors.

Tagged As , ,

Pinterest: For the Win(terest?)

Scanning through our readers wednesday, we saw that Young House Love and Bower Power are hosting another Pinterest challenge. Amber and I decided that this would be the time we jump in on one. Amber is on a roll with knocking out projects, so I didn’t think it’d be too much to ask (Plus I might even flex my DIY muscles who knows…).

The idea is to take something from Pinterest that you want to do and actually do it. I was thinking, coming off the success off the awesome color blocked bentwoods, we would go ahead and ombre the dresser we got off craigslist last month.

The Challenge reconvenes next wednesday, so it looks like we now officially have plans for this weekend. Next time you see this guy, he should look completely different.

 Anyone else jumping in on the challenge? Let us know what you’re doing!

There are no tags for this post

Color Blocking Process

Color-Blocking

Once we decided to color block our bentwoods, we starting thinking about how we should go about executing our idea. I prepped the chairs similar to the table with one huge exception the wood filler. All 8 of our chairs were in good condition for antique chairs, but they did have some character to them (read: wear but in a good way).

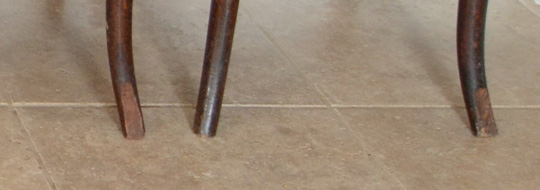
You can see the wear on the legs here. I didn’t want to lose the antique feel of the chair (that sounds weird considering I was about to color block them but you know what I’m saying). We did repair a seat, but that’s about it. None of the chairs were wobbly, so no major work was needed.

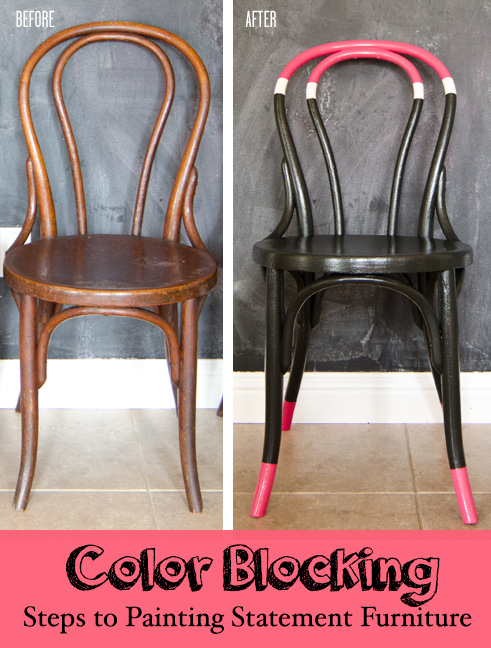
I primed the chairs with gray spray paint primer.  The goal was to tape as little as possible. I painted the legs pink (Disney Color by Behr called Invitation to a Princess) without measuring and the stripe cream (Behr color matched to Sherwin Williams Pacer White) also without measuring. It took 3 coats to cover but only about 30 min per coat to complete.

I marked off 3 1/2″ from the bottom and taped the bottom of the pink legs off. Since the bentwoods have a curve top, we couldn’t measure from the top to an exact point. We marked the 1st curve of the chair. Nick held a large level while I taped the next curve of the chair. And on and on and on until all 8 chairs were done about 2 hours later. It sounds bad, but each chair needed to be taped at 8 different places x 8 chairs so 64 tedious tapings.

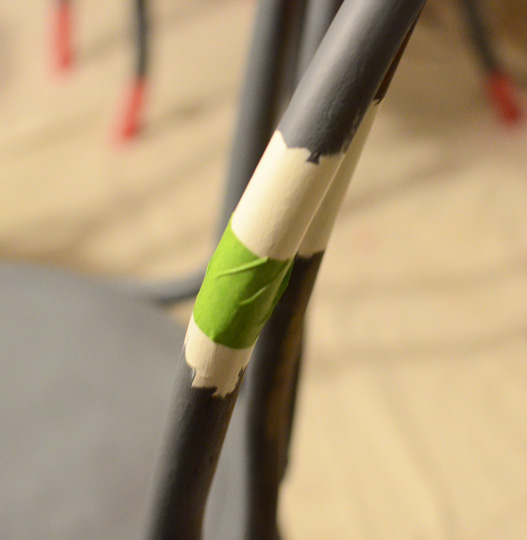
Keep the cream stripe as straight as possible around the curves. You can see the disconnect in the tape here with the crease. I just ripped a little piece of tape off and overlapped it to create a straighter line. Tedious but necessary. I wasn’t about to spend my time painting if I didn’t get my lines straight. The end product would look awful. Good thing is the cream stripe is 1 1/2″ so we just used 1 1/2″ frog tape. There wasn’t an additional measurement between the top and the the bottom of the stripe.

I sealed the tape with a coat of cream on the top.

And a coat of pink at the bottom. We did the same thing when we painted Ramona’s nursery. This kept the black (and pink at the top) from bleeding through the tape. It’s a 20 min (+ dry time) commitment that saves you hours in touch ups.

It took about 5 hours total to paint the black and pink stripe. Remember it’s 8 chairs, so it was going to be time consuming no matter what. I only needed 2 coats and some touchups for the main color Behr Premium Plus Ultra black suede (left over from here and here). The pink stripe took 4 coats before it looked even.

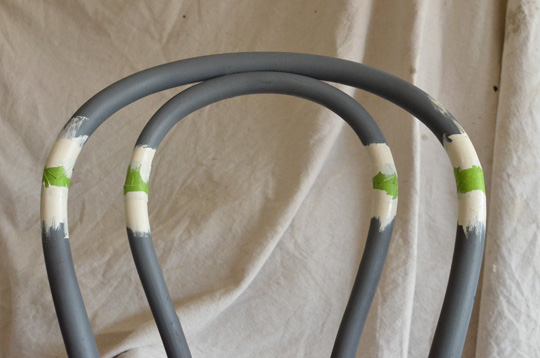
I couldn’t wait to peel the tape off. Sometimes it look perfect like this.

And sometimes it looked like this. I will say that was the worst of all. I have no idea what happened. It was the 2nd piece that I peeled off, and I was worried it was going to be a nightmare to do touchups. Luckily there were only 2 that peeled badly.

I sanded the stripes with a 220 grit block to smooth out the line.

I got craft paint brushes and touched up the stripes. It only took me 2 coats and about 1.5 hours. 2 coats of wipe on poly later and done. They were ready to move in after 24 hours of letting the ploy cure.

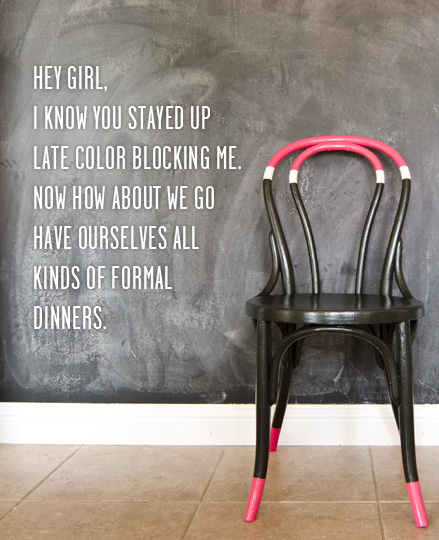
Whatever you say sexy color blocked bentwood. But seriously I do want to have a formal dinner. Who’s in?

Tagged As , , , , , , , , ,

That’s Right We Color Blocked Them

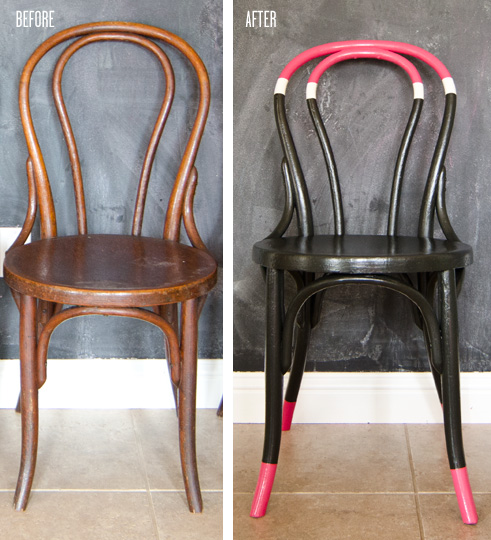
One night we were talking about our collection of 7 mismatched Thonet bentwood chairs that we had started over a year ago. It was decision time for the formal dining. We’ve been sitting on projects in there for far too long. We pulled up pinterest (since it’s 2012 and that’s what you do).


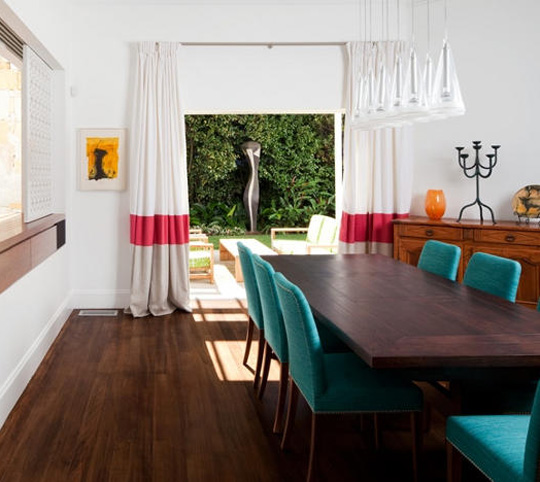
via

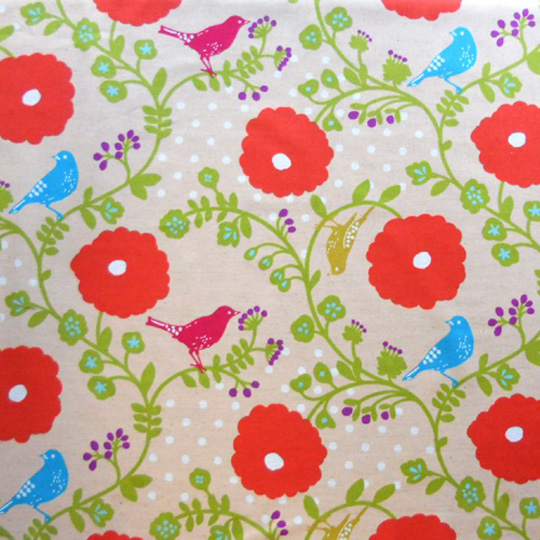
I loved everything about these color blocked curtains. We had already decided we wanted the echino fabric. We hadn’t bought it yet, so we could change our mind.


via

This was on my board dedicated to bentwood. (I know I’m slightly obsessed.) I loved how the legs were dipped. Of course the ombre desk is awesome and a diy project in our future.

Nick said why don’t we just color block the bentwoods. Genuis. This is why I love this man. We set off to find 5 more chairs to get our plan in action (read about our score here).

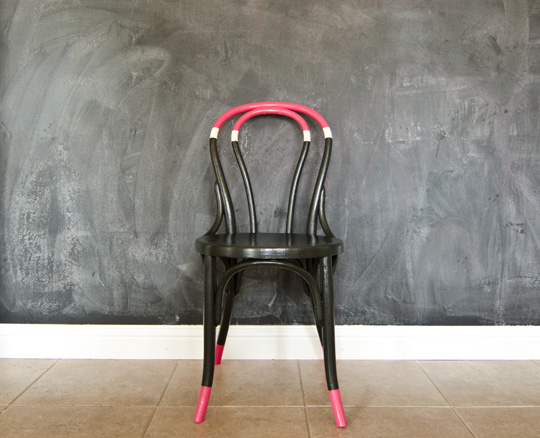
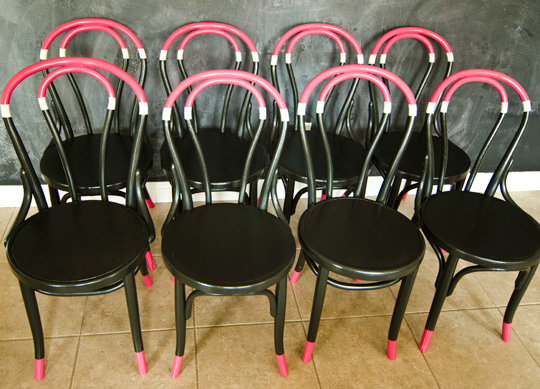
We decided to play off the magenta bird in the echino fabric and block it with cream color. The hot pink is from Disney Color by Behr called Invitation to a Princess. The cream is Sherwin Williams Pacer White. The main color as black suede (left over from here and here). All were mixed as Behr Premium Plus Ultra.

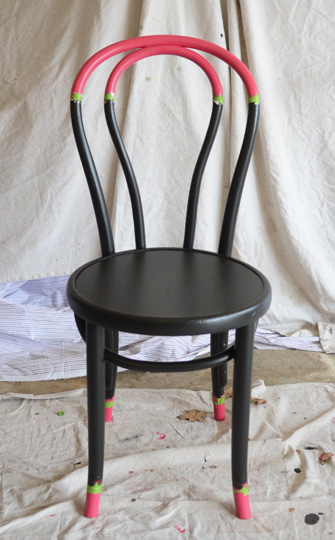
I color blocked 8, yes 8, bentwoods. I will share the process later, but I couldn’t wait to show how awesome they turned out. It’s so dramatic for such a classic, iconic chair. What do you think?

Sidenote: So I have 1 extra bentwood in the style above and 4 in what we call the era style. I’m sure you’re wondering what I am going to do with those. Simple. I am going to hoard them. The 1 I didn’t paint is actually tagged as a Jacob & Josef Kohn Mundus Bentwood. The eras are just too classic for me to part with. I have no other plans for them other than hoarding. Although I do use an era for my sewing table right now.

*Update: Read about the process here.

Tagged As , , , , , , , , , ,

Formal Dining Fabric Purchase

After we had all our bentwoods safely home, I got on ordering fabric for drapes in the formal dining room. We had already decided on Echino collection by Etsuko Furuya for Kokka. I bought a yard of it when we did some LA fabric shopping.

It’s even more gorgeous in person. I know birds are a bit cliche, but I loved this fabric the moment I saw it. It has an amazing color combination. I needed 7 yards, so I ordered it at Harts (they no longer have it on their site). It was $140 which is more than I typically spend but still reasonable. I went to bed with a huge smile knowing my formal dining room is coming together quickly.

Harts called the next day to tell me they didn’t have 7 yards (cue sad Charlie Brown music). I immediately cried got online and searched etsy. No one had 7 yards. More tears. I thought maybe I could order enough for 1 panel then cut it in half since it is 62″ wide. I couldn’t convince myself to do that. I wanted 2 full, flowing, beautiful drape panels in this perfect fabric.

I was really stubborn determined to have these as my drapes, so I decided I’d just order it from different sellers. I ordered 3.5 yards from FABITAT on etsy (who is a wonderful seller by the way) and 4 yards from Harts (half yards weren’t an option). My total went from $140 for 7 yards to $147.71 for 7.5 yards. Not bad. I’m just glad it all worked out, and I can make some sweet drapes for the dining room.

Tagged As , , , , ,

Well, what do we have here?

We’ve been sitting on this post for about a month now while we wrapped up the posts about the nook. But now it’s time to share some good news.

So our search for Thonet bentwood chairs has been going on for a while now. It became a bit of an obsession. Wait, did I just use past tense? Oh dear blog reader, just keep reading (yes, we know that the only people reading this are both of our moms and some dude who keeps googling behr black suede door).

The search has spanned over 2 blogs. We bought 2 different types of bentwoods once accidentally. And we started to go into a state of antique depression. We asked god why all the bentwoods have disappeared when we needed them so desparately.

Then, about a month ago, we decided that we were going to spend a day trying new antique stores looking for bentwoods. Our thought process was this: we generally stick to the same haunts and the bentwoods were nowhere to be found. They didn’t seem to restock fast enough. So we were going to try our luck at some new places. We decided on the max we were willing to pay ($40 per chair) and set out.

We were on a mission and we had a plan(this is not common). We would not stop until we found our bentwoods (or 2pm, cause Ramona needed to be picked up from Mother’s Day Out).

The first place on our list was the historic camp bowie mercantile. We took a stroll around the store and didn’t find much until we walked by this booth:

Do you see them? They’re glorious!

That’s right, 6 matching bentwoods (the one at the back with the arms wasn’t included in the 6). We need 8. We already had 3 in the same style, so 6 would be great.

The price was $270 for all six, but we decided to play it cool and ask what the lowest price they’d accept is. After the people at the mercantile talked to the vendor, she said she’d take 20% off. We totally would have paid full price, so $216 was music to our ears (that’s $36 per chair)!

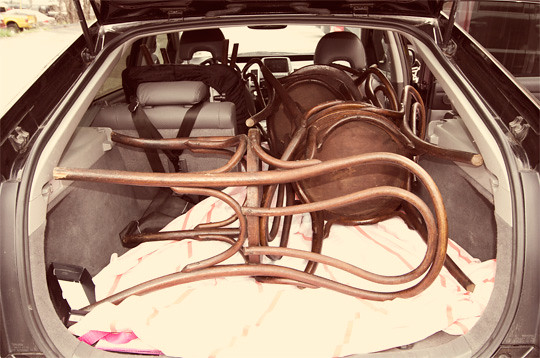
Once we figured out a way to stick 6 chairs in the back of our Prius, were headed home. Well not quite, we actually got the new rug for the nook the same day (we were on a roll yo)

So what did we learn from this little exercise? That having favorite antique shops is great, but when you are on the lookout for something specific it’s better to cast a wider net.

Update: Read about what we did with our bentwoods here and here.

Tagged As , , , ,

Chair Facelift Complete

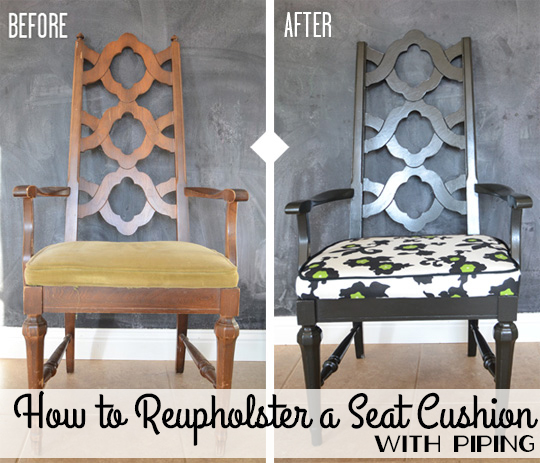
How-to-Reupholster-a-Seat-Cushion-with-Piping

To bring you up to date on the reupholstery progress, I painted the chairs, made the piping and sewed the cushion pieces together. Here are some tips for the final step – stapling the the cushion and seat pad.

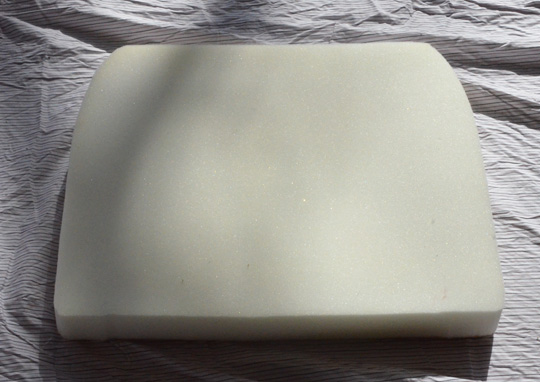
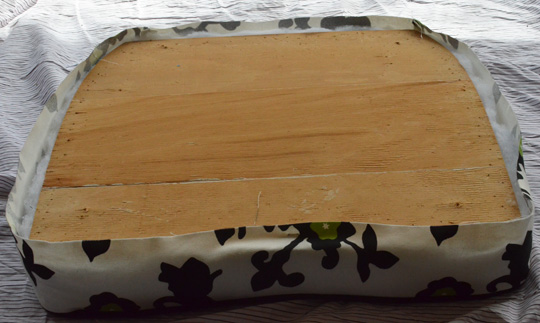
I sprayed adhesive on the wood chair bottom to secure the cushion pad down. This step isn’t necessary, but I had leftover adhesive from framing the vintage sign. I figured I might as well.

Staple the batting to the side of the chair bottom. Cut off the excess batting so it’s flush with the bottom of the seat. This makes it easier to pull the fabric around.

Slip your fabric over your pad and batting. Staple the front center first. Pull the fabric tight making sure there aren’t creases. Make sure you are consistent with how tight you pull the fabric. Staple the front, the back, the sides and then corners.

I didn’t have an exact process for the corners. The front of the cushion was more squared while the back was more round. I just tried to fold it until I had 1 small crease as close to the bottom of the seat as possible.

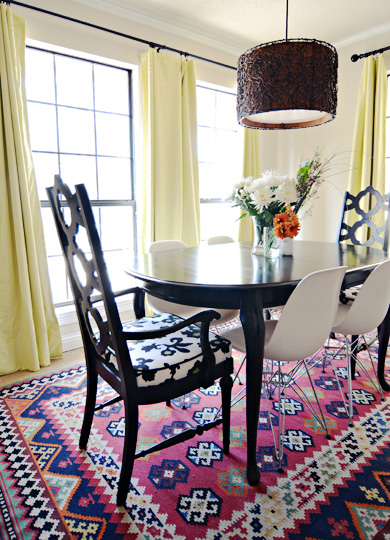
Treat the fabric with some scotch guard. Screw the seat bottom back to the chair, and you’re done. Pretty crazy transformation with some paint and $8 per yard Serena & Lily fabric.

We definitely have more pattern in the nook now.

Of course the space is not finished, but it’s nice to have some of the bigger projects complete.

Tagged As , , , , , ,

February Goal Check

You were probably expecting to see a post about stapling the seat cushions and finally being finished with the chairs for the nook, but that will have to wait until tomorrow. It’s time for another round of let’s see how Amber is doing on her goals just 2 months into the year. (I write that as I polish off a box of girl scout cookies. Good thing I set zero health goals, so you can’t hold me accountable for that.)

1. Complete at least 1 crafty project per month.

I was overloaded with craft projects this month. I made Ramona’s valentine’s gifts. I painted the table in the nook. I made my own piping and sewed the seat cushion for nook chairs. Also working on a secret crafty project that should be blog ready by next week.
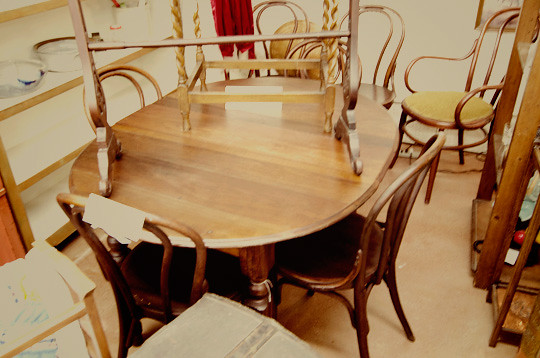
2. Read at least 1 book. I did read A Whole New Mind: Why Right-Briners Will Rule the Future, but I haven’t finished it yet. Leave it to me to not meet a goal in a month that gave me an extra day.

I have read part 1 (which is only 3 chapter but it sounds more impressive). It is fascinating. Nick got the cliff notes version from Daniel Pink at a lecture hosted by his former company. Basically we are moving towards future where right brained thinkers (artist, inventors, counselors) will be the most successful. He gives you six senses that help you develop this type of right brain thinking. If you are a teacher, business owner, or parent, you should check it out. It is not a difficult read and super engaging.

3. Do more fun things with Ramona.

Here we are painting…you know fostering that right side of her brain! We’ve gone to the park almost every week. (Thank you spring weather in February.) Also since we started cooking together in January, anytime I’m doing anything in the kitchen she feels that she needs her stool so she can see. We’ve done things that don’t cost anything (bonus we can even stay in our pjs for most of it, park excluded of course I’m not that parent).

4. Journal everyday. I have been pretty bad about doing this at the end of the day. I still have every day filled out, but I may have written it 3 days after it happened. Maybe I’ll be better in March.


Tagged As , ,