Seat Cushion: Pieces and Sewing

How-to-Reupholster-a-Seat-Cushion-with-Piping

After you’ve made your piping, it’s time to cut and sew the pieces of your seat cushion.

Lay your cushions on your ironed fabric. Flip it over and check to make sure you like how the pattern is arranged on the cushion. Outline your cushion with a fabric marker. Mark 3/4″ for your seam allowance.

Cut your fabric along your 3/4″ marks. You now have the top of your seat cushion. Iron it again with heavy starch to get all the wrinkles out.

Pin your piping with the cording facing in.

When the piping mets at the back of the cushion, leave it open about an inch for each side (start and finish). You can stick a pin in sideways where my fingers are as a reminder to leave those pieces alone. You will deal with them after you sew your piping around.

Use your zipper foot and sew as close to the cord as possible. *Remember to leave yourself an inch of piping from where you start sewing.* Pivot (with your needle in the fabric) around the corners of the cushion.

(I know I seriously need a manicure. Just don’t look at my hands. Please.) You’ve sewn to the back of cushion where the piping meets and needs to come together smoothly. Use a seam ripper to open up the piping on both ends.

Peal back the bias. Overlap the cord and cut it.

Tape the cord with masking tape. I have a ton of Frog Tape, so that’s what I used. Bonus it matches the fabric.

Do some folding. Fold one side under. Overlap the other piece of bias and slightly fold that under, so it looks like the picture above. Pin it and sew that final piece of piping down.

Your cushion will look like this after you’re done (except the back will be sewn). Don’t ask me how I did this twice and managed to not get a picture of the cushion at this stage.

Now it’s time to work on the bottom piece. I measured 4 inches and cut 3 strips. If you are using fabric with a large scale pattern, you should mark your fabric according to this tutorial. If you have a fabric with a floral pattern or a solid color, it doesn’t really matter since there isn’t a obvious repetition that will look weird if it doesn’t match up from the top cushion to the bottom piece.

Measure around your cushion to determine the length your strip needs to be. Add a 2″ seam allowance (1/2″ for your 4 ends). Mine needed to be 68 1/4″ finished, so my pieces needed to add up to 70 1/4″. My fabric was 56″ wide, so I cut 14 1/4″ piece from 1 of my strips. Pin the right sides together with 1/2″ seam allowance and sew. Press the steam down.

Pin the bottom piece with the right side down. Make sure your short strip is at the back of the cushion. Pin it 1/2″ from the piping. Sew it as close to the piping as possible. (This is more difficult that sewing the piping to the top piece. Be patient. Pivot around the corners.)

Clip around the corners, but don’t clip your stitch. This will make the fabric lay flat.

Flip your bottom piece down. You are ready to move your seat cushion to your chair!

Here are some great tutorials on sewing with piping: Make It Love ItDesign Sponge, and Sew4Home.

Click to read tips for the final step of reupholstering your seat cushion!

Tagged As , , , , , , ,

Seat Cushion: Piping

How-to-Make-Piping

I wanted to share the process of making the seat cushions since I felt like a had to mesh a bunch of tutorials online to make a seat cushion with piping for our dining chairs. You don’t want to read a gigantic post, so the process will be spilt up into manageable stages (you know like projects you do in real life anyway). Forewarning this particular aspect of making the piping is not shown step-by-step because there’s a tutorial for that…Making Bias Tape by Prudent Baby.

Bias is the cross grain of your fabric. You can see me measuring and marking my fabric along that 45 degree angle. As mentioned, used the Prudent Baby tutorial for Making Bias Tape. Follow her steps to the ironing your bias tape (step 2). Then stop because you aren’t going to fold and iron to make bias tape.

My bias is marked 1.5″ stripes. The typical way to determine your bias width is double the width of your cord and the width of your seam allowance. My cord was 6/32″ so double that is 12/32″ which doesn’t come out really even at 0.375″. The standard seam allowance is 1/2″ so double is 1 inch. I didn’t want to measure 1.375″ so I just rounded it up to 1.5″ to make it easier to mark.

Look closely at my bias ruler. I thought I was pretty genius marking it with bright red thread. Here’s the deal the fabric is black and the 1.5″ line is also black, so I was having a hard time seeing well enough to line up the 1.5″ line against the white line to mark my next line. I know that makes me sound like an old lady, but I don’t care. It was seriously frustrating me, so I danced when I came up with the red thread trick.

Once you do some sewing (again see the tutorial), you cut out one long strip of bias ready to use after you press it. Now you are ready to pin your cording to your bias and sew them together.

Use a zipper foot and sew as close to the cord as you can. I will admit that I can barely sew a straight line (don’t judge), but the zipper foot makes it incredibly easy. It only took me about 1.5 hours and that’s with never having made bias tape before. I was figuring it all out as I went. I used 1/2 yard of fabric which gave me a little more than 11 yards of bias. I only used 5.5 yards for the piping, so there was more than enough.

Sidenote: There is fuse piping which makes all this even easier. You will still need to cut your bias, but instead of sewing the bias to your cord you iron it. Yes it’s that easy. I did buy some of this. Even though the measurements are the same 3/16″ for the fusible to 6/32″ cord I used (which reduces to 3/16″), the 6/32 was actually thicker. It doesn’t make sense, but that’s how it is.

*Update: See how the chairs turned out here.

Tagged As , , , , , , ,

Guide to Painting Furniture

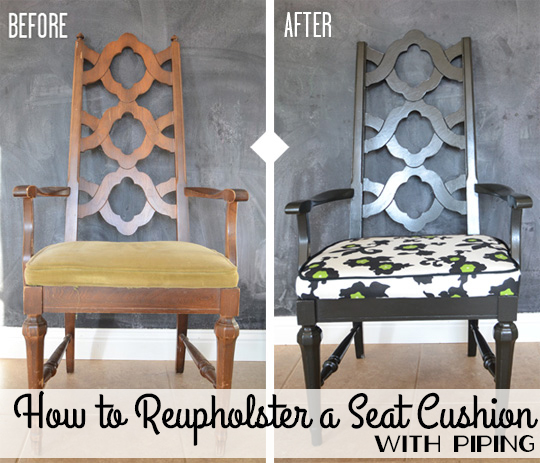
Here is the Wills Casa rendition of how to paint furniture. Nick showed you the nook update with our now black (and super awesome) $25 craigslist table. I wanted to show the whole process of the transformation as a guide to anyone thinking about tackling a furniture update via paint.

Shopping List:
Next Paint Prep (or TSP)
Elmer’s Wood Filler
Putty Knife
Klean-Strip Liquid Sander
Ryobi Corner Cat Sander with 80 grit sandpaper (optional)
Zinsser Brown Label Primer
Behr Premium Plus Ultra in Satin (I used Black Suede)
Flood Floetrol
Minwax Wipe On Poly in Satin
Minwax Fast-Drying Polyurethane in Satin
Foam Roller with high density rollers
Foam Brushes
Tack Cloth
Lint-free towels (or old tshirts as long as they are white)
Latex Gloves

1. Clean your piece of furniture.
It’s important to get your furniture as clean as possible. I wanted to make sure to get all the left over grease and grime off. (2 year old + food + table = deep cleaning required always) I cleaned it with Next Paint Prep from Lowes. It’s low VOC and low odor, so I opted for this instead of traditional TSP. Also it was a few bucks cheaper.

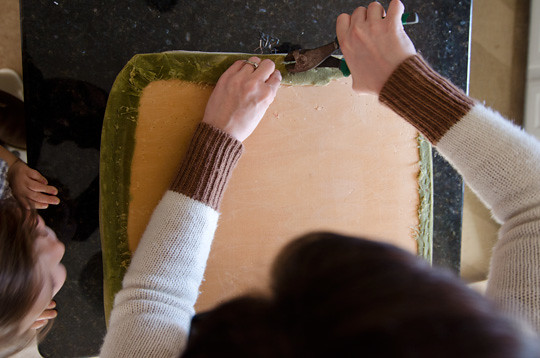
2. Fill in holes with wood filler.

Find all those dents, scrapes, and holes. Fill them with some wood filler using a putty knife. I used Elmer’s Wood Filler. Sand the filler down with 220 grit sandpaper. Wait 24 hours before applying any liquid sander or primer.

3. Sand.
You have 2 options liquid sander or hand sanding with 80 grit paper. The condition of your furniture will be the biggest factor in determining which option will work for you. If you have a piece that is in poor shape with lots of bruises, then you will want to hand sand to smooth out the wood. The Ryobi is $30 at Home Depot.

I did both. I used the liquid sander on the legs and table edges. (This is also the easiest method when dealing with curves and small areas. I liquid sanded the chairs because the pattern was too intricate to use a sander.) Use a lint-free cloth and wipe the liquid sander on your furniture. (Yes it’s that easy.) It’s dry in about 10 minutes and ready for the next step. I hand sanded the table top. I probably didn’t need too, but there were some bubbles in the veneer that I wanted to sand down. I just sanded the shine off. There is no need to sand to bare wood.

You will need to dust your furniture off before you apply primer. I used tack cloth followed by a damp lint-free cloth. Make sure to wipe down the legs too since dust knows no boundaries.

If the furniture isn’t smooth before you paint it, it will not be smooth after you paint it. No matter how many coats you put on.

4. Prime.

I used Zinsser Brown Label Primer. I applied it with a foam brush on the legs and around the table. I used a high density foam roller for the table top.  Apply a light coat. Remember that it isn’t going to look pretty. It will appear blotchy, but you aren’t painting your furniture white with it. You are simply preparing it for your color. (I put the table up on paint can, so I could paint all the way down the legs without touching the drop cloth.)

I get brownie points for applying 2 coats to the table top since it will get the most wear. Even with 2 coats, you can see it’s blotchy. Good thing about primer is it’s ready to recoat within an hour. I gave it more time than that because I basically only have 2 times to paint a day – naptime and bedtime.

5. Paint + Floetrol
I already spoke of the wonders of Floetrol when I painted the chairs. I mixed my Behr Premium Plus Ultra Black Suede with Floetrol in a plastic tub according to the directions. I applied the paint the same as the primer. Foam brush for the legs and around the table and high density roller for the table top. I was painting black on a surface I just primed with white, so I knew it would take some coats. Be patient and apply light coats. Give yourself at least 4-6 hours between coats. Before each coat check for drips (I’ll address this later) and clean the surface since garages are full of dust.

I stored my brushes in ziplock baggies. I put foil down in the pan, so I could just toss it between coats. It saved me from buying multiple pans or cleaning it out each time. That plastic tub is my paint + floetrol mixture. You can find them at Home Depot.

It took me 3 coats to get the table covered evenly. When you roll, start at the edge of your surface and roll to the other edge. It’s not like painting a wall where you make V’s. You want a consistent look without brush marks or streaks. It is the same with the foam brush. Start and the top and pull the brush down. If the paint is starting to dry, you will have brush marks if you roll over it again to get a missed spot. Wait and get it on your next coat or touchups.

6. Polyurethane.
I applied Minwax Wipe-On Poly in Satin to the legs and around the table. Rule #1 use latex gloves when applying it or you will have sticky hands forever. It’s quick you just pour some on a towel and wipe (exactly like liquid sander). I find that it works great when dealing with curves. I used Minwax Fast-Drying Polyurethane in Satin for the table top. I applied it with a foam brush. The wipe on was too streaky for the smooth table top surface.

Wait about 4 hours between poly coats. I put 3 coats on the legs and table top. Let it cure for at least 24 hours before you use it. I waited a week (remember antique rug + broken vacuum). I probably would have given it 48 hours just to be on the safe side.

Extra Credit, Dealing with Drama:

When you find a paint drip, use 220 grit sandpaper and sand against the drip. It’s dripping down, so sand up. Sometimes you get lucky and it peels right off when you sand. Sometimes it doesn’t, but don’t sand back and forth. You will wind up taking off more paint than you want.

Here’s a close up of the table because it’s just so pretty all jazzed up in black.

As with any DIY project, I am a firm believer in researching different ways people tackle their projects. Here are some resources I found the most helpful Centsational Girl, Young House Love, and Alter’d Designs (she has more information in her ebook about glazing, distressing, etc).

The nook is coming together. I know the chairs still don’t have seat…I’ll get to that this week.

Tagged As , , , , , , ,

My Wife is A Beast

And I mean that in the most flattering way possible.

Quick story: when we were in high school, Amber worked 2 jobs. She would wake up super early and work at a coffee house before school and then go to work at bookstore after school. I promise you, you’ve never seen anything like it. Her work ethic was and still is insane.

The craziest thing is she brings that same dedication to everything she does, including a blog that google analytics would have you believe no one reads (for the record, we still don’t believe you google analytics). If you’ve seen my instagram lately, you probably have seen me opine about what an amazing job she’s doing.

Last week, like you’ve seen a few times, she finished painting our nook table black.

Then she made the piping and started sewing the cushion covers for our chairs for the nook (yea, they are looking amazing too).

On top of that, she’s been knocking out a super-secret project that not even instagram know about yet (we couldn’t tell it because we’d have to kill it).

So why am I telling you all this? Mainly because I want you guys to see that she is working really hard, even if the blog hasn’t been showing it this week. She’s working on a guide to painting furniture and let me tell you, posts like that are quite an undertaking (me losing the memory card with pics from the process isn’t helping the situation too). So Please sit tight, we may not post again this week, but I promise we have some really cool stuff coming up.

Until then, here’s a photo of my two favorite people in the world on the way to Disneyland in December.


Tagged As , ,

Nook Update

So you saw that we got a new rug for the nook right? And you saw that Amber had finished painting the chairs? So the newest component was the table. Amber spent about a week and a half getting it painted black. Then we spent another week waiting to move it back in because our vacuum broke and we needed to vacuum the rug badly (it’s old, which means it was also dirty).

We wanted to take a traditional styled table and make it look more modern with black paint (similar to our west elm hutch). We got the table on craigslist (with 6 chairs) for $125. We turned around and sold the chairs for $100.  So we only had $25 in the table before painting. We used the paint supplies on 2 other projects (including the armchairs) so we don’t have an exact price, but we think it cost between $50 and $75 to paint the table. $100 bucks for a new table is not so bad right?

Mrs. WillsCasa (that’s my nickname for Amber cause we’re cute like that) is working on a post with a more detailed look at the painting process. I can’t do it because the whole process is pretty much voodoo magic to me.

Tagged As , , , ,

Jason Wu for Target Scramble

I know I’m late in posting this, but I wanted to share it. I was way too excited for Jason Wu for Target, so I convinced Jamie to go with me to knock people down buy all kinds of stylish goodness. Ramona woke me up at 4 (which isn’t typical but long story). Since I was awake, I checked to see which items had been released online since I knew Target had started releasing a few items at midnight. The dress I wanted was sold out online. I checked the store availability and found out it wasn’t at any Fort Worth stores. I was wide awake at this point and frantically trying to find the dress. I found it in Dallas. I texted Jamie immediately and told her we were changing plans so get to my house asap.

I know I look scary here, but Jamie reminded me at least I wasn’t wearing my pjs. Touche. We left at 6:45 (Jamie slept through my frantic texts) and were at Target by 7:15. Doors opened at 8, and there were about 4 people in front of us that were exchanging stories of Missoni.

Once the doors opened it got pretty crazy. We divided and conquered by just grabbing multiple sizes of anything that we thought we’d want. Here’s what I got… (Disclaimer I had been spray painting all day, so don’t judge my face and more importantly don’t look too closely at my hands. Also I look weird smiling, so just know that I’m not smiling on purpose.)

Okay so I semi-smiled there. I already have a million striped shirts/sweaters, but you can never have enough. In fact I have a black and white striped shirt from Madewell that is pretty much the same. Shirt: J. Crew, Sweater: Jason Wu for Target, Jeans: Banana Republic, Boots: Some shop in Soho

Nerd chic with my Moscot Nebbs. Loving polka dots right now too. Blouse: Jason Wu for Target (I also bought this one), Skirt & Belt: J. Crew, Shoes: Banana Republic

More stripe love and seriously comfortable. Shirt: Jason Wu for Target, Jean: Original Penguin, Shoes: Journeys

Simple, comfortable, trendy. Shirt: Jason Wu for Target, Jeans & Shoes: J. Crew (You can’t see them very well, but they are heeled oxfords. I LOVE them.)

The dress that sent us to Dallas! Yes, I did get it. Good thing because they were going for around $200 on eBay. The tulle and sequin trim is scalloped. It’s way cuter than I thought. Dress: Jason Wu for Target, Shoes: Bakers.


Tagged As , ,

Happy Handmade Valentine’s Day

This weekend I was laughing with my sister about how holidays and kids’ parties will never be simple again thanks to the internet, more specifically Pinterest. Valentine’s Day is no exception. I will say that none of the things that I did are difficult (nor are they my ideas so follow the links for the tutorials). They just require a little more time than grabbing a set of boxed valentines.

I used this to make these treats for the kids in Ramona’s class. I bought regular wedding bubbles at the Dollar Tree and put conversation heart stickers from Target to jazz them up a bit. Rachel put the printable on her site, but Nick added “love, Ramona” in photoshop.

I made some Vanilla Brown Sugar Body Scrub for Ramona’s teachers. Nick made the cute labels in illustrator “compliments of Ramona” in the same style as the kisses bags.

I sewed some cardstock to make cards for Ramona’s teachers. I just used fabric scraps to make the hearts. And there you have it all our handmade goodness of Valentines.

Of course our Valentines wasn’t completely handmade. We did buy Ramona a Fisher Price Record Player. We didn’t think we could handmake that, so we sprung for the store bought one. Hope you have a wonderful Valentine’s Day!

Tagged As , ,

Rug for the Nook

Last month we did 2 posts on the current status of the kitchen. The second post focused specifically on the  status of the nook. If you look at the punch list, it mentions getting a new rug.

We loved the way the West Elm diamond jute rug looked, but it wasn’t super functional with the eiffel bases on the eames chairs.

You see the feet of the chairs constantly got stuck in the weave of the rug. It was a constant battle trying to get your chair unstuck. So while we weren’t pursuing a new rug specifically, its been in the back of our minds that we needed to get another.

So last week while Ramona was at Mother’s Day Out, Amber and I headed out for a day of antiquing. We hit some stores and made a few scores (more on that later). After we had lunch, we decided to go to Simple Things since we were in the area.

We hadn’t been to the new location yet, so we didn’t know what to expect. The lady at the front said that they didn’t have a showroom like at their previous location, but that we were welcome to look around their warehouse.

So we rummaged around. It was pretty cool (sorry I didn’t take a pic of the set up). We found quite a few things we liked, but nothing we really needed. Then we saw a bin full of antique flat woven rugs.

This one caught our eye. So we asked the price (some stuff was marked, some wasn’t). It was $99. They said we could take it home on loan to see if it worked. So we did. And we liked it.

The size is a little longer than necessary, but the perfect width (the west elm rug was a bit too short). The rule of thumb for a rug in a dining area is that when the chairs are pulled out, all four legs should still be on the rug. This one fits the bill.

It’s a bit of a “design risk,” but we think it will look pretty awesome with the table painted black and the chairs. We can’t wait to show you guys!

Tagged As , , , ,

Chair Pad Situation

The fabric for the nook arm chairs showed up last week and it was time to get some new pads made. I didn’t think the old ones being replaced was a necessity, but we figured that we should go ahead since we are already replacing the fabric.

Amber started out by pulling the staples off, the bottom of the chair. There’s Ramona trying to help. Then we realized it was 11:15 and the upholstery supply store that Jamie had recommended closed at noon. So, we left, with the fabric and pad still attached to the seat (In the end it didn’t seem to matter).

The place we went to get the new seat pads is called Keeton Supply Co. It’s upholstery supply shop near downtown fort worth. It sells pretty much everything you would ever need for an upholstery project.

I know the pictures aren’t too exciting, but I promise, to a crafty woman this place is exhilarating. While we were there Amber was getting all twitchy, I could tell that her inner craftiness was about to explode. She kept asking “Do we need ANYTHING else?” Which means: let’s think of stuff we want to do/spend money on.

In the end, we just got 2 seat pads, some batting and the 6/32″ piping for the chairs. (Side note: I kinda want one of those foam cutters that they use to cut the pads. Yes, I realize I have absolutely no use for one.) We got out of there for around $40.

The chair project is entering the completion phase. Let’s see if we can bring this baby home.

Tagged As , , ,

Overthink, Rethink, Decide

I have a process that requires way too much time to pull the trigger on most home improvement decisions. It’s overthink, decide, rethink, decide…and even then I skip that last step for months. Maybe the reason I like antiquing so much is because I decide quick. Well I decide if I want to buy something or not. It’s just the restoration/placement of the antique I just purchased that sits for months (sometimes years) before I actually decide what to do with it. (Nick refers to this pile of antiques as the queue.)

So I’m restoring some chairs for the nook. I bought fabric. When it came in, I really, really liked it. Then I rethought about the scale and how much white space there is between the black flowers and how little green there is. I kept over thinking…dare I say even looked for different fabric. Which for the record, I knew was pointless because I exhausted all my options the first time. Nick suggested using the fabric from the drapes in the office since he knows how much I love that fabric. (Plus that room won’t be the office for much longer, so those drapes have to relocate/be repurposed.)

I covered the seat cushions in both fabrics to get a feel for the final outcome before I made any type of commitment. I had to put them on the Eames because the other chairs were getting some polyurethane. I figured I didn’t want to risk ruining either fabric just for the sake of avoiding a decision. (Remember the fabric on the left is is original plan and on the right is the office drapes.) Imagine them against black chairs instead of white.

At this point I realized how much I was avoiding making a decision. The drapes are clearly too large scale for the chair pattern. Yes they have more color because of that, but the flowers are just too large for such a small seat cushion. What is wrong with me? I really like the Serena & Lily fabric which was the original plan anyway. Someone just tell me to make some seat cushions already.

*Update: See how the chairs turned out here.

Tagged As , , , ,