Happy 29th (!!!!) birthday Nick Wills! We are celebrating in our favorite city (besides DFW) Nashville. Hence why it’s been super quiet around here. Let’s hear it for vacations and food!! Actually we are just lamenting not moving here last year when we were homeless. Good food and Southern charm breeds regret apparently.
Rebuilding Wills Casa Uno
The post fire process was painful emotionally and just an all around pain in the rear dealing with paperwork, insurance claims, and rebuilding. We had Allstate for our home owners insurance. Initially they said the back room just needed to be “cleaned and sealed” by a specialist. I was livid about that. The responsibility of an insurance company is to restore the property to the condition it was before the catastrophe whether it be fire, flood, or vandalism.
The Demise of Wills Casa Uno
When I decided to share our first house with y’all, I felt like we really needed to because it has shaped so much of who we are. It’s been almost 9 years, but writing (actually just thinking through writing) this post has been really emotional.
We bought the house in March 2005. October 2005 we had a house fire.
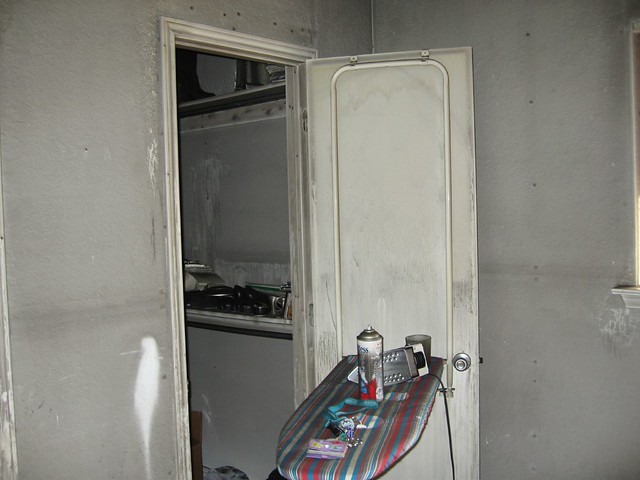
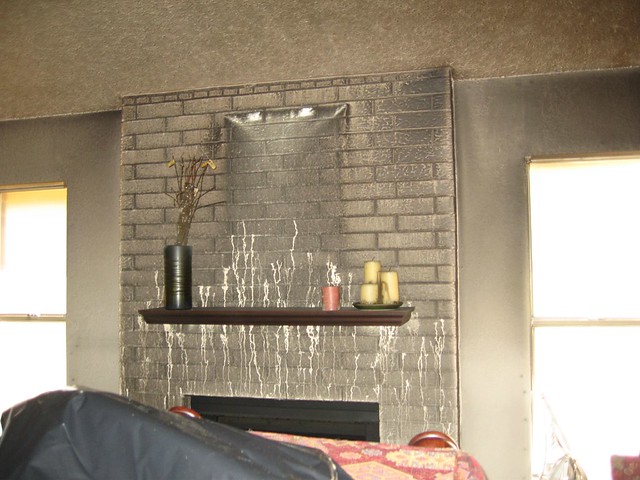
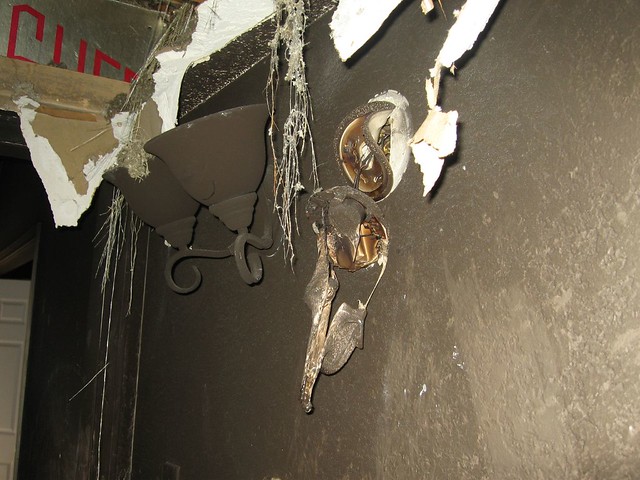
Our alarm clock malfunctioned and created a smoldering fire. There was not a lot of open flame, so it was mostly smoke damage. The house had zero visibility when the firefighters entered.
I was at work. Nick had class in the morning, went home to have lunch and let the dog out, then headed to work. Over the next couple of hours the house was destroyed. Our neighbor didn’t have a number for us, so he called the previous owners who called their real estate agent who called our real estate agent aka my mom.
When I found out I scream Isabella – our dog – and ahead home. I called 911 to let the firefighters know there was a dog in the front bedroom. At this point we had no idea what had happen or the extent of the damage was (I mean Nick had just been home how bad could it be?). Nick got to the house before I did. When I asked about Isabella, he just cried.
This is in the hallway to our bedroom. The closer you got to the bedroom the blacker things were. Since the house was not very big, everything was ruined from the smoke.
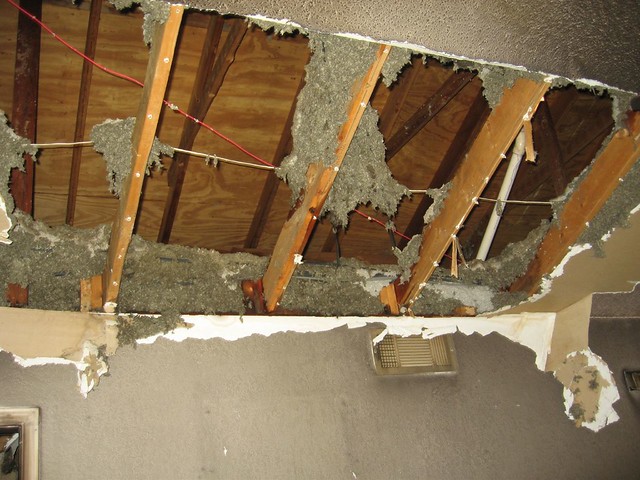
When the firefighters entered, they sprayed different areas of the house. The ceiling in the living room fell from the weight of the water. There was lots of wall damage from them checking for hot spots. All of our furniture was pushed in the middle of the room.
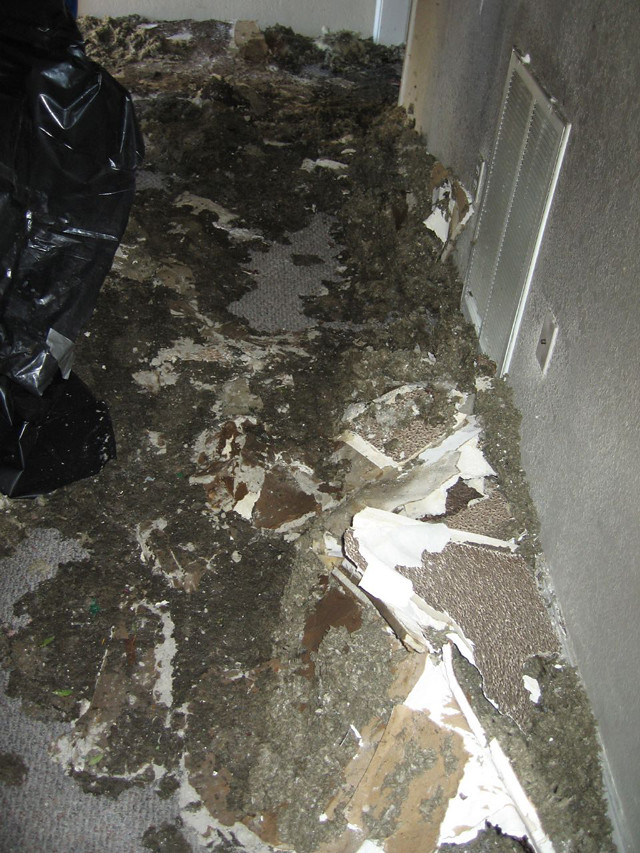
That’s the ceiling on the living room floor. There was a mess of drywall, insulation, and ash everywhere. Plus it was wet and mushy.
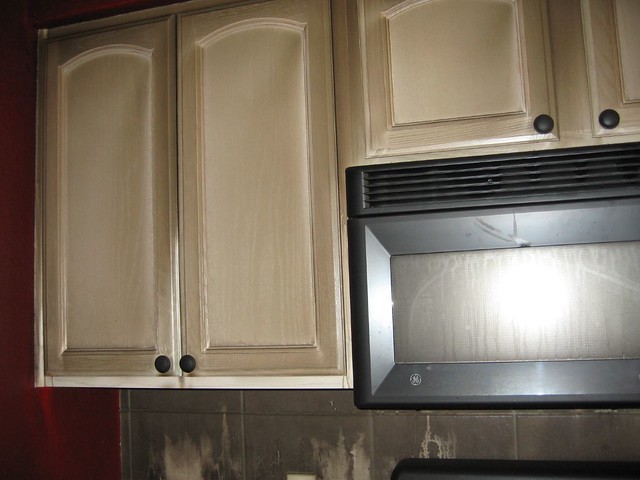
The cabinets actually looked better with the ash. Notice that we had painted the kitchen red to offset the flesh cabinets. It was an improvement, but I will never paint red again. So many coats. We had also installed a microwave/vent hood to save countertop space. All of the minor changes/updates we had made in the 8 months of living there were ruined.
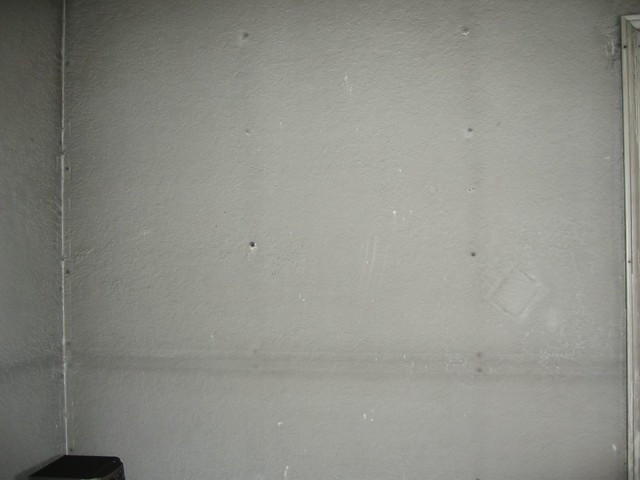
You could see where every nail in the drywall was. They said it was from the heat. You could also see every imperfection in the wall where there had been patches.
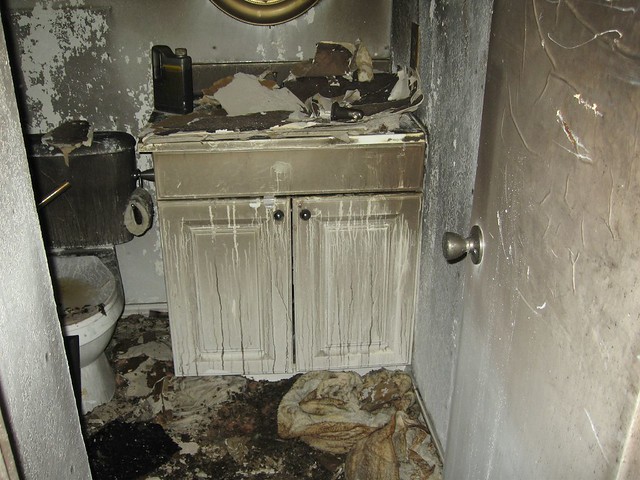
This was the bathroom on the other side of the house. Everything was covered black and wet. You could smell smoke as soon as you turned on our street. We literally had nothing but the clothes we had on. We went to Target and bought some essentials. Then checked into a hotel. Once we laid down the magnitude of the day just settled on us. Then came more and more tears just when we thought we didn’t have any left. We had buried our dog and lost everything we had in a few hours.
I can’t even begin to describe the weight of those emotions. It has changed us in ways we probably won’t ever realize. It might be why Nick and I cling to each other as viciously as we do. We had nothing but each other and were about to begin our first huge remodel with heavy hearts.
The First Wills Casa…Wills Casa Uno
I should prep you that this post is full of terrible photos, but the story of our first house has such a huge impact on us that I have to share it. It was 2005. I was 20, and Nick was 19 (almost 20) when we bought our first place. We tried to buy a house before we got married, but there weren’t many options on our tiny budget. We were in college full time and worked part time. (Read: We were poor yet still oddly interested in owning real estate.)
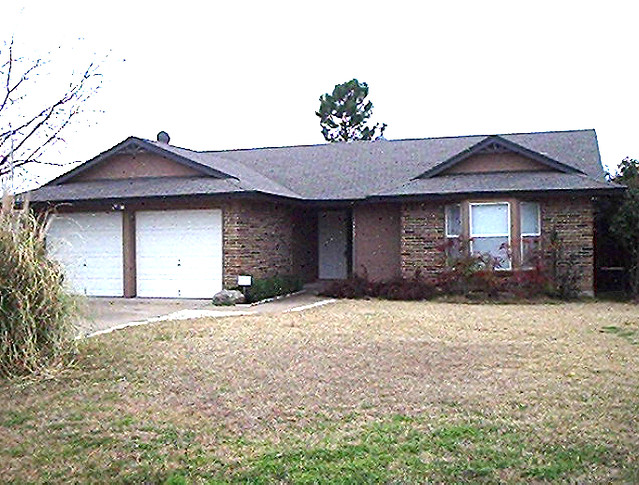
We had a short apartment lease and a mere 10 months after we tied the knot this gem popped up on the market right when our home search resumed. (This photo is from our inspection report. Yes I have the inspection report for the house we bought in 2005 but no good photos of my house.) We looked at tons of terrible houses. This one was on the market for a day when we looked at it.
Specs: 2 bedrooms, 2 bathrooms, 994 square feet, split bedrooms, huge back yard
Hilarious aside when we walked around we were oohing and awing then said, “Where’s the 3rd bedroom?” We wrote an offer that day. There were multiple offers since it was completely refinished inside and priced much lower than market value for a quick sell. Spoiler alert they took ours because they liked that we were a young couple not an investor looking for a rental property. It was one of those meant to be things.
Even though everything was new in the house – paint, cabinets, flooring – all new but definitely not our style. There was lots of peachy brown. Early 2000s neutral happening all over that 994 square feet.
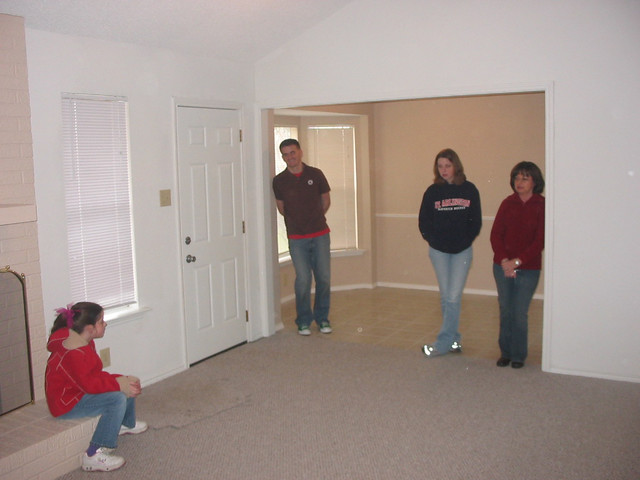
That’s my little sister (who is now 19!!!), our friend Chase (the talent behind this – scroll down to mine), me (representing UT Arlington), and my mom/realtor.
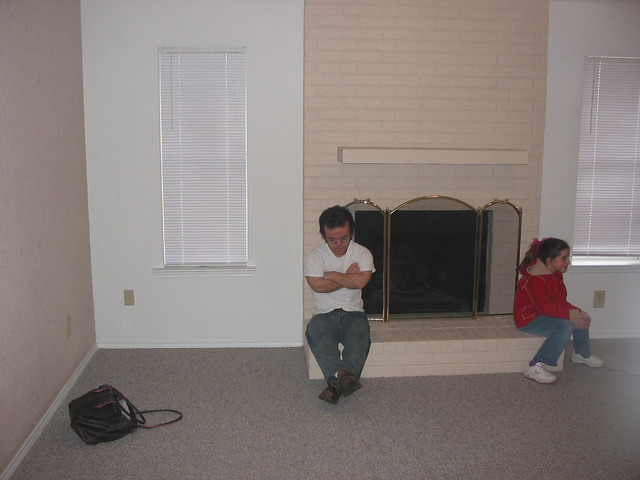
Here’s the other side of the living room just to give you some idea of how small it is. Use my sister for scale. The fireplace is straight up peach. I think this is a classic example of when you pick a paint color with a swatch without sampling it especially when you are going for earthy neutral via a brown tone.
You might be wondering why the house was completely redone and then priced so low. Well word on the street is the seller’s son lived in the house but was having some personal problems that led to some disagreements in the family. Then the house was vandalized. I don’t know how true any of that is, but the fact is everything was replaced and the seller wanted out.
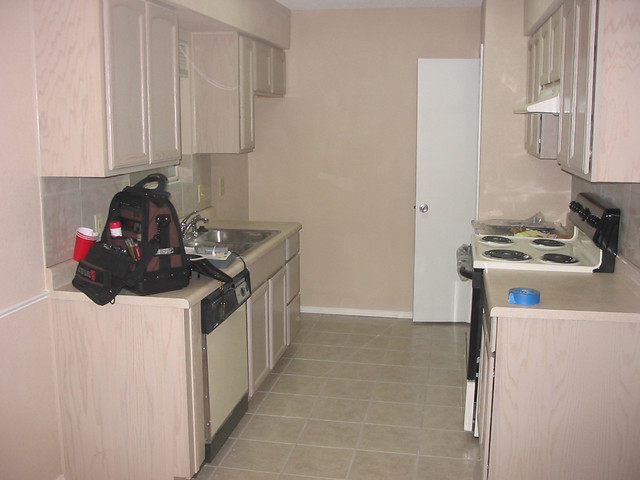
The kitchen cabinets were a strange sort of dead flesh tone that was equal parts terrifying and repulsive. The wall color wasn’t helping that out any. The appliances were bisque but new, so that was a plus. There was a small window over the sink.
Our monthly payment was like $600 which was less than we could have rented a one bedroom apartment even an on campus apartment. It might seem crazy to buy a house on 2 part time incomes while in college, but it was the best decision we ever made.
This (and the first picture) were taken at my sister’s wedding in Mexico about 2 weeks before the real start to the story behind our first house…
Gender Neutral Baby Shower
Let’s have a little throw back Thursday action to that time when I was 8 months pregnant and didn’t find out what I was having basically forcing my gracious friends into throwing a gender neutral baby shower. To top it off I wanted a central location since I have friends all over the metroplex (Dallas/Ft Worth is huge y’all).
NBD.
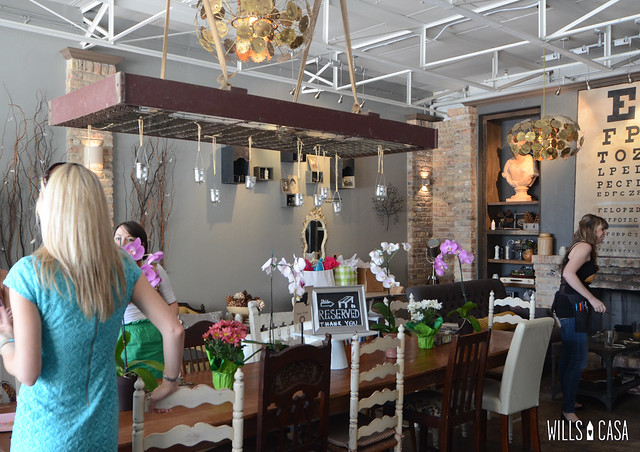
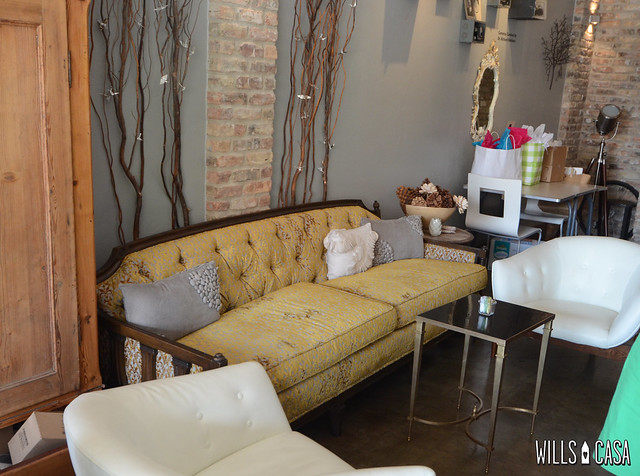
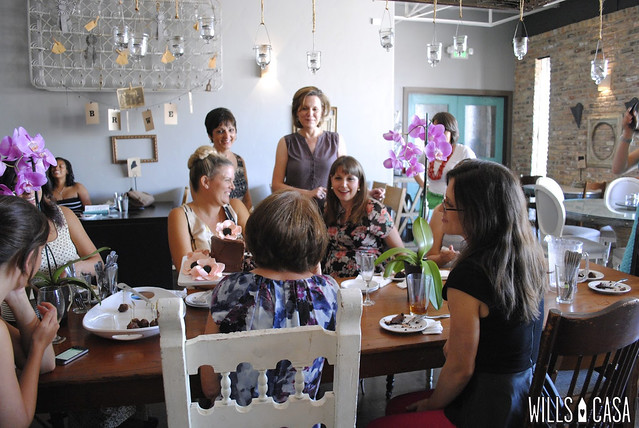
Enter Brewed in Fort Worth. Nick and I have had a few working lunches here and really enjoy the space. There are lots of little sitting areas like this around, so it’s pretty much the perfect place for a baby shower.
See there’s my pregnant self chatting it up with guests. Heavy h’orderves on the table (that has whimsical mismatched chairs). I was actually burning up because we had just bought our lighting since we were just killing time at Old Home Supply up the street before the party. It was August. In Texas. They have no AC (Old Home Supply not Brewed). Sorry shower guests.
Check out the gold fixtures here though. Amazing.
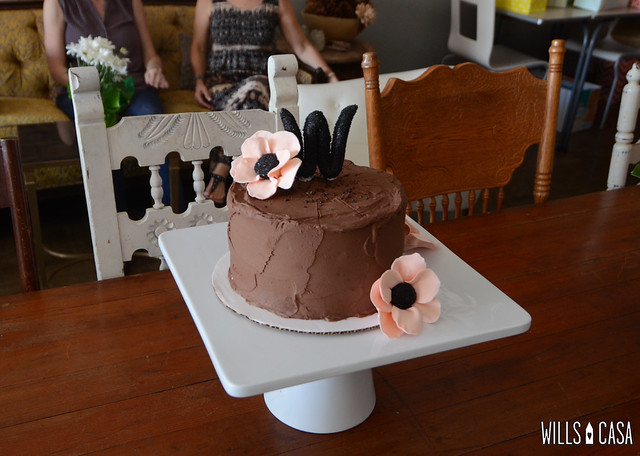
There was a bit of a cake debacle. I guess it didn’t transport well and got smashed on the ride to Brewed. They had this chocolate cake hanging around and just salvaged the original decorations. Honestly I’m not a chocolate cake fan (team vanilla all the way), but this was incredibly good.
It was so nice to be able to open gifts from the comfort of a couch. I mean I was so huge. Of course opening cute presents like a Rangers hat and tiny newborn things is pretty awesome from anywhere.
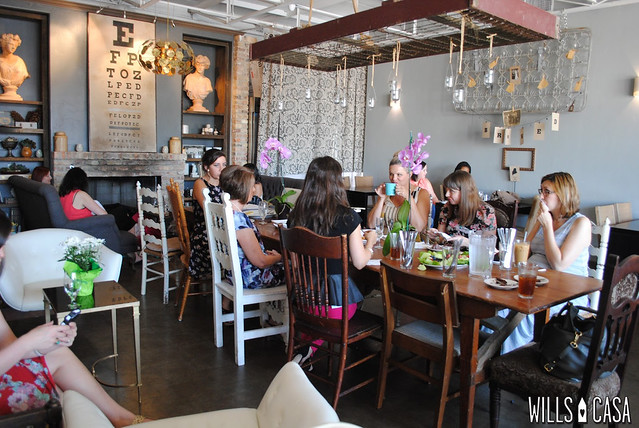
Afterward we got to just sit around and talk which is an insane luxury at showers. It was such a sweet time with friends. Soaking up all the girl chatter. Making speculations about what I was having – everyone but 2 people said boy, so apparently I’m friends with a bunch of psychics who knew.
What I wouldn’t give to know what was being said here. Something hilarious for sure.
My sister, mom and I posing for my last baby shower. Ha! I’m so glad to finally blog about this. If I don’t have it posted, then eventually the pictures disappear or get lost on my computer somewhere.
On that note one of my memory cards bit the dust. I no longer have access to an entire memory card full of photos. If anyone knows how to solve that issue, let me know!
Modern Bathroom for Guests and Such
We are moving this bathroom party upstairs for a sneak peek into our modern bathroom for guests and such. We were in a complete rush to make all the decisions upstairs. We didn’t go into panic mode or anything. The decision making process for the upstairs on our end was pretty painless.
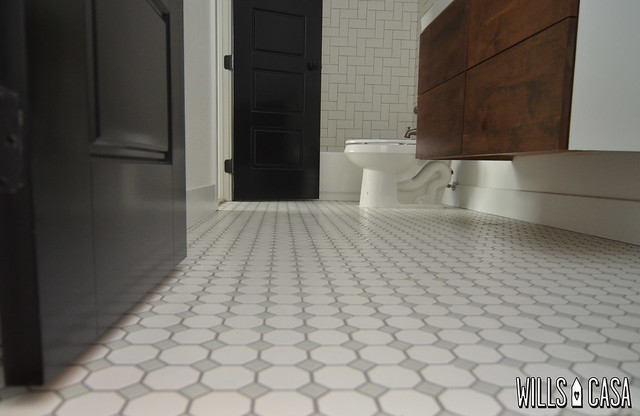
We loved the tile choices for the kids bathroom. Plus we had some left over, so it seemed like the smartest (most budget friendly) move. We needed more tile but still an overall savings. The thing was we wanted this space to be unique since it will function mainly as the guest bathroom although anyone upstairs (the kids in their playroom and I in my office) will use it as well. We had to figure out how we could create a bathroom using the same materials but still be different from the downstairs one.
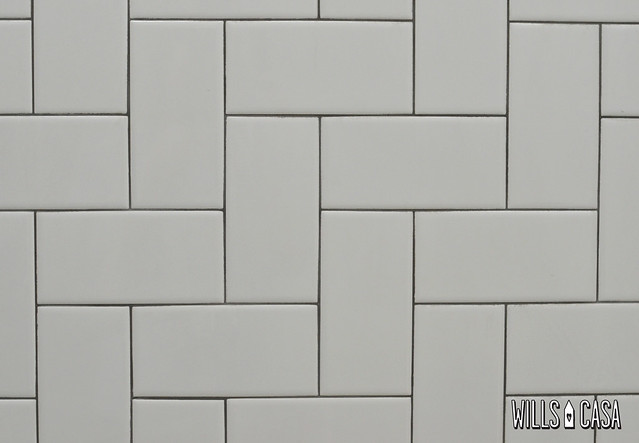
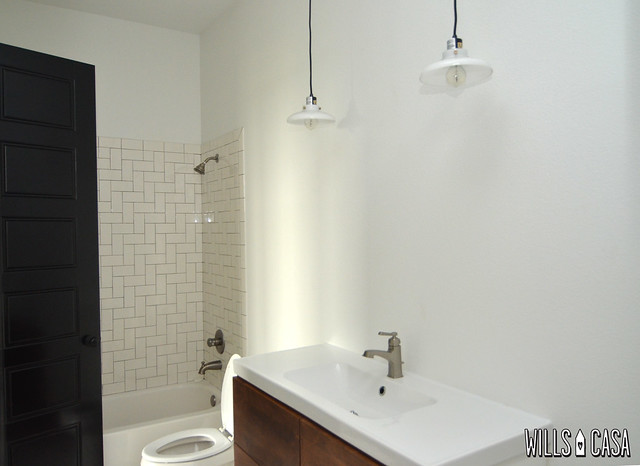
We decided to have them install the shower subway tile in a herringbone pattern. I got the idea after seeing Jordan Ferney‘s picture on instagram. Shocker I got inspiration from a restaurant (master shower floors were from a coffee shop, so totally fitting).
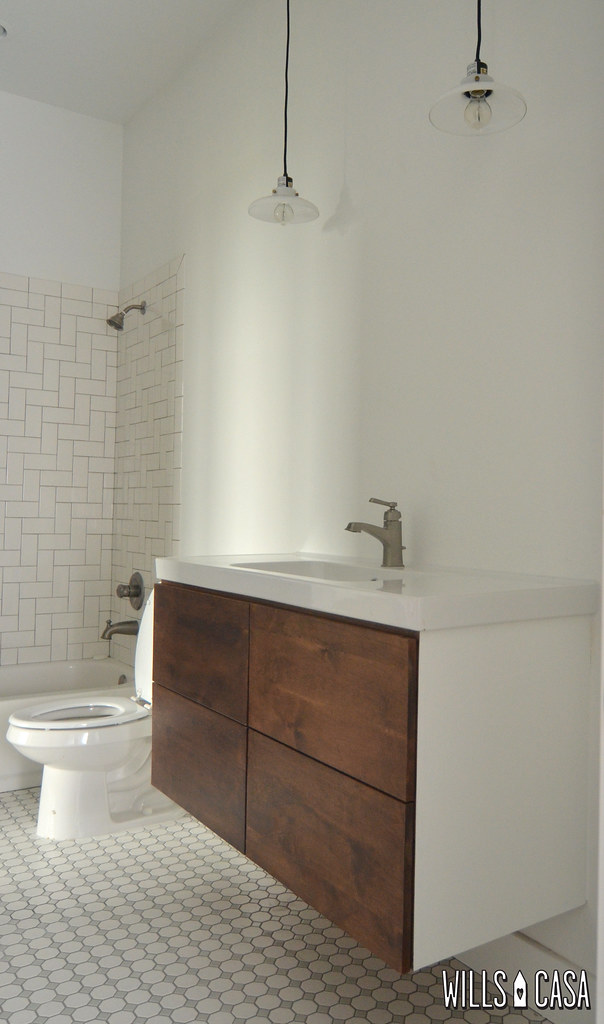
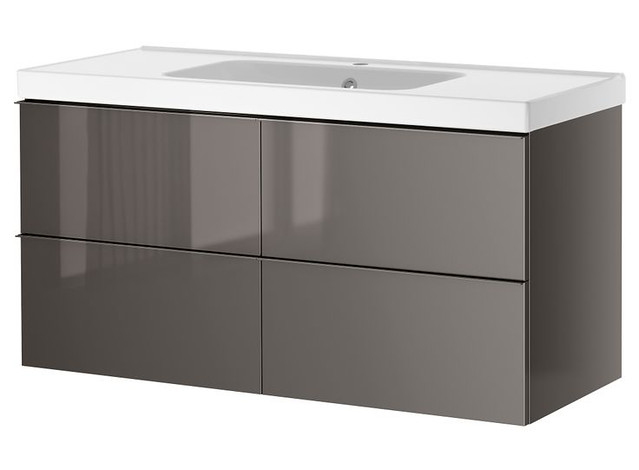
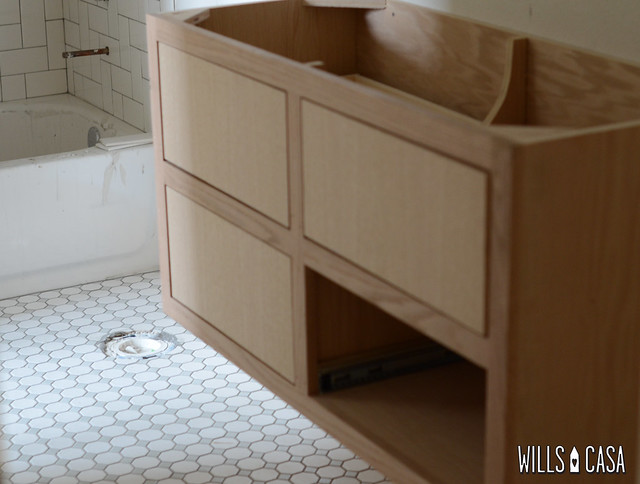
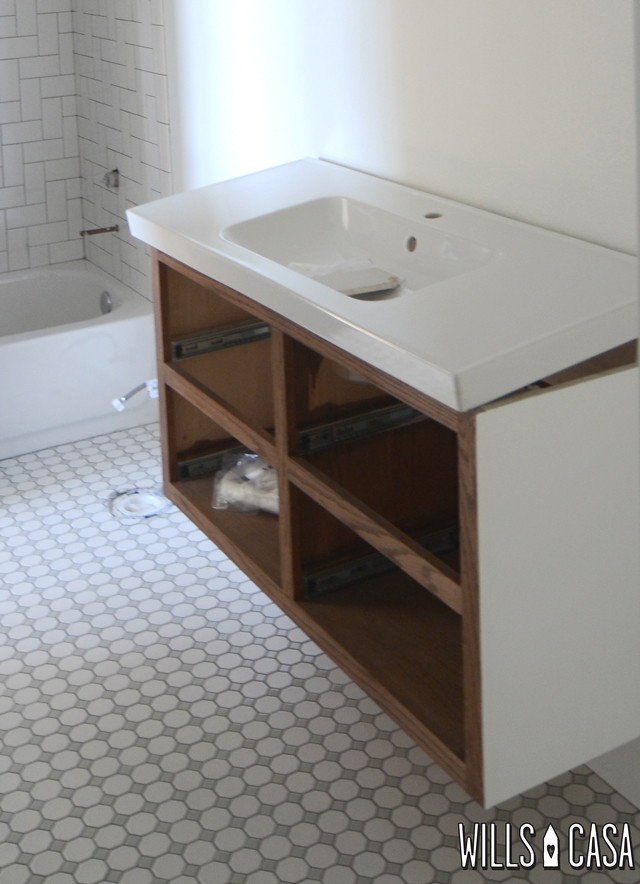
Initially we thought we’d pick up a GODMORGON IKEA cabinet. Gray seemed like the best choice since there is so much white in there already. I love the modern look, and a floating vanity would be a perfect step away from all the other bathrooms in the house. When we started comparing prices between IKEA and what our cabinet guy could make, it was tens of dollars. Yep $10’s. It was a no brainer.
Except that it was a struggle for them to get it right. Face palm. I sent a very detailed email with pictures included (pro tips here). I wanted the cabinet exactly like the GODMORGON except all real wood with a painted shell and Alder wood drawers (yes I specified the wood I wanted for the drawers in the email).
First attempt the drawers are not full overlay like the IKEA version. Also the drawers were oak. (Fun fact 2nd attempt included oak drawers again!)
We did buy an ODENSVIK sink because $140 for a sink + not having to deal with the countertop people again was so worth it. We had it onsite before they built the cabinet AND we had the dimensions to the cabinet maker before he began. Amazingly that happened, so try again guys.
There were more fixes that had to be made to the drawers. They were too deep for the plumbing, etc. Fourth time is the charm apparently.
The ODENSVIK sink was a great call. A huge money saver, and it looks so good. We picked up the pendants from west elm. In person they are more of a milky transparent white than the picture. They are really beautiful.
The faucet is from Lowes. It’s the only bathroom that has nickel fixtures, but it works with the style of this bathroom.
You may or may not have noticed we don’t have a mirror up here. We are still deciding exactly what we want to do. We might DIY something or buy something. Who knows. We like to keep ourselves guessing.
This is the view of the bathroom from the eyes of Beckett. I’m loving everything that’s happening in here. I’m not sure if I want to get a new shower curtain or use the Kate Spade one from the last place.
Guest bathroom is ready! Actually this is where we shower since the whole master shower isn’t functioning. A huge thank you to Nicole for putting the master bathroom on her honor roll.
Full disclosure you might think I’m annoyed by all the kinks and hiccups we had during the build and now, but it’s one of those things you just have to laugh at. In the grand scheme of things, it’s no big deal. It’s just what happens you have a specific idea of how things should be, and you don’t compromise that vision.
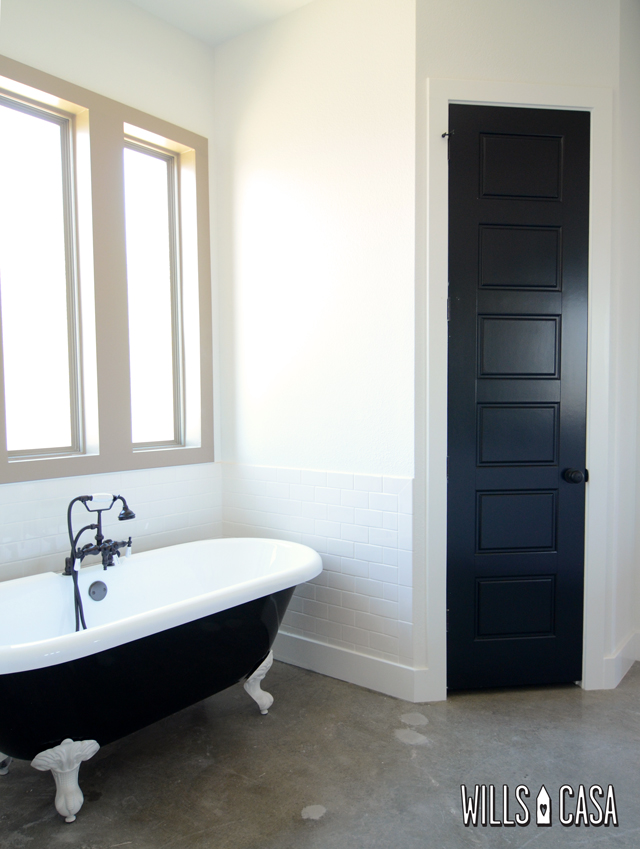
Completed (ish) Master Bathroom
I know you’ve all been wanting to see the master bathroom and how the countertops look with everything in there. Oh the suspense. Nick shot this from the closet doorway which seems like a fitting shot to follow up the closet post.
The tile company is actually coming out to rip out the baseboards around the clawfoot tub and take the subway tile down to the floor. Some water got on the baseboards pre move in, and they swelled up. We figure we might as well fix it with tile since that would be a constant issue otherwise. (I like to splash in the bath.)
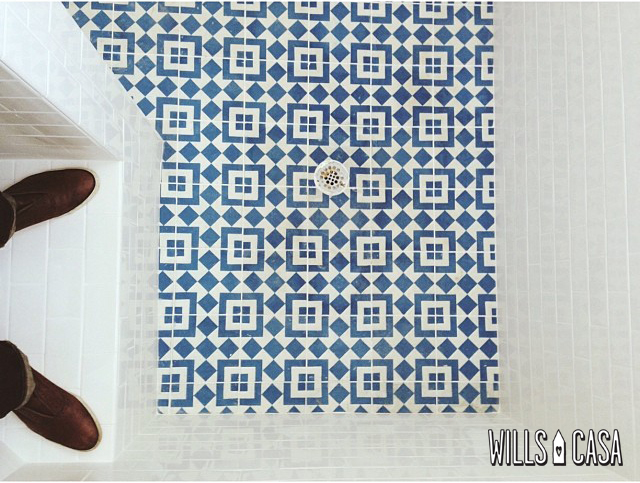
Obviously our shower floor is what we love most in here with the Granada Tile. We still haven’t used the shower which is another longer (more painful) post for a different time. Happy thoughts. Happy thoughts.
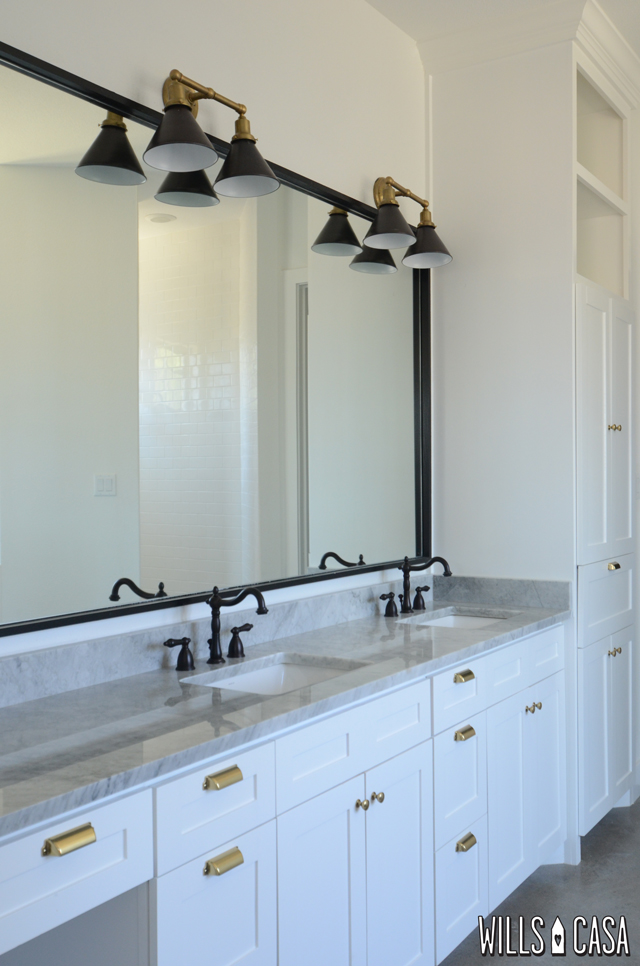
It’s so hard to get a straight shot in the bathroom, but I wanted to give you an overview of the vanity set up. Same hardware as the kitchen and closet.
Our lights are from Schoolhouse Electric. The plan for the master bath has always been black and brass. Bathroom lighting was so difficult. We had a huge mirror and wanted something appropriate for scale, and it had to look awesome too (obviously). Schoolhouse was perfect because we could customize the fixture with so many shade options. We went the classic route with the black shade.
Fun fact we still need 2 light fixtures in here – one for my sitting area and another for the bathtub. Already have plans and can’t wait for the chaos to settle a little to execute them! Read: Nick get on that dude!
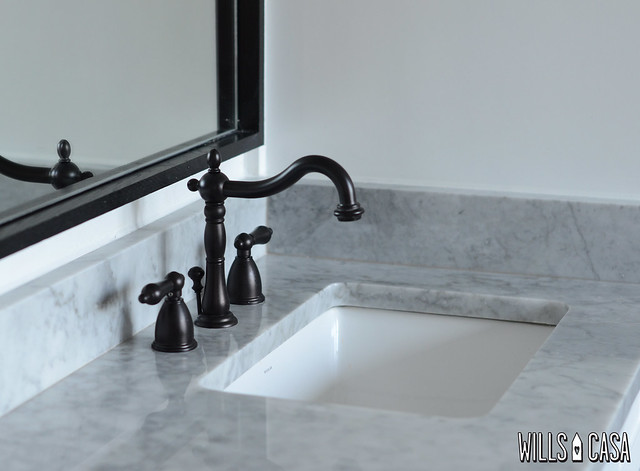
The faucets with the deep rectangular sinks make me feel like a princess. Yes princess. I just love everything that’s happening on the countertop. (Can you even believe I typed that after this dramatic post?)
Can we just talk about how pretty this marble is? I know it wasn’t what I wanted, but there is some serious gorgeous marbling going on here. It goes with the concrete floors much better than I anticipated now that we are actually in there (clothes on the floor and all…kidding). We don’t even have a rug yet, so it can only get better!
We had them frame out a mirror just like they did in the kids bathroom. We got oak 1×2’s and painted them the same black as the doors. I did have them install them with the 2″ sticking out to create a little ledge. I like the skinny framed look.
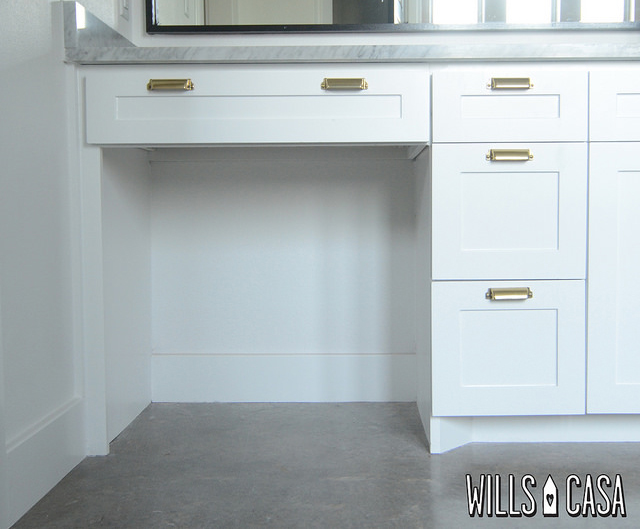
My vanity area is a strange height. I’m curious to see if a bar stool will work with the drawer. Might need to DIY something for this. I do like having a space to sit and get ready. Not that I’ve done that much in the midst of unpacking. (It’s been a depressing state of pjs, no makeup, dirty hair for longer than I should admit to publicly.)
So there’s the master bathroom in all it’s undecorated glory! I will keep you posted on the shower, but just know we are still bathing over here even if it’s rarely.
A huge thank you to Nicole for showing the bathroom some love on her honor roll. If you want to show us some love, follow us on bloglovin‘, Facebook, twitter, instagram, all of the above we aren’t picky!
Designing the Master Closet
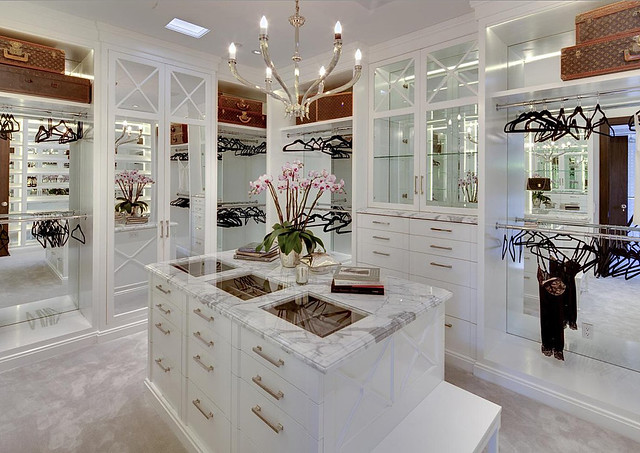
via – Go look at the rest of this house. The kitchen has tile like my painted floor.
When we first started talking about the design of our master closet, I envisioned a grandiose space that was luxurious, organized, and obviously gorgeous. Nick didn’t want to share a closet initially, but I convinced him that if we shared we would have more space. Not sure if that was entirely true, but at the time it seemed so.
Once I got a little more realistic with the actual space we were working with, the design aspect was a little more difficult. I knew I wanted space for shoes and some shelves especially a place for a carry on bag (let’s hear it for spontaneous trips).
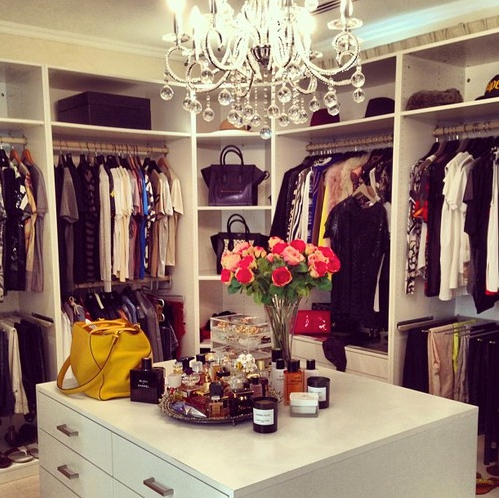
We were already having the cabinet guy build us 2 dresser units. When they got onsite, they were much larger than anticipated which made the closet design harder. They only made sense if you put them together. Then they were so large they wouldn’t fit on the most logical wall where they could just stand alone there instead of take up hanging space.
I found the above inspiration image and thought that corner shelving thing has some real potential. We could use that to really make the closet look custom around the large dresser units. I relayed the pic and the message to the guys…
First the shoe storage is crazy wonky. I don’t know who thought it would be a smart move to use a hanging rod as storage support. (They tried that in the pantry as well…fail.)
Most importantly the corner units which we went with on both corners of this wall were so bulky. It was going to be difficult to use the space especially with the dressers pushed against the corner units. There was such an overhang from the dressers that using the corner unit would have been awkward. On the redesign I said, “I just can’t style these.” Cody looked at me like WTF is this chick talking about then responded with, “What?” Thanks for leaving out the TF in that Cody, but your face said it all.

Apparently when this story was relayed to the builder, Cody announced, “It’s like building a house for Woody Allen and Diane Keaton.” It was our turn to WTF.
Obviously I found out he said that (I find everything out), I politely let him know it’s 2013 (it was then), so we prefer the comparison to Brad and Angelina. Brangelina think it’s hilarious too just look at them. Actually now that I’m seeing this, Cody was probably right about Allen and Keaton looks wise. Touché.
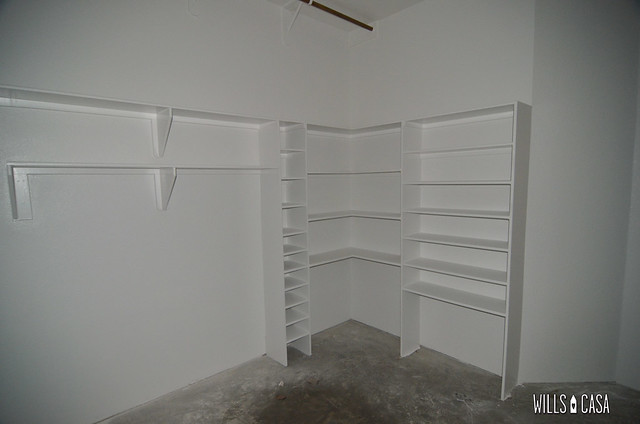
We had them rebuilt the shelving. First we scraped the entire corner unit on the other side. We added Nick’s shoe storage to give ourselves some space with the dresser built ins. Accessing the corner unit is more natural now. The corner shelves were cut with angles instead of being triangular-ish.
We stopped my shoe storage at the curve in the wall which was the plan initially. It just wasn’t listened to in the beginning. We also raised the bottom shelf up to accommodate my boots. Again that was always the purpose, but it wasn’t done correctly.
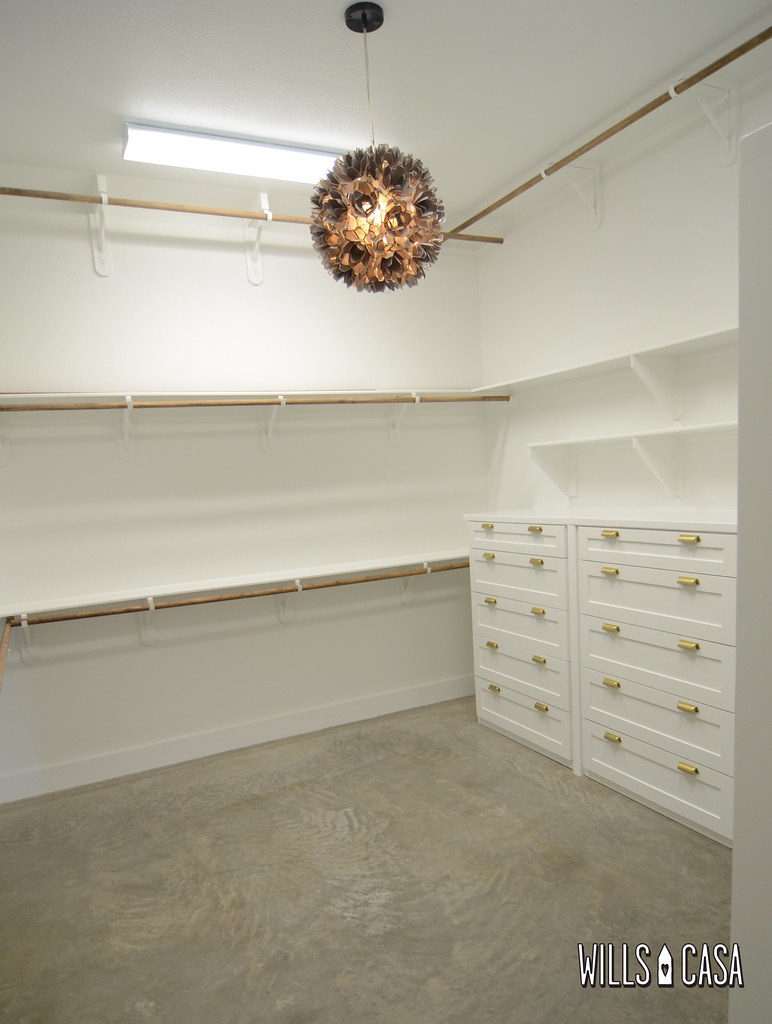
The dresser units were installed. We put the same hardware as the kitchen. There is additional hanging space across from this. The plan is I get the left hanging space, Nick gets the center. We share the remaining corner unit. However Nick is preparing himself for total Amber takeover eventually.
It was such an interesting process. We were definitely in over our heads with closet design. There’s a reason why people have successful companies designing and creating custom cabinets for closets. It ain’t easy. We decided this is a great solution for now. We need to live in this space to figure out what works and what doesn’t. We can change this out if it doesn’t work.
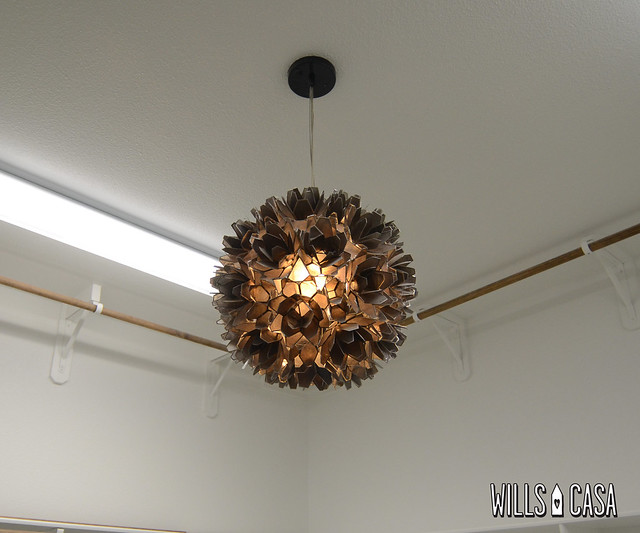
We did hang our capiz shell pendent from the last house in there. We have fluorescents too. Otherwise there’d be no light! I think this light will travel to whatever house we go to next (don’t want to think about that, don’t want to think about that). We bought it for Ramona’s nursery, so it’s got such great sentimental value even if we never used it in her room!
I would show you the current state of things, but who wants to see a clothes/accessory explosion. Not I. Nothing is styled. Also I refuse to stage my clothes.
Because Everyone Needs a Good Before and After
If you follow us on Instagram, you know we are in the house!!! We started moving our stuff in Friday and officially closed on Monday. Y’all we are tired and all kinds of grumpy right now (and extremely stinky).
Ramona woke up at 6:30. Nick got up with her while I stayed in bed with Beckett for a while longer (until Nick came in and said get up Ramona will be late for school…keeping in real/documenting these first moments – also I don’t really care he’s a saint for letting me sleep in). Nick snapped this picture right after Beckett woke up which is nearly simultaneous to when Ramona realizes he’s up.
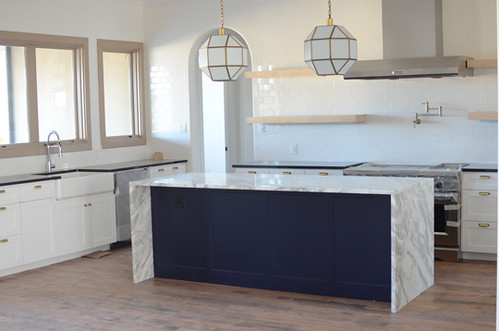
I wanted to show you all the *ahem* progress we’ve made so for. Above is the kitchen before.
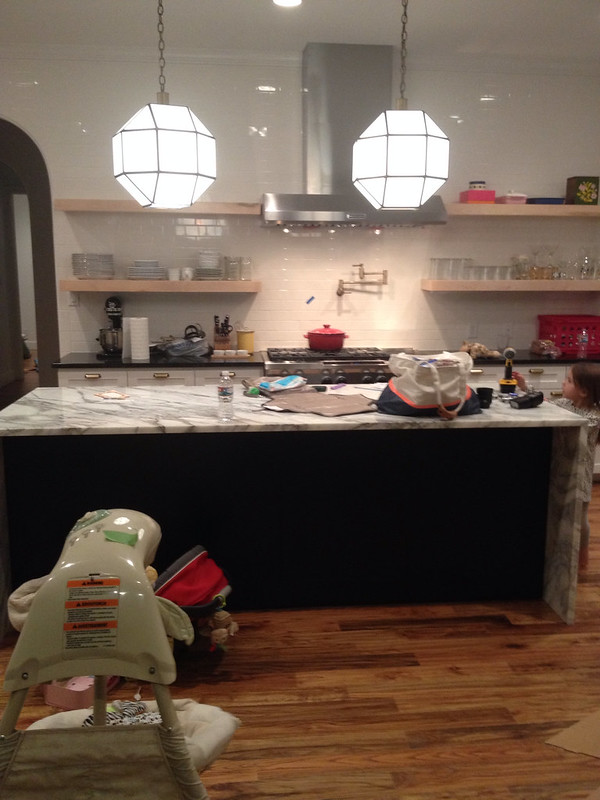
The kitchen after…haha let me just tell you what our strategy at this point is: throw whatever you find in the correct room and break down the box. No method, just throw it. Pay no attention to the “styling” here.
Formal dining room pre move. All. The. Sexiness.
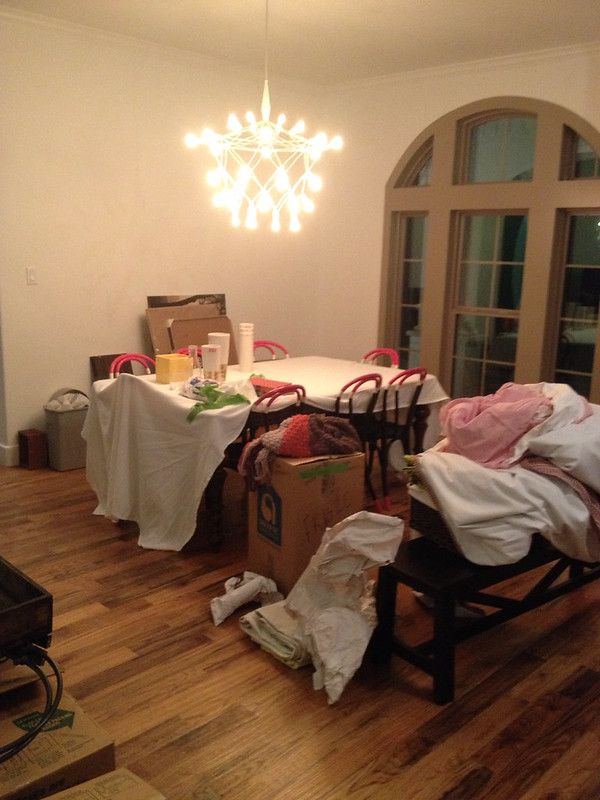
And boom what a lovely after. Okay yeah so I’m starting to think that this is the only blog post in history that is showcasing worse after pictures.
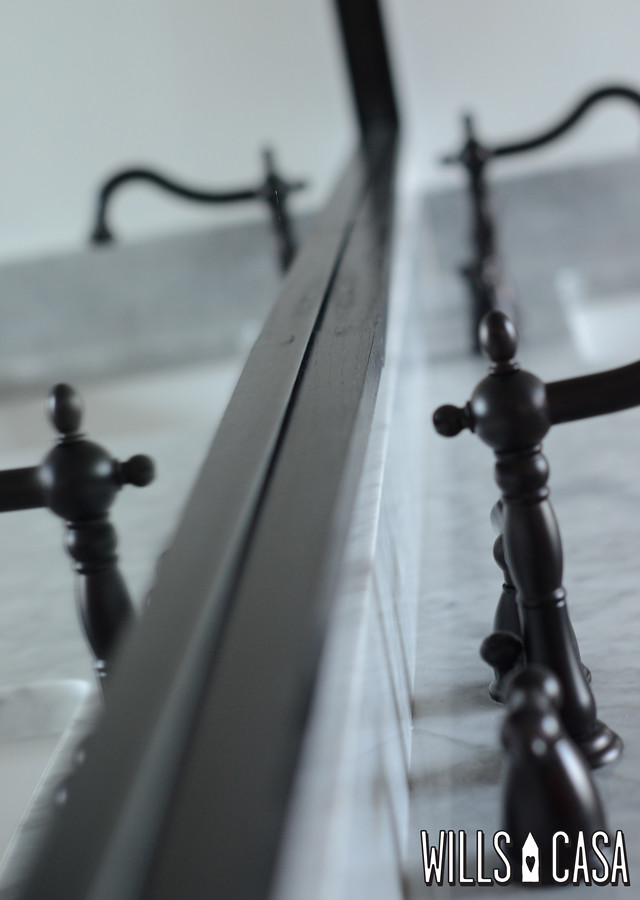
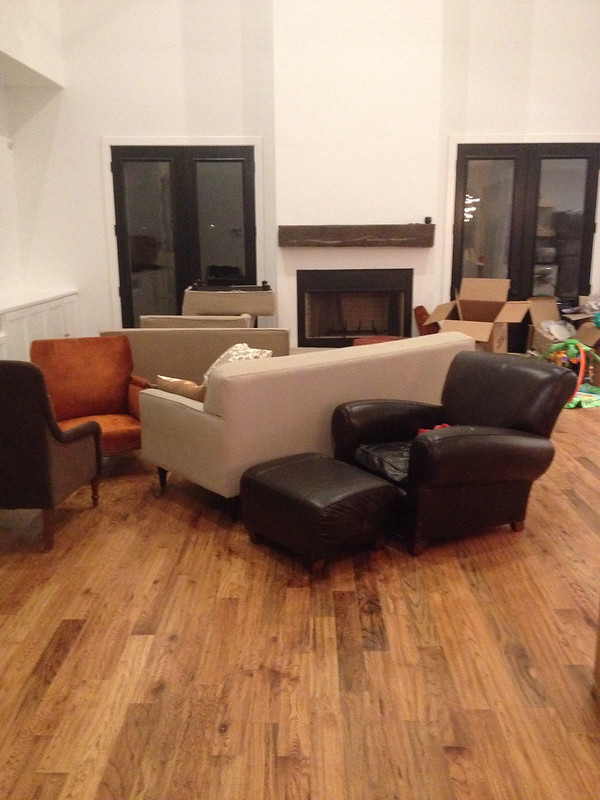
This is the only pictures I have access to right now for the living room before the move. White walls, wood floors, windows…you know the standard formula around here.
The living room after. We are going for the whole furniture graveyard vibe mixing in some cardboard boxes with trash accents. It plays nicely with the wood tones.
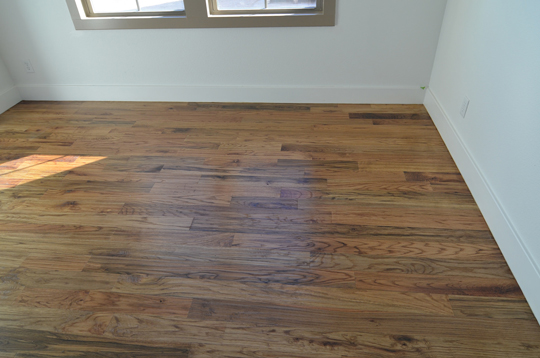
Ramona’s room before. (Technically this picture is of Beckett’s room, but it’s basically the same.)
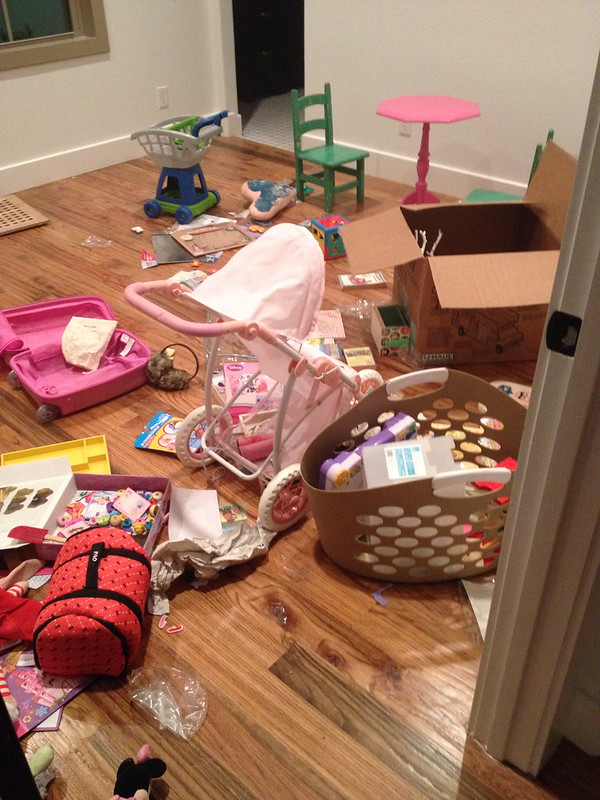
Ramona added her side table and chairs for the whole tea party chic look. Then obviously the piano needed to be there. No tea party is complete without a pianist. While it started off with such promise…
Things quickly got ugly when she realized how to open boxes and take advantage of distracted parents. Somehow she managed to find the box labeled “toys with a millions pieces each” because seriously there’s tons of small parts scattered everywhere.
So there you have it friends a round up of the worst after pictures in the history of the internet. Just wanted to pop in today and let you know why things will be quiet around here. Moving with 2 kids especially a baby that’s nursing is no joke y’all. Plus we packed all this stuff up 11 months ago. I have no clue where anything is, but I do know we are not minimalist. Geez we have a ton of stuff even after the massive purge we did when we moved.
Happy Wednesday! Wish me all the luck today!
How to Paint Concrete Floors: Geometric Style
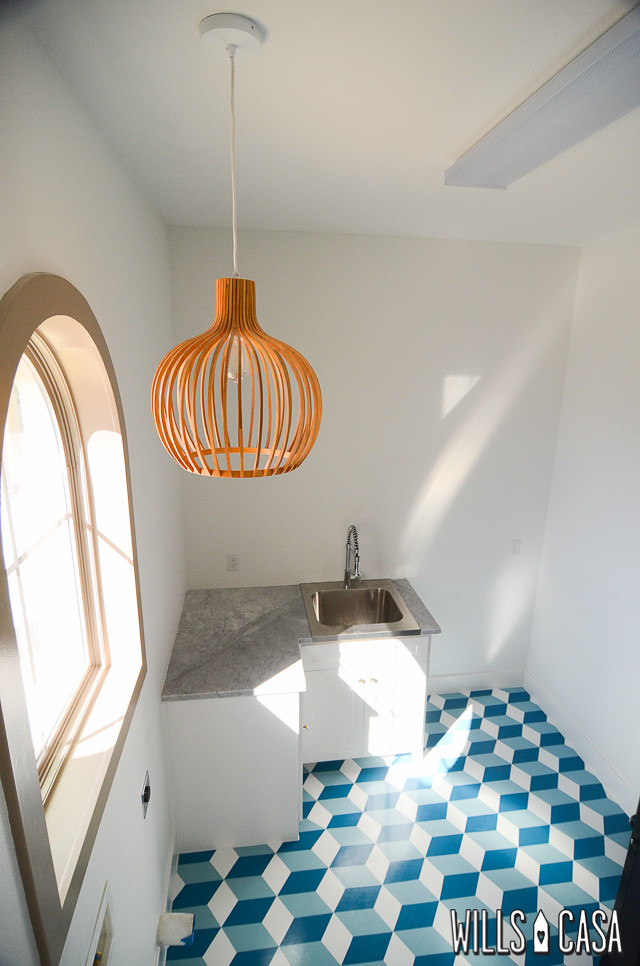
We left 2 floors unfinished in the house – the master bath and the utility room. I knew I wanted to paint a concrete floors specifically the utility. I’ve been mildly obsessed with the idea since I’d seen these floors on Little Green Notebook. I couldn’t wait to DIY at the new house, so I just went and painted the concrete floors in the utility room. And you can too..
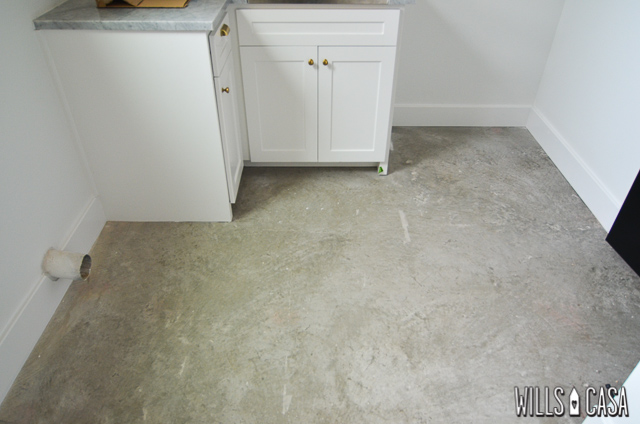
So here’s the before since every dramatic makeover needs a picture like this. I’m standing on the other cabinets to give you a feel of the room.
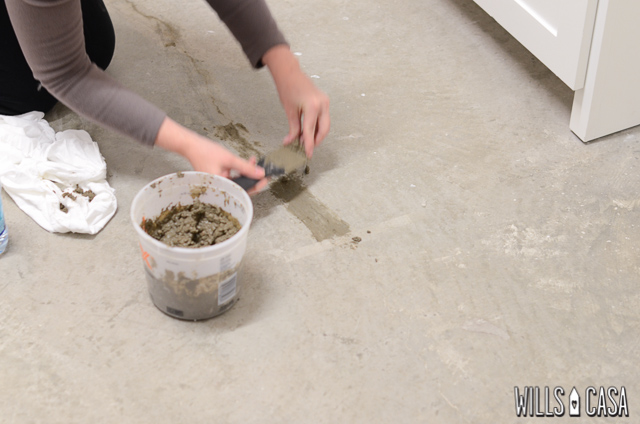
I used Mandi‘s tutorial on how to paint concrete. I patched a crack with some quickcrete. I missed several holes…oops. Who knew a new floor would have so many holes?? I sanded the floor down with 80 grit paper to prep for the paint!
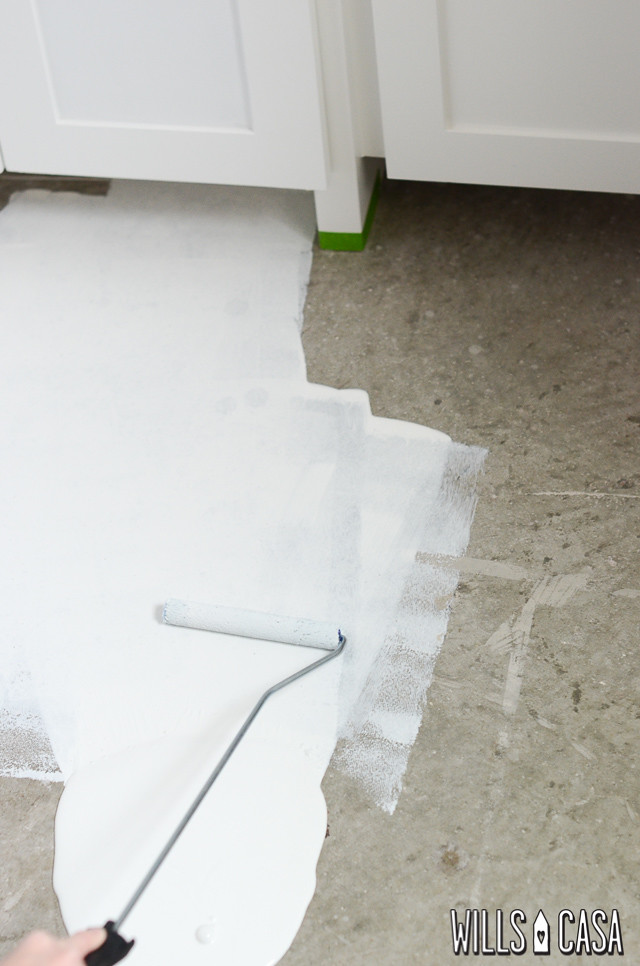
I picked up a gallon of Sherwin Williams Porch & Floor Enamel in Pure White (same color as our walls). I literally just poured it on the floor and rolled.
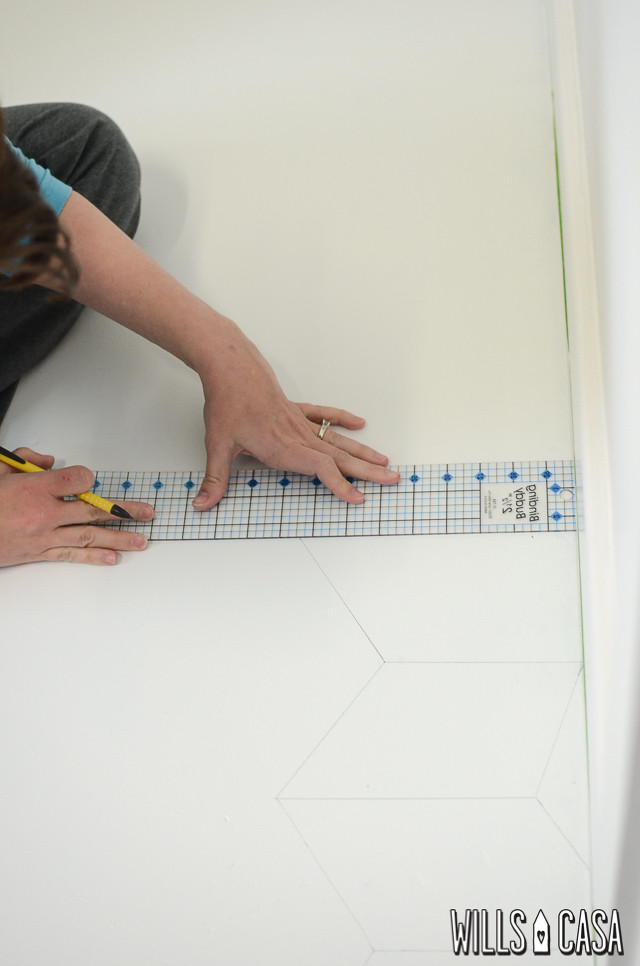
Now to nail the pattern down. I knew I wanted something geometric…and 3D. Nick made a parallelogram (did you prep for a math lesson?) in illustrator. You can download the template here. I cut it out on cardboard. I started at the door and worked towards the wall for the first row. Basically I used the handmade (slightly ghetto) stencil to trace, flip, and trace again for each row. I used my quilting ruler when I drew the lines though because it was cleaner than the “stencil”.
Once the first row is set, drawing the pattern is much easier especially with the quilting ruler.
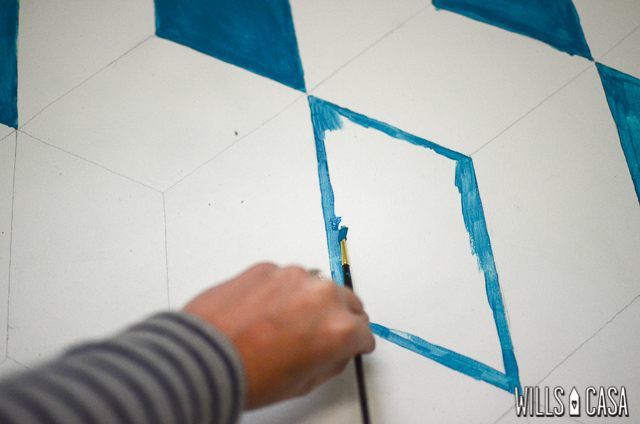
I started hand painting…with a craft brush for the outline of the parallelogram. I painted about 20 like that. It. Took. Forever. I was pretty good about getting the line fairly straight, but it wasn’t perfect. Sidenote: I’m not left handed. I just needed a picture.
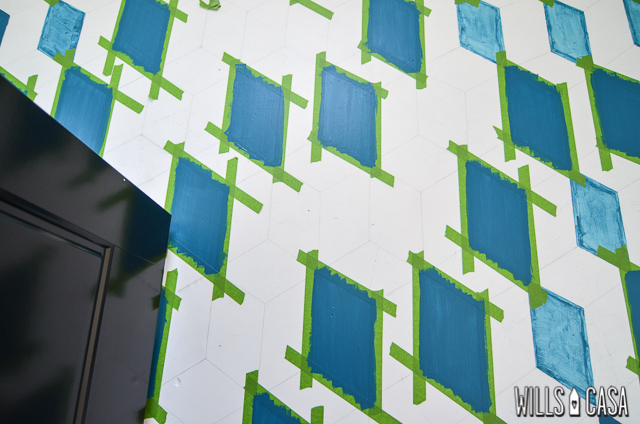
I switched my strategy to frog tape. Surprisingly it saved me a ton of working time even with having to tape. I did have to do 2 rounds of taping per color. You can see some of the hand painted ones versus the taped. The darker color is SW Blue Nile. It took 3 (!!!) coats. Thank God I taped, right?
It took about 20 minutes to paint the taped floor in comparison to the 20 minutes per parallelogram that it was taking me to hand paint.
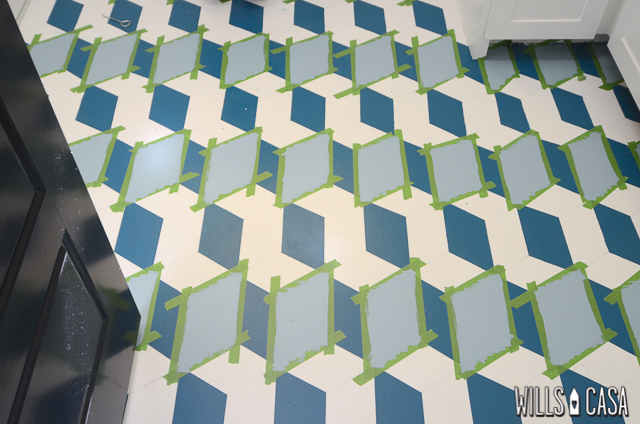
Once the darker blue was finished, I taped off for the next color SW Ebbtide. I taped a row then skipped a row and taped the next row. That’s how I should have started with the dark blue, so do it if you attempt painting this pattern. Once I finished those 4 rows (2 coats for the lighter blue with at least 4 hours of dry time), I taped off the remaining rows and painted.
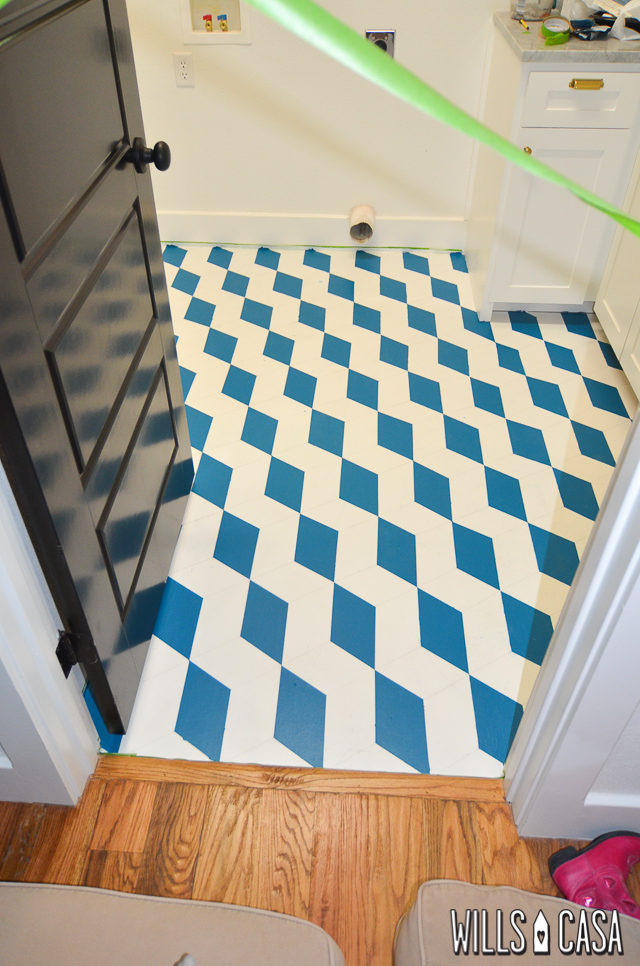
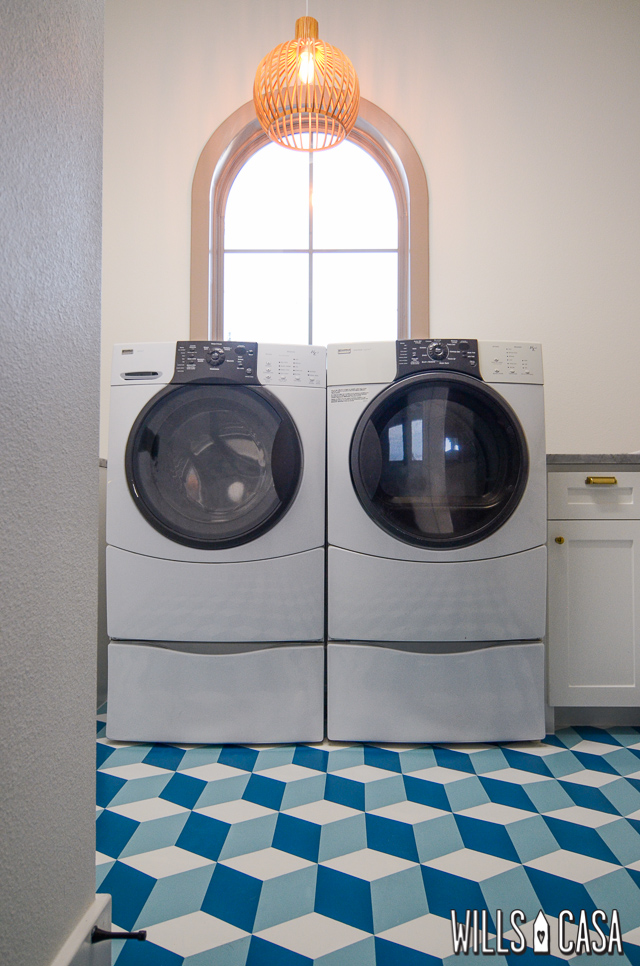
Pull off the tape and bam you’ve got yourself a gorgeous cubed floor. I got my craft brush out for touch ups. I’m a perfectionist when it comes to painting. There definitely a handmade feel because it isn’t perfect, but we find it charming.
There was lots of discussion about my floor amongst the subcontractors like, “woah it’s kinda 3D if you look at right,” “are you an artist,” “this is interesting”, and etc… I’m like dudes I’m sitting right here still painting the stupid thing stop walking on it!!
I put 2 coats of Concrete Sealer Wet Look from Sherwin Williams. I made sure no one walked on it for 24 hours with a house full of contractors that was not an easy thing. You can’t move furniture (in this case a washer and dryer) on it for 72 hours. Not a problem because I finished about a week before we moved in (yesterday)!
ElseWhere FaceBook | Twitter | Instagram | Pinterest