Birthday Party Favor Bag Printable

favor bag printable

Here’s a super easy DIY that we did on the favor bags for Ramona’s zoo party. We just grabbed standard sized brown lunch sacks (which are currently at the forefront of hipster branding btw) and printed directly on them. (We aren’t quite hipster enough to stamp them, so the printer route worked best for us.)

diy birthday party favor bags

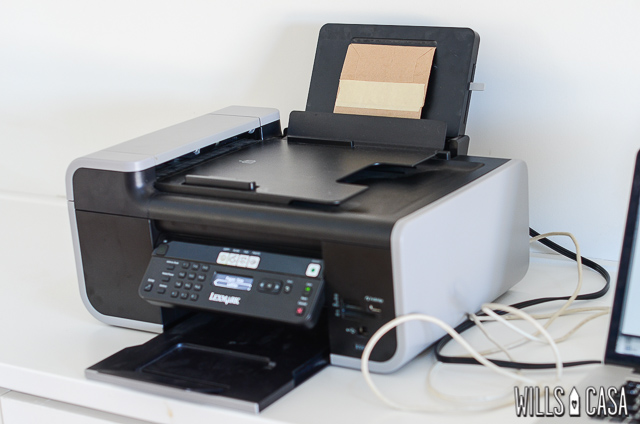
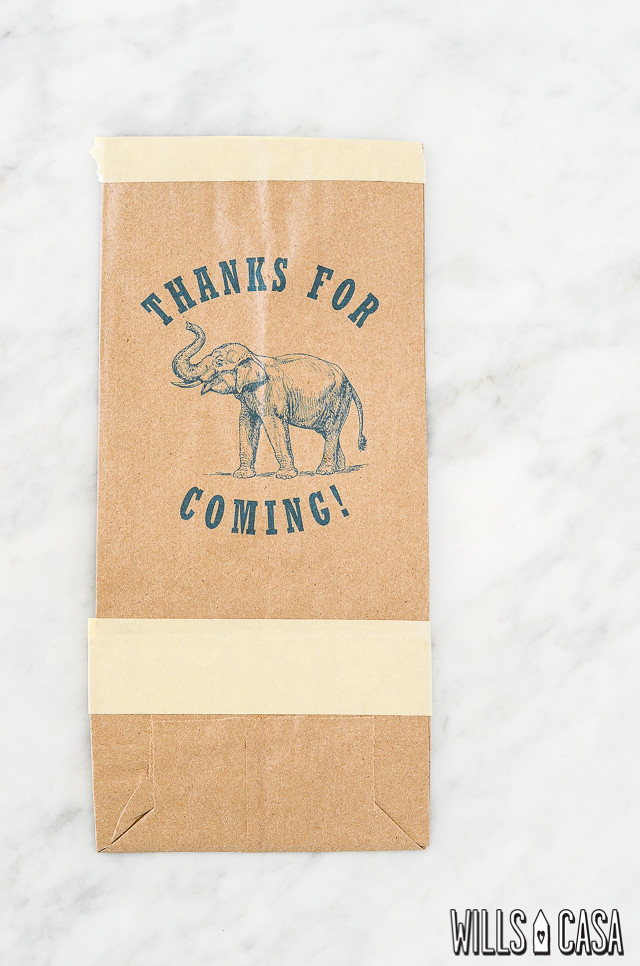
First tape the top and the fold of the bag, so the printer can pull the bag without jamming up. Masking tape or frog tape work perfectly since they peel off easily without ripping.

diy birthday party favor bags

Not the sexiest picture ever, but it’s to illustrate a very important step. We lined up the bag with our printer’s specification. Printed them one at a time since it is easier to avoid jams and offset printing on that way.

diy birthday party favor bags

The elephant you will recognize from the invitation. It’s like we planned it or something. Peel the tape off…

diy birthday party favor bags

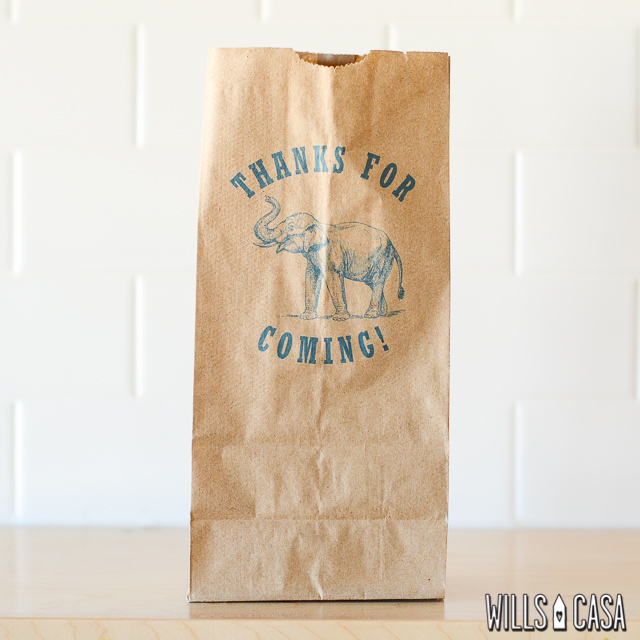
You’ve got yourself a pretty stylish birthday favor bag. You can download the file to print the favor bag in blue or pink.

diy birthday party favor bags

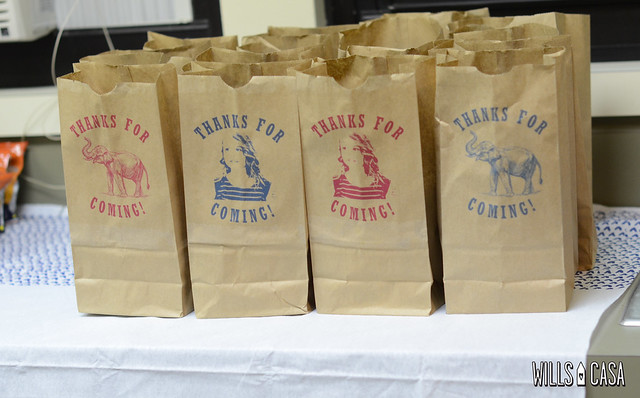
We mixed in our threshold image of Ramona from the street art as a favor bag too. I love that the bags are simple with a cute image on them. They aren’t loud or over the top. Plus they stand up on their own. Bonus.

The printing-on-a-lunch-sack technique works for any party even if the elephant doesn’t. You could totally pull off something like this for a baby shower or wedding. Threshold image of the couple? Did I just plan my vow renewal? Maybe.

diy birthday party favor bags

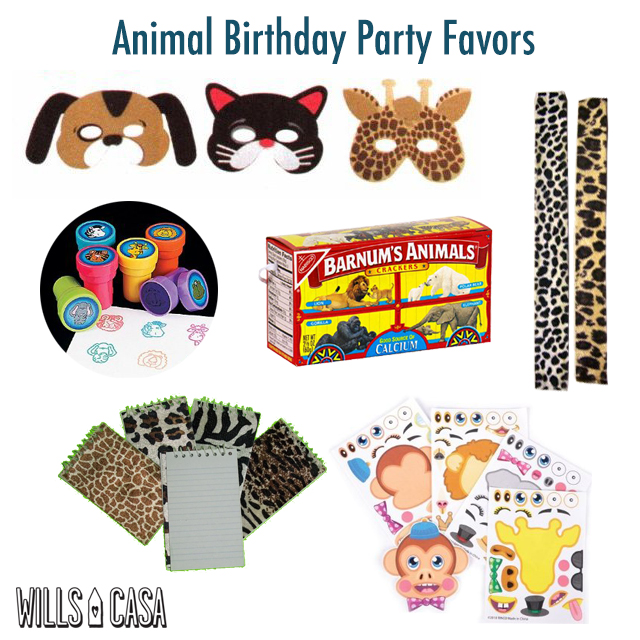
In case you’re looking for some ideas on what to stuff in your birthday party favor bag. I used these goodies.

Animal masks / Slap bracelets / Animal stamps / Animal crackers
Animal print notebooks / Make-a-face animal stickers

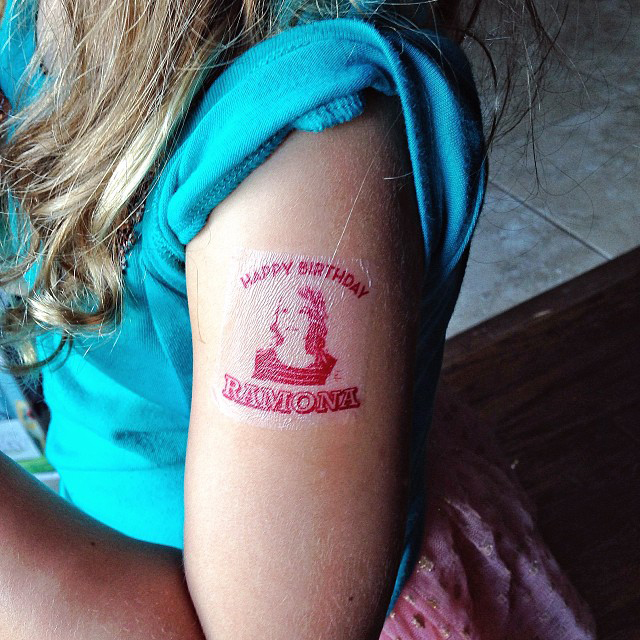
We also made these tattoos. They wouldn’t cut out right on the Silhouette, but still an awesome addition to the favor bags. Did you know you could buy temporary tattoo paper and print your own?! Incredible.

Full disclosure: Affiliate links are included in this post. Along with awesome content and a printable that’s free!!

**Remember these invites are for personal use only. You may not sell them. Also if you blog about the invites, please be kind and reference back to us.

Tagged As , ,

Free Printable Animal Birthday Party Invitations

free birthday party invitations

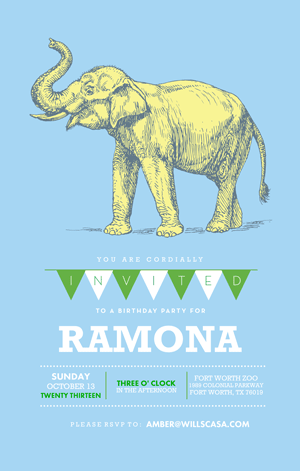
Yep FREE birthday party invitations that are also awesome. These are 5 x 7 invitations that you can customize with your birthday party information.

Last year when we uploaded printables for Ramona’s airplane party, the number one question we got was “Can we have the birthday party invitations too?”…. Unfortunately, I lost the file and didn’t feel like recreating it. Not that I’m lazy, but it isn’t a simple process.

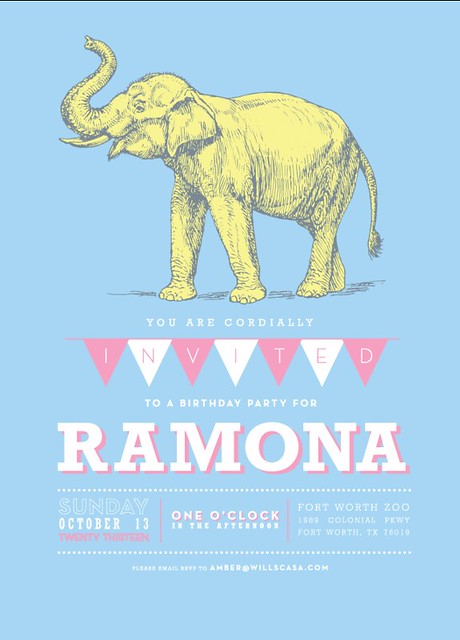
Above is the invite I designed for this year’s party. Before I got going I wanted to do one that anyone could download, customize, and use (for personal use obviously). I made two copies this year – one boy-ish, one girlish – that would allow people to change (most of) the text like the name, date, etc. Some of the type treatments had to be dropped, but I think they still look pretty splendid.

  free birthday party invitations

To download and use these party invitations just right-click and select save-as for the invite you want – pink or green. If you click on the invite, it will pop up as a pdf and won’t allow you to input your information properly. Remember right-click and select the save-as option to be able to customize the invite.

We’ve seen some issue with the Preview app on Macs, so don’t use or it will look weird. Make sure you open the file in Adobe Reader. You can select “highlight existing fields” to show the areas where you customize your text. Note the background is still the same blue. It’s only highlighted to show you where to pop in your child’s name, date, and location to personalize the invitation to your party specifications.

If your computer doesn’t default to Adobe Reader, then right-click your saved invitation, select “open with” on the menu, then click Adobe Reader.

These invites would work great for a circus or animal party too! We went with an elephant because the Fort Worth Zoo welcomed 2 (!!!) baby elephants this year. Can you imagine being the mother of twin elephants?

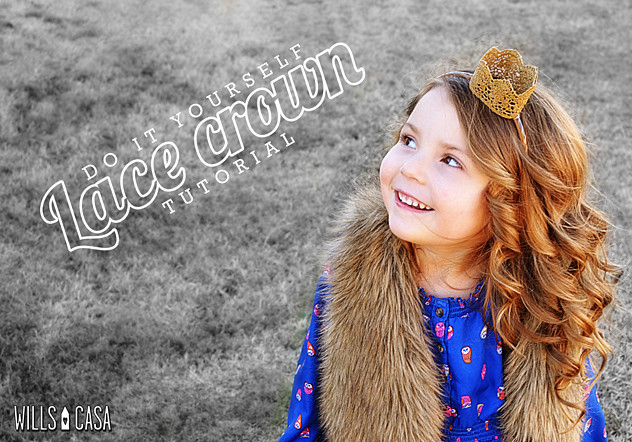
DIY lace crown tutorial

Amber is over at A Bubbly Life sharing her tutorial on Ramona’s lace crown. Make sure to check it out.

We will be back tomorrow with 1 more birthday DIY with printable!

**Remember these invites are for personal use only. You may not sell them. Also if you blog about the invites, please be kind and reference back to us.

Tagged As , , , , , ,

Ramona’s Zoo Birthday Party

zoo

We set the birthday party bar pretty high on Ramona’s 3rd. About a month before Ramona turned 4 (and about a week before Beckett came), we were in a panic about what we were going to do.

Obviously the house wasn’t finished to have the party there…unless you call no electricity and a complete construction zone a party. We decided it was best to have it where there was no threat of injury. Enter the Fort Worth Zoo.

zoo

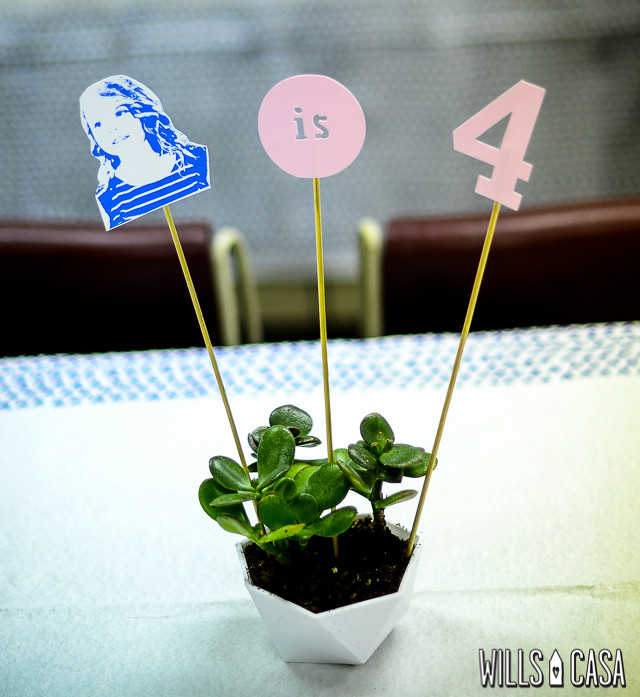
Since we had an hour for set up and take down, we had to keep the decor to a minimum. We just didn’t have the time, so we wanted to make sure what we did was awesome. We used Caitlin‘s genius DIY of succulents in these geometric dip bowls. I used the picture from Ramona’s street art with “is 4” cut from the Silhouette machine.

This was such a simple centerpiece. It took about 30 minutes to create the whole thing, and it was ready to put on the table. Bam. Who knew throwing a party could be easy?

zoo

It wouldn’t be a party without a Fort Worth classic – a Black Forrest Cake from Swiss Pastry Shop. It’s gluten free and totally delicious. We cut the “Happy Birthday Ramona” with the Silhouette. Instead of the using the letters, we used the cut out for a punch out effect. It was easier to attach to the baker’s twine and gave us a more unique look. That elephant image was used on the invite…which we will have up as a printable for you!

zoo

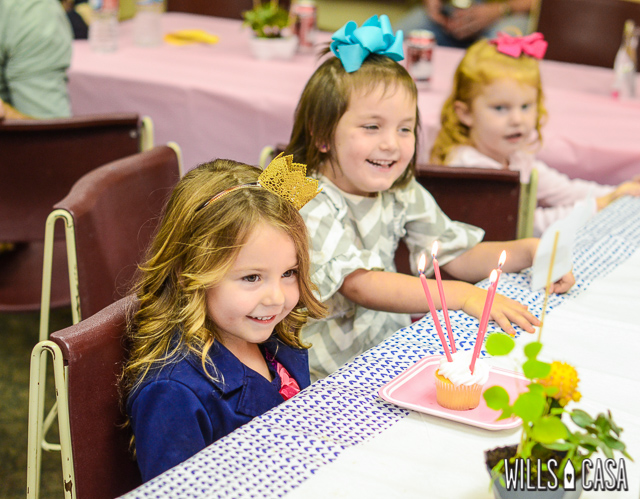
With little ones, cupcakes are always easier especially on location. I got 6″ candles since I love the look of giant candles. 6″ isn’t giant but on a cupcake the proportions make me happy.

zoo

Believe it or not Beckett slept through the entire party. That was back in his chill days like age 0-3.5 weeks.

So there’s our relatively fuss free zoo birthday party. Simple DIYs that made a big difference. The centerpieces made the space feel less like a classroom. The cake and food is always top notch with us (Nick smoked some pork…it was delicious). The kids got to go into the zoo afterwards. It was a win for all.

We are looking forward to sharing the invite and favor bag printables with you later this week!

Tagged As ,

DIY Birthday Street Art

DIY

Nothing like blogging about a project 4-5 months after it happened, right? Well welcome to Ramona’s birthday week. Sit back and enjoy some birthday DIYs while the house finishes this week (fingers crossed).

A cool tradition in the town that we moved to, one that’s been going on for as long as anyone can remember, is painting an old railroad building to tell someone happy birthday. The building is right along the road that drives through the center of town so everyone can see it. It’s a really endearing small town tradition.

This year, for Ramona’s birthday, I decided I would do it a bit differently… street art style. The whole time I was working on it I kept telling Amber “I’m pretty much the Banksy of [insert town name here]”

DIY

I’ll skip over the technical details, but basically I created a threshold image of Ramona in photoshop. Exported it to Illustrator, so I could create a vector image out of it. Once I blew the image up, I took it to Office Max and had them print it out on their giant plot printer. It printed 36 inches wide, so I made it 72″ x 72″ to have 2 long prints that would need to be connected.

Photo was from our maternity session with J Noel Photography.

The prints kept screwing up, so I had to end up print them about 50 different ways. Eventually we got a combination that would work.

I went that night with Amber’s sister Apryle, and we painted the wall pink. Remember Beckett was 2 weeks old, so Amber was preoccupied.

DIY

The next night I made some wheatpaste… which is basically just boiling water and flour together until the gluten forms a glue.

DIY

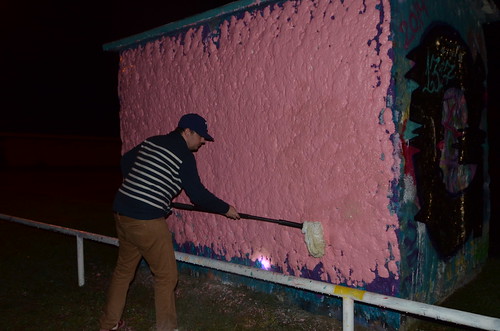
I went out when it was dark, well because it just seemed right, and mopped on the glue. Yes mopped with an actual mop.

DIY

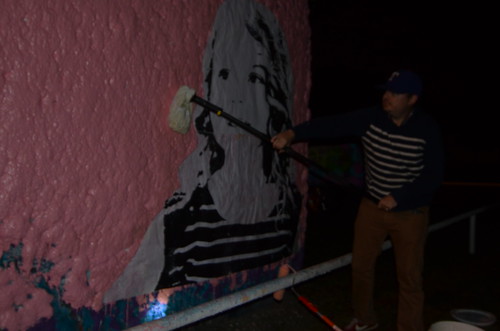
Once the surface was covered, I put up the prints and mopped over them with the wheatpaste. And continued to paste until all of Ramona was all the way up on the wall. It’s a similar process to Mod Podge.

We placed the letter individually the same way.

DIY Street Art

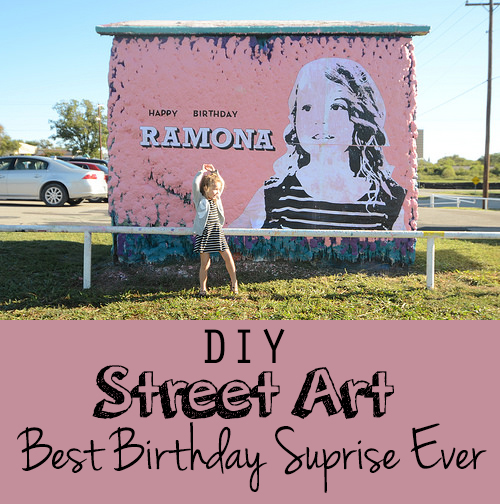
The next day was Ramona’s actual birthday, so we took her in the morning to show her our little birthday card to her. She loved it, though I’m not sure she appreciated how much work it was. Hopefully she’ll see this when she gets older and think we were cool parents back in the day.

She called it the “big Nona” – Nona is our nickname for her. Hilarious because she calls the Statue of Liberty the “big lady”. We can’t pass the building now without having to read her what’s on it. Nothing says I love you like birthday street art especially when it’s legal.

Check out more of the birthday party, grab a printable invitation, and see our favor bags with a free printable!

Tagged As ,

Upstairs Flooring: History in the Making

Upstairs Flooring

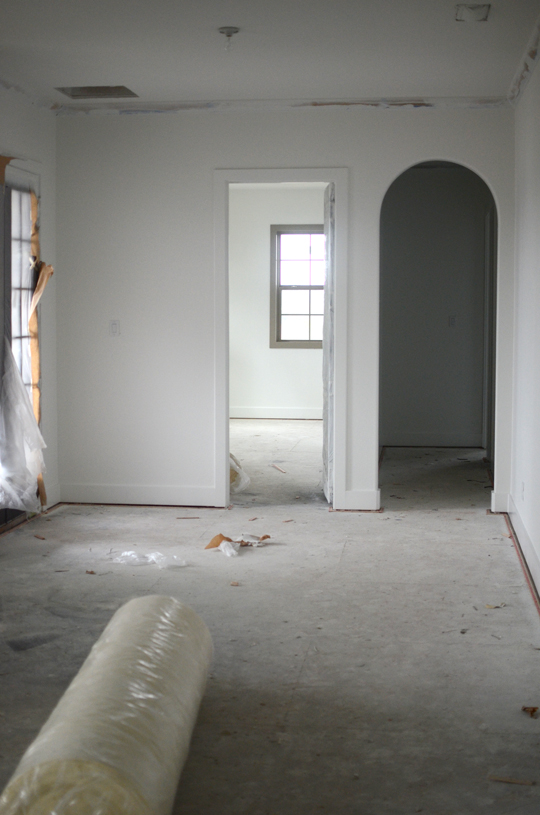
Once it was decided that we had to finish the upstairs, the electrical, drywall, trim, and paint went up pretty quick. (Remember all the rooms were already framed.) A huge downside to finishing the space is we knew we’d have to compromise on flooring. Thus history was made…

Scallops

The Wills went shopping for carpet. (Dramatic much?) We’ve had 2 previous houses (2.5 if you count our downstairs since it’s technically finished), and we’ve replaced all the flooring in both houses even still shopping for carpet was a first for us. We’ve never bought/shopping for carpet ever in the history of Wills casas if you’re wondering that’s like 9 years almost a third of our life and basically all of our adult lives. Uncharted territory for sure.

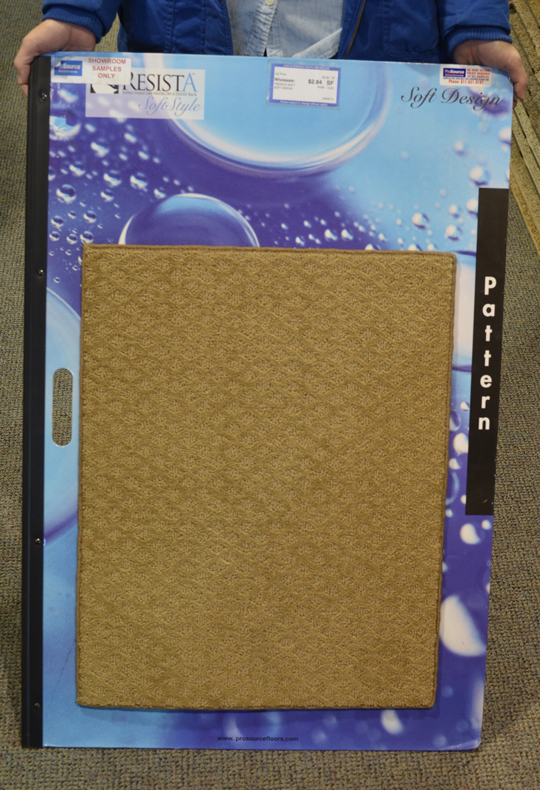
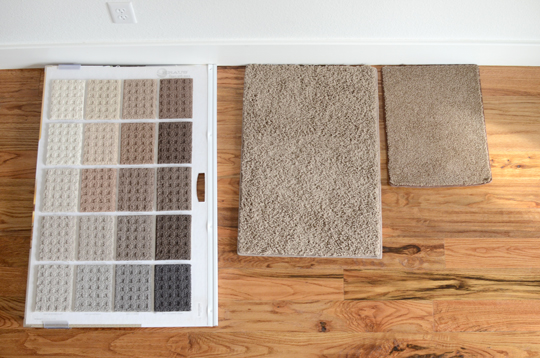
I was immediately drawn to this patterned carpet. It reads diamonds in the picture, but it was more of a scallop pattern. It took me all of one day to get tired of it. It was $2.84 a square foot without pad or installation.

Upstairs Flooring

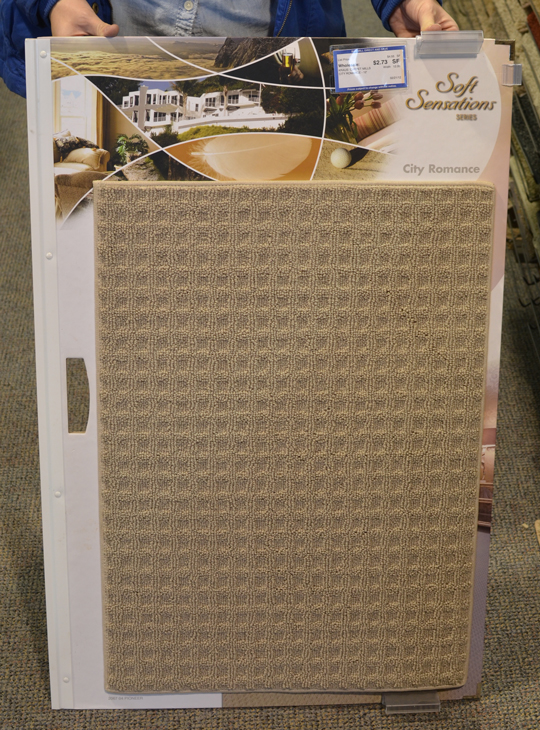
This square pattern carpet was a pretty good option. It was $2.73 per square foot (again without pad or installation as all these prices will be). It wasn’t that soft, but I liked the pattern.

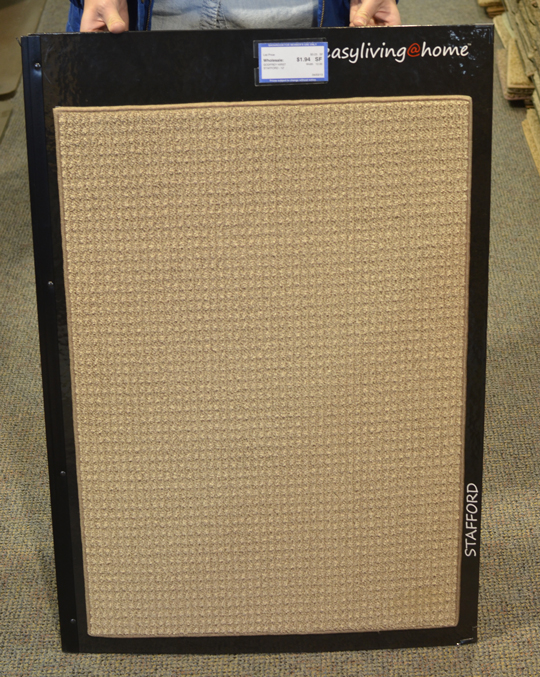
Upstairs FlooringFor comparison sake, we found another carpet that had a square pattern. It was only $1.94 per square foot. I didn’t care for this option. It felt busy and the color options weren’t that great either.

Upstairs Flooring SamplesI found 2 basic carpets sans pattern to take to the house as well. They were both around $1.60 per square foot. We weren’t thrilled with our choices in the warehouse, but all the samples looked much better in the house. Amazing what natural light and white walls can do for a carpet sample.

We knew we couldn’t go to light on the color because of the playroom and general shenanigans that will happen upstairs with our kids and my crafting. We also didn’t want to go too dark since dark carpet shows every piece of dirt even if it hides stains.

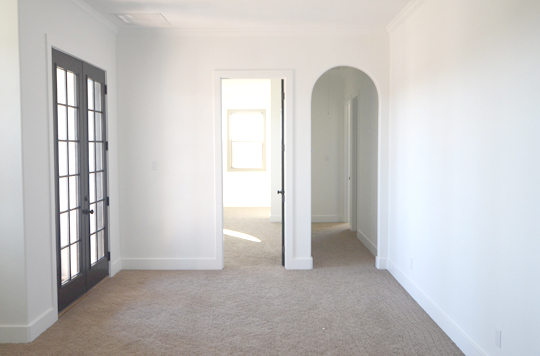
UpstairsWe went with the middle sample. It’s a basic one color carpet that’s not too light or dark. It’s soft and reasonably priced. It didn’t make sense to buy the patterned carpet. Neither of us were thrilled enough to spend over a $1 more per square foot (there’s like 1400 square feet up here – playroom, office, media room, guest bedroom + a bathroom that is not carpeted but still up here.).

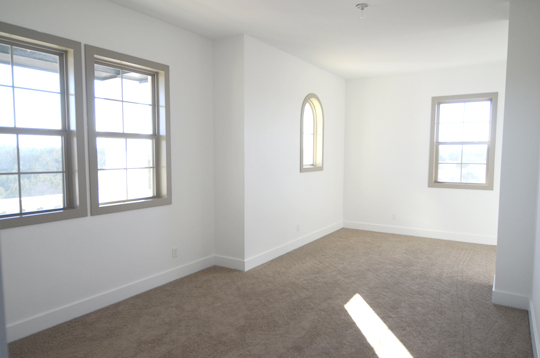
OfficeHere’s my office. It’s got a little nook to the right and 4 (!!!) windows. Blogging headquarters y’all. I’m really excited to have my own space to craft and what not.

One good thing about having carpet up here is it helps with the noise. It muffles all the bouncing, screaming, and playing that the kids will do up here, so Nick can get work done downstairs in his office. Once it was installed there was a significant difference in the noise level which will only get better once we have rugs, furniture, and things throughout the house.

Nearly there folks…as if we haven’t been saying that for months.

FYI we were nominated for Apartment Therapy’s Homies Award for Best Home Project & DIY Blog. It would be so amazing if you could stop by and vote for us!! We would so appreciate it!

There are no tags for this post

How to Build a House and Stay Happily Married

This is the true story of two married people, picked to build a house, work together and have their lives written on a blog, to find out what happens when people stop being polite and start being real…
Or this is just where we answer your burning questions in a less dramatic way then reality according to MTV. Either way prepare to have your world rocked.

Katie (my favorite reader…if I played favorites – I love you all equally like any good mother) had this incredible question up her sleeve:

All your recent great work has led me to a question. Because you’ve built from the ground up, what did your timing, choice, and sourcing process look like? Did you have to methodically go room by room, or focus on material (all tile, all countertops, etc.) and then go from there? As someone who agonizes for months over drawer pulls, how did you handle all of that?

So. Much. Goodness. Also this post was completely cowritten by us, so you get both the husband and the wife’s view of the process.

As far as approach, whether or not we went room by room or focused on materials… the answer is both.

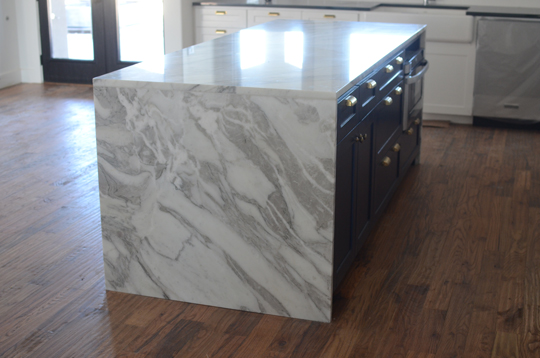
Basically we went room by room ahead of time and planned out the overall feel before we started meeting with the subcontractors (cabinets, counters, etc). Some of our vision was easier to pull off than others. The island marble (white, gray veining with a waterfall) was our plan from the moment we put pen to paper with our architect. Unfortunately, it wasn’t easily executed.

However since you’re dealing with subcontractors for each specific thing (i.e. flooring, plumbing, cabinets, etc.), all meetings and final decisions are made based on a specific materials. We found the process to go smoother when we considered the whole room then broke it down by materials. It made the details in the meetings less daunting and the communication clearer between us and the subcontractors…not that they always listened to us 100%.
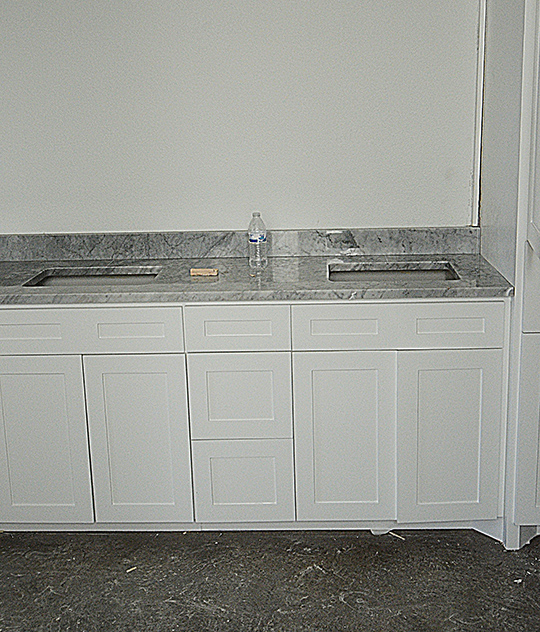
This is why the master bath countertop being gray was so disappointing because all the other design decisions had been made (flooring and cabinet color) and executed before the countertop arrived more on the gray side. It changed the feel and our vision of that space. That’s kinda the downside of having such a strong opinion about how a space should come together. Still worth it though.
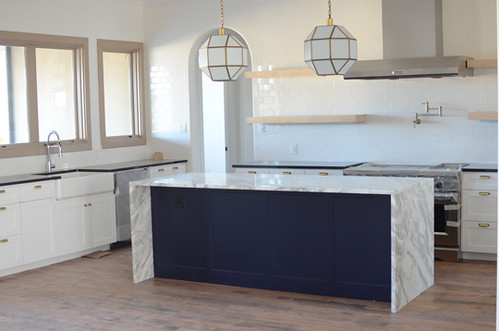
Our sourcing was a combination of budget considerations along with achieving the look we wanted. This is where building a complete custom house is awesome because you are limitless with option. No one tells you no (think kid in a candy store scenario). Light fixtures were big for us. We met with a consultant from a lighting supply store early on, and we weren’t super happy with the selection (or pricing) and ended up sourcing a lot of the fixtures ourselves (like the killer vintage pendants above the island). We also got some crazy looks for busting out an ikea fixture. We’re not brand whores and don’t think that just because something is cheap it won’t look good, so it didn’t bother us.
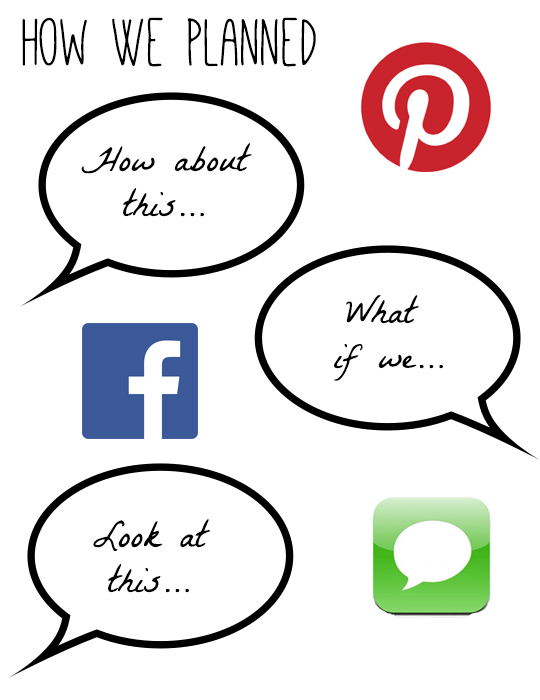
How we planned: it was a constant conversation on text, facebook and pinterest. So many times Nick would be in the other room (or at work) and see something he really liked (a light fixture for example) and message Amber a link on facebook. We used secret boards on pinterest to have conversations with each other and post tons of options for a specific thing (I think at one point there were 30 options in a row posted for our master vanity light).
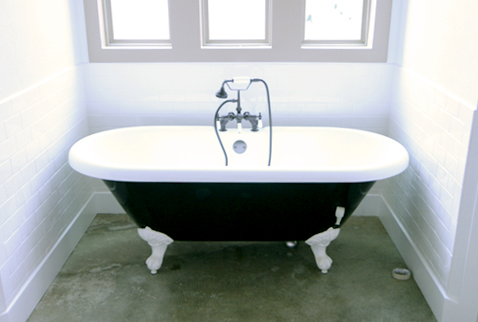
Lastly, some decisions you make or change mid-stream as the room evolves. When they framed out our bathroom, the idea of a generic tub just didn’t set well with us. The more we went up there the more we realized that we wanted to do something different. They had already framed out for a jet tub when we had them yank out the framing and cut into the foundation to plumb for the clawfoot tub.

Was it overwhelming? We don’t think so. Well sometimes. Did we get all the choices right? Don’t think so either. There’s not a ton we would change, but there’s definitely things like the fireplace and the exterior color scheme that we would do differently in retrospect.

We were able to make decisions very quickly. Even though Amber is usually the one antagonizing every choice, there’s nothing like living with your parents to help speed up the process. Kidding (kinda).

The key is to think of the space as a whole, then break it down by the materials. Allow yourself to adjust as you see things coming together. Research the heck out of every decision to make sure you are getting exactly what you want for as cheap as you can.

Tagged As ,

Newborn Necessities

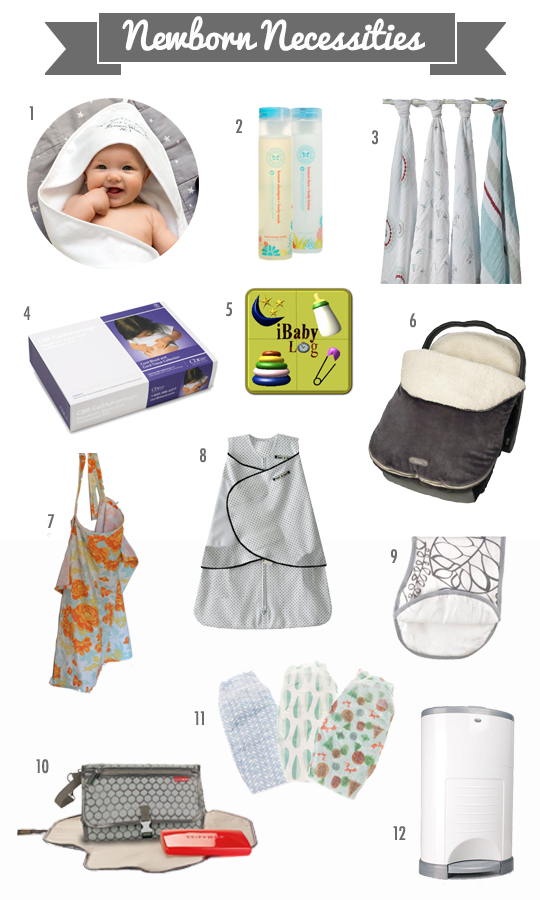
1. Towel  /  2. Shampoo & Lotion  /  3. Swaddle Blankets
4. CBR  /  5. iBabylog app  /  6. Bundle Me
7. Nursing Cover  /  8. Sleep Sack  /  9. Burpy Bid
10. Changing Station  /  11. Honest Diapers  /  12. Dekor Plus

As promised I rounded up some of my newborn must haves. I mean I’m 4 months in with kid number 2,  so I’m basically an expert. If only people.

H&M has great organic cotton towels and bodysuits for cheap, so stock up. I love the Aden + Anais swaddles. They make swaddling less daunting. Swaddling is hard y’all. I would put Beckett in the sleep sack for night. The bundle me for his car seat is a must for winter babies. I had one with Ramona too. It’s just so nice to have them warm and be able to cover them without struggling with a loose blanket.

I couldn’t live without the iBabylog app. It tracks nursing times and sides, diaper changes, everything. Just 4 years ago I had to record all that stuff in a journal. Technology is changing the world I tell ya.

I can’t even begin to tell you how much we love Honest diapers and products. It’s amazing to have diapers and wipes delivered monthly. Magnificent. Plus they have adorable patterns. And bonus Beckett has not had a diaper rash since we have switched to exclusively using Honest diapers. We have the essentials bundle as well, so we use the lotion and shampoo (and cleaning supplies). It’s convenient, responsible, and stylish. What more can you ask for? (Answer: Nothing.)

I love the changer (10). It’s easy to delegate changing responsibilities when you can just hand that thing over instead of the entire diaper bag. I had a different diaper pail with Ramona. Then I bought the Dekor Plus, and it’s by far the best way to dispose of all those adorably patterned diapers.

Don’t be fooled by overwhelming baldness cuteness. This kid has entered into the extreme drooling stage. Jessica got me these incredible burpy bibs – burp cloth + bib. Nothing like a baby essential that is dual purpose.

So the Cord Blood Registry kit isn’t really something you use, but I felt like it needed to be included. We have saved both kids’ cord blood, and Beckett’s cord tissue (they didn’t do that when Ramona was born). We researched it and felt like it was the best choice for our family.

Any mama’s want to chime in on their must have items?

Some affiliate links included. The links to Honest and CBR are the same referral links available to all their clients.

Tagged As ,

Cabinet Hardware

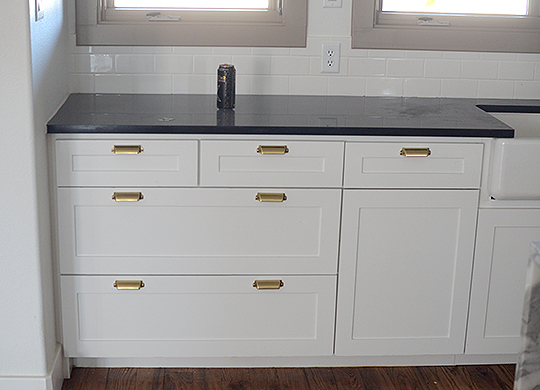
I should have titled this post “cabinet hardware the hidden cost in building”.  True not it’s not always necessary to spring for hardware during the build. However with our flat panel drawers and doors, it’s nearly impossible to open them without hardware. Thus let’s commence on some hardware purchasing shall we.

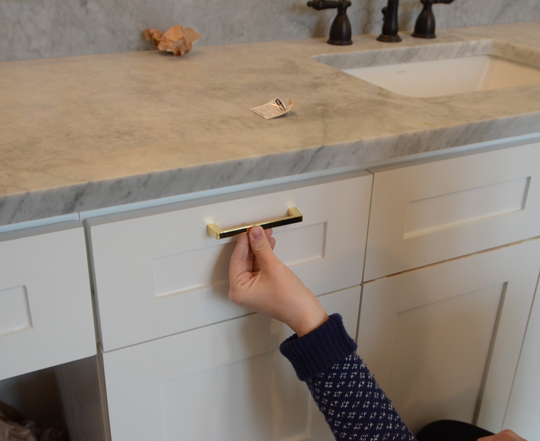
We knew we wanted brass throughout, but most brass options are online only. I ordered these brass pulls from Home Depot. I liked the shape. The finish was a little too 80’s brass though.

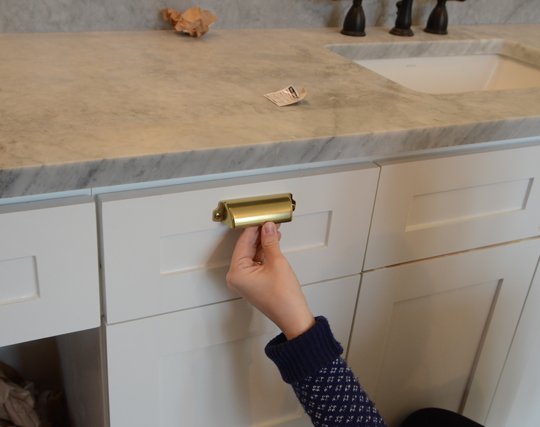
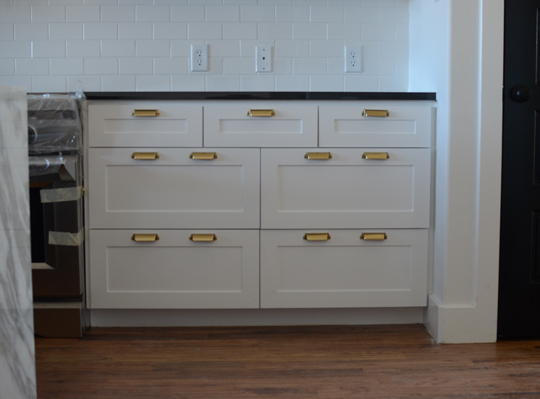
Of course we ordered the blogger’s brass staple – these Martha cup pulls from Home Depot. And sold. They have a great tone to the brass and are reasonably priced which is necessary because we have so. many. drawers.

We decided to put 2 pulls on our larger drawers. The downside to using these pulls is there’s only one size. Although these specific drawers are too large for a single cup pull regardless the size of the pull.

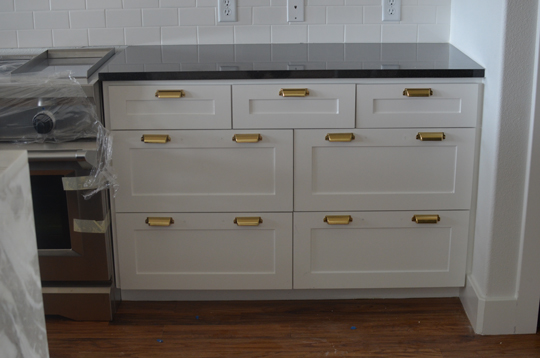
It wouldn’t be our build if there wasn’t a little drama. After we were high on the island countertop install, we walked in to find the hardware on the smaller drawers installed wrong. The pulls were much too close together. It was worse in person than the picture displays.

We had to explain that the pulls should be installed centered at the 1/4 and 3/4 of the drawer. Y’all, we don’t settle for anything. It really is exhausting for everyone. Seriously the pulls look so much better in their proper place. I’m so glad we don’t settle.

Just a little aside on our kitchen, no uppers = drawers galore. I’m getting old and can’t be bending down to grab things out of cabinets.

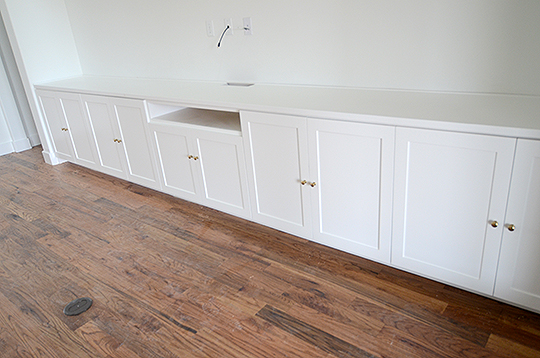
We did have to find hardware for doors too. We went with these brass goblet knobs. It completely changed the look for the living room built in. It’s going to look so good in there once we figure out a wallpaper, get furniture, and a rug…

The cup pulls and knobs look beautiful with the navy cabinets too! We are thrilled with how simple hardware pulled the cabinet spaces together. Everything looks more finished and ready to be used.

Anyone have any good hardware sources? We still haven’t purchased any towels bars, hooks, toilet paper holders and what not.

Tagged As ,

Open It Up

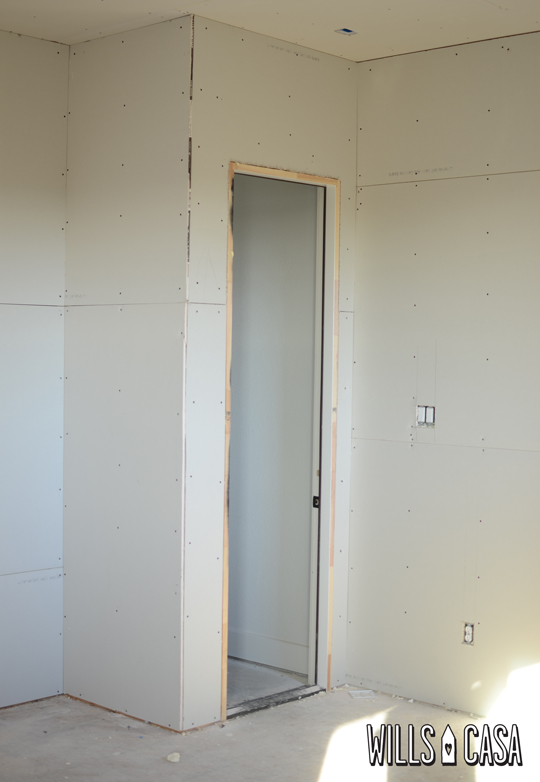
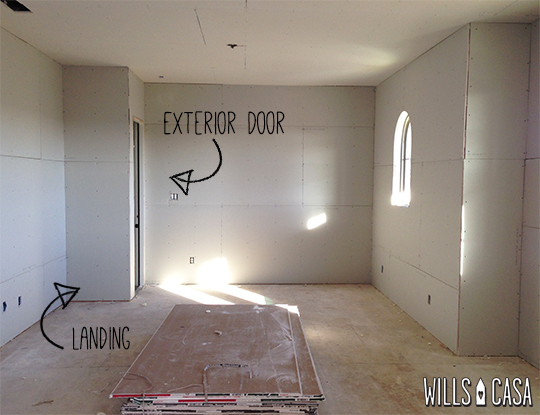
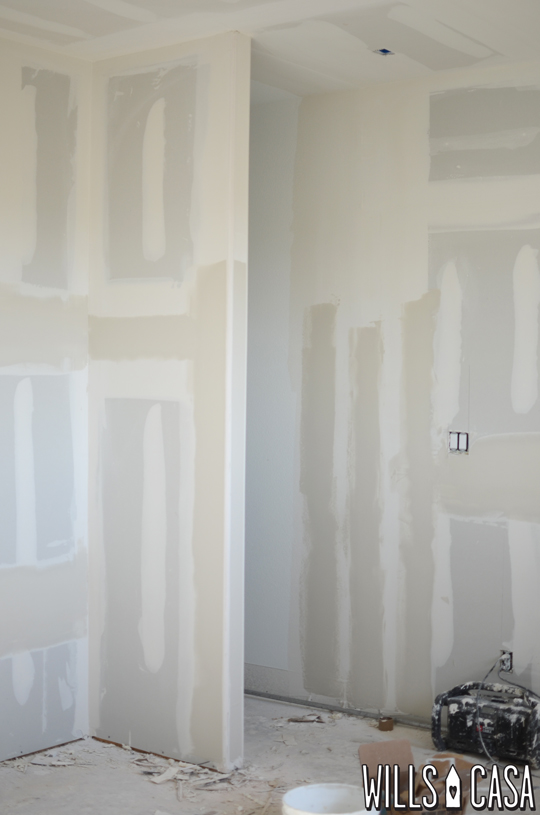
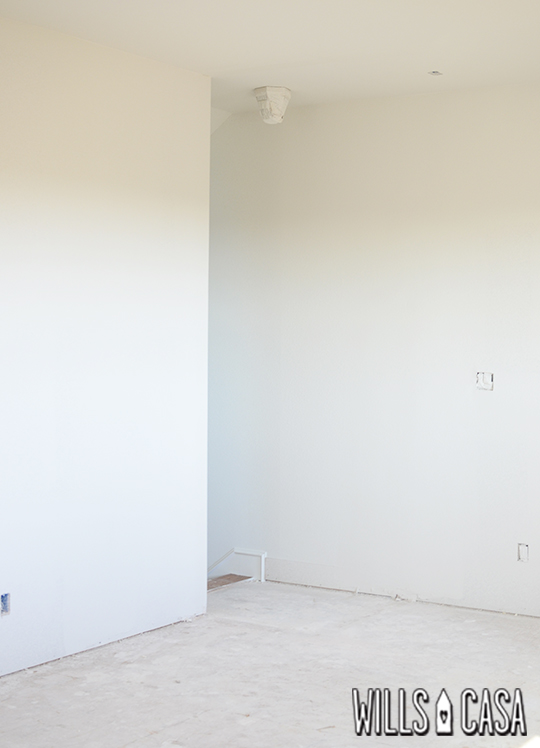
Once we decided/were forced to finish the upstairs, the electrical was run and the drywall went up. When you walked up the stairs and arrived on the landing, you walked through an exterior door into the playroom. This set up was ideal for closing off an unfinished upstairs from a finished downstairs…

Obviously not so great for a finished upstairs. The thought of leaving the door to use as a baby gate was alluring, but not an exterior door. It separated the upstairs and downstairs in the oddest of ways.

We decided to open the whole threshold up. When we were talking about it, Nick wanted to take down the 3 foot wall that created that landing space. I was not in agreement (and neither was Cody aka project manager…he was more adamantly against it than I was). I was thinking if we left it then we could use that entire back wall. The landing wall would keep all the toy baskets and what nots in place.

After the threshold was opened up, that landing wall really felt weird. You walked up the stairs, then had to walk a few feet more to be in the actual space. Okay Nick was right. Write this day down. History was made.

Taking that 3 feet out opened the space up tremendously. It was such a small and simple change, but it was really the best choice. Now to get a baby gate and finish the upstairs! We’d be ready! FYI our builder says we will be finished this Friday which probably means 3 Fridays from that! So close!

There are no tags for this post

Boom Goes the Dynamite

Remember how I was upset the other day and wrote down all the reasons I have to celebrate? I think we are finally at a stage on the blog where we can talk about it. I wanted to get a little further along in the build process before we said anything. You know answer the BIG question of why in world we haven’t closed yet?!?

via

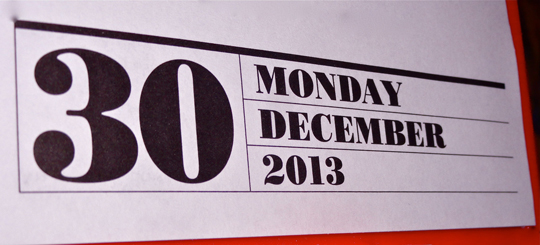
We were supposed to close on December 30th. Even though the house wasn’t quite finished – the floors weren’t stained, the island had no countertop, and a long list of etceteras. Our appraisal came back where we needed it to be. We were through underwriting. Imagine us twiddling our thumbs (very anxiously) waiting for the house to be finished “enough” to close. Then…

A little dramatic but it really did feel like someone dropped an a-bomb on us. Underwriting decided we couldn’t close with the upstairs being unfinished. Remember that genius plan we had to DIY the upstairs after we moved in? Save money upfront. Give us the best of both worlds – new + reno. We even added more square footage since hey we were finishing that later so might as well.

It wasn’t a safety thing. I should be very clear in saying having an unfinished upstairs is fairly common where we are building. It usually isn’t as much square footage as ours but unfinished nonetheless. This completely blindsided everyone – us, the builder, the loan officer, and now you.

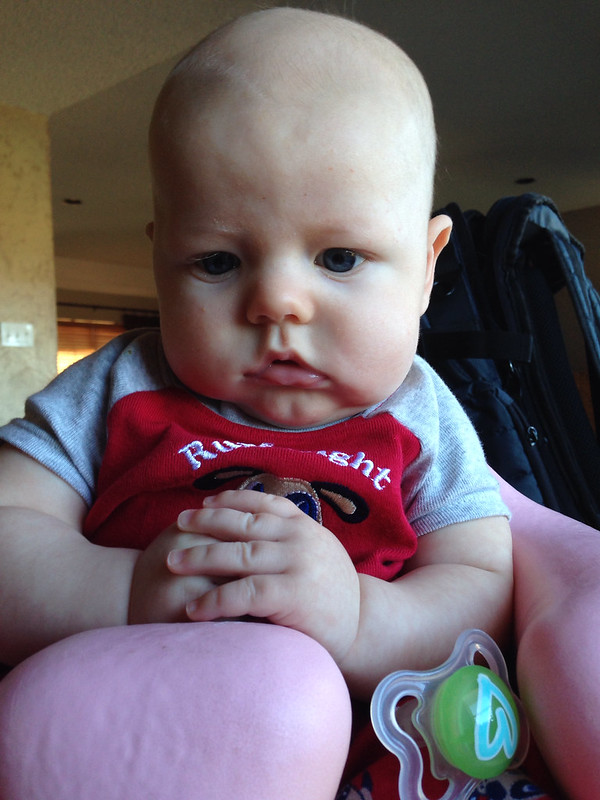
We all put on our thinking caps/went into panic mode. You can see Beckett is very seriously reviewing our options. We found a bank that would keep the loan in house, so we could close without having to finish the upstairs. Once we got all the paperwork back, there was a fairly insignificant difference between the monthly payment closing without the upstairs finished (new lender) vs paying the extra to finish the upstairs (original lender). From there the choice was simple, let’s finish this thing off.

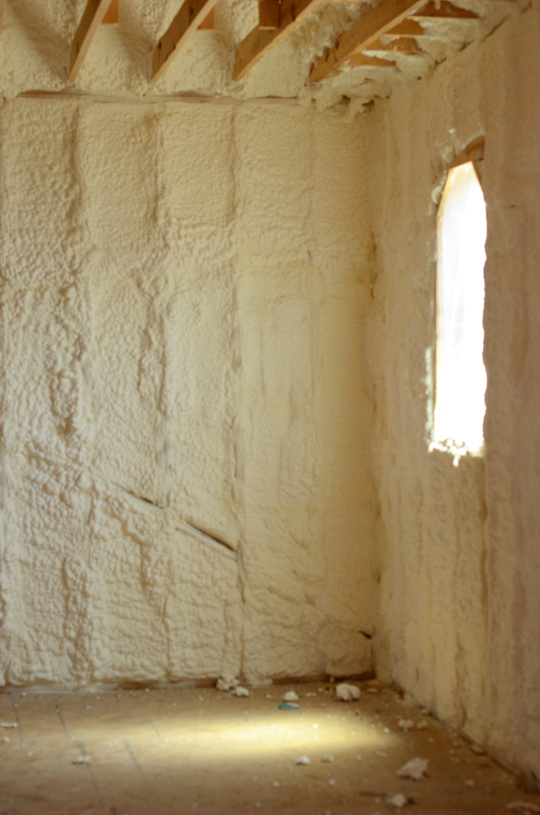
In case you forgot our post framing walk through, the upstairs is entirely framed out and insulated. We started the whole build process again for the nearly 1500 square feet up there. Ugh. At this point we were so over building as you can imagine from all the work/running around/general headache (see: mirrors or countertops).

So that happened. Aren’t y’all excited you get to see the upstairs come together? Honestly I wasn’t at first, but now I’m so glad things turned out this way. Let’s get this {expletive} built.

There are no tags for this post